How to Make Dreamy Blueberry Lavender Ice Cream

Cory Mosley is the Vice President of Growth for Pecan Jacks. He supports franchise growth and brand strategy while helping protect the quality behind every scoop, bringing “A Sweet Day Is A Bite Away®” philosophy to customers across the country.
The idea of using flowers in food can be a little intimidating. We’ve all heard the warnings about lavender tasting more like soap than a sweet treat. But when you get the balance just right, a floral note can transform a simple dessert into something truly extraordinary. The secret is in the technique, not the complexity. This recipe is designed to demystify the process, showing you exactly how to infuse your cream with a delicate hint of lavender that beautifully complements the sweetness of fresh blueberries. We’ll guide you every step of the way to create a sophisticated Blueberry Lavender Ice Cream that is fragrant, balanced, and absolutely delicious.
Key Takeaways
- Build Your Flavor on Quality Ingredients : The best results start with the right components, so use full-fat cream and milk for a smooth texture and source culinary-grade lavender for a safe, delicate taste.
- Control Time for Perfect Texture and Flavor: Two critical steps guarantee success: chill your ice cream base for at least six hours to prevent ice crystals, and steep the lavender for just 15 to 20 minutes to avoid a soapy flavor.
- Make It Yours from Swirl to Storage : Customize your ice cream with additions like honey or lemon zest, and protect its creamy texture by pressing parchment paper on the surface before freezing in an airtight container.
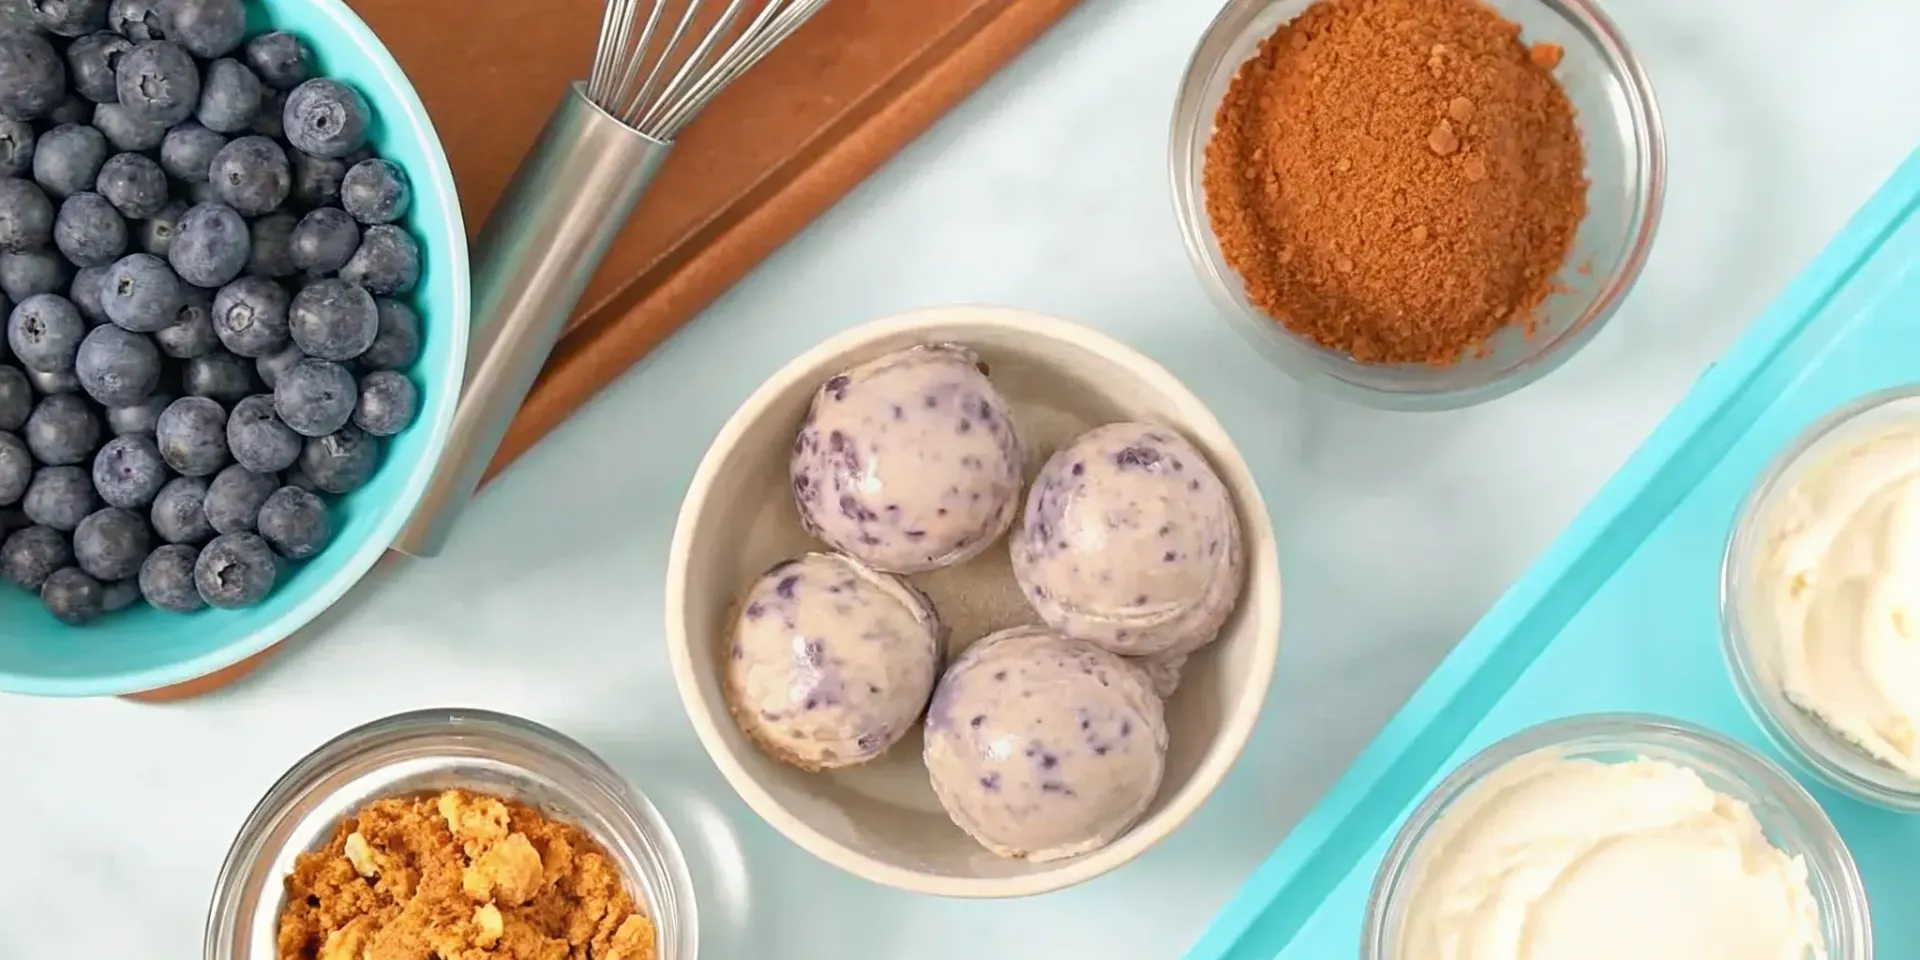
Your Blueberry Lavender Ice Cream Ingredients
The secret to truly memorable, artisanal ice cream isn’t a complicated recipe; it’s the quality of the ingredients you choose. At Pecan Jacks, we build every flavor, from our classic southern pralines to our unique adult-infused ice creams, on a foundation of the best ingredients we can find. This homemade blueberry lavender recipe is no different. It relies on a handful of simple, pure components to create a sophisticated and dreamy dessert that tastes like it came from a small-batch creamery. You don’t need a long list of artificial additives or stabilizers to make incredible ice cream. All you need is fresh dairy, sweet fruit, a hint of floral essence, and a little bit of kitchen magic. Before you start, gathering the right ingredients will set you up for success and make the whole process feel effortless. We'll cover everything from picking the perfect blueberries to finding the right kind of lavender, ensuring your final creation is as delicious as the treats we make in our own candy kitchen. This recipe celebrates simplicity and lets each ingredient’s natural character shine through, which is the heart of all great artisan food. Let’s walk through what you’ll need to bring this beautiful flavor to life.
Fresh vs. Frozen Blueberries: Which Is Best?
Honestly, you can’t go wrong here. If you’re making this in the middle of summer when blueberries are at their peak, fresh berries will give you an unmatched burst of flavor. But one of the best things about this recipe is that you can make it any time of year. High-quality frozen blueberries are a fantastic alternative because they are picked and frozen at their ripest. This means they often pack just as much, if not more, flavor than off-season fresh berries. The choice is yours, so use what’s most convenient. The goal is to cook them down into a beautiful syrup that will swirl through your ice cream base.
Choosing Your Lavender
This is the one ingredient where you need to be a little particular. It’s essential to use culinary-grade lavender, which is grown specifically for consumption. You can find it at specialty spice shops, farmers markets, or online. Please don’t just grab any dried lavender you find, as floral-shop or decorative varieties may have been treated with pesticides or chemicals that are not safe to eat. Culinary lavender has a sweeter, less potent flavor than other types, making it perfect for infusing into your cream without tasting like soap. A little goes a long way to add that lovely, subtle floral note.
The Creamy Base: Cream and Milk
For that signature creamy, scoopable texture, you’ll want to use full-fat dairy. This recipe uses a simple, egg-free base made with heavy cream and whole milk. This style, often called Philadelphia-style ice cream, is wonderfully straightforward and lets the blueberry and lavender flavors shine. The high fat content in the cream and milk is what prevents ice crystals from forming, ensuring your final product is smooth and rich, not icy. While it might be tempting to substitute with lower-fat options, I recommend sticking with the full-fat versions for the most luxurious result.
Sweeteners and Thickeners
Sugar does more than just sweeten your ice cream; it’s also crucial for the texture. It lowers the freezing point of the base, which helps keep the ice cream soft and scoopable right out of the freezer. In this recipe, we also use a little cornstarch as a thickener. Mixing cornstarch with a bit of cold milk to create a slurry, then whisking it into the warming base, helps stabilize the mixture. This is a simple but effective trick that creates a beautifully smooth consistency without the extra step of tempering eggs. It’s a go-to method for creating a foolproof, silky ice cream base every time.
How to Perfect Your Lavender Flavor
Getting the lavender flavor just right is the secret to taking this ice cream from good to unforgettable. Floral flavors like lavender are tricky; they can add a sophisticated, aromatic layer that feels special and unique. However, there's a fine line between a delicate floral hint and an overpowering, soapy taste. It’s a delicate dance, but don’t worry, it’s one you can easily master. The key is to pay close attention to three things: the type of lavender you use, how much of it you add, and how long you let it steep. Nailing these steps ensures you get a subtle, aromatic hint of floral goodness that perfectly complements the sweet blueberries, creating a truly artisanal scoop. At Pecan Jacks, we believe that the best flavors come from balancing quality ingredients with care, and that’s exactly what we’ll do here. This process is all about control and tasting as you go, which is the heart of any great homemade recipe. By focusing on these details, you'll create an ice cream with a complex, layered flavor that tastes like it came from a high-end creamery.
Why Food-Grade Lavender Is a Must
First things first, not all lavender is created equal. When you’re making something to eat, you absolutely must use culinary lavender, also known as food-grade lavender. This isn’t just a fancy suggestion; it’s a matter of safety and flavor. Lavender sold for decorative purposes or potpourri can be treated with pesticides or other chemicals you definitely don’t want in your ice cream. Using culinary lavender guarantees it was grown to be eaten. Plus, these varieties are specifically chosen for a sweeter, less perfumey taste that works beautifully in desserts. You’ll find it online or in the spice aisle of well-stocked grocery stores.
How Much Lavender Should You Use?
When it comes to lavender, less is always more. It’s incredibly easy to go overboard and end up with a batch of ice cream that tastes more like a sachet than a dessert. While some recipes might call for a large amount, this can be overwhelming. I recommend starting with just one or two teaspoons of dried lavender buds for your entire batch. This will give you a gentle, elegant floral note that enhances the blueberries without stealing the show. You can always steep it a little longer if you want a stronger flavor, but you can’t take it out once it’s too potent. Trust your taste buds and start small.
How Long Should You Steep the Lavender?
To get that lovely lavender flavor into your ice cream base, you’ll need to steep it like tea. After you warm your cream and milk mixture, you’ll add the dried lavender buds and let them sit off the heat. This process helps to infuse the dairy with the lavender’s essential oils. A good starting point is to steep for about 10 to 15 minutes. Afterward, be sure to strain the mixture through a fine-mesh sieve to remove all the buds. This step is crucial for achieving that signature smooth and creamy texture we all love in a perfect scoop of ice cream.
How to Make Blueberry Lavender Ice Cream, Step by Step
Alright, let's get to the fun part: making the ice cream. This process is all about building layers of flavor, from a bright blueberry syrup to a fragrant lavender-infused cream. I’ll walk you through each part of the process. Just take it one step at a time, and you’ll have a beautiful, artisanal dessert that tastes like it came from a specialty creamery. The key is patience, especially during the chilling stage, but I promise the final result is more than worth the wait.
Step 1: Create the Blueberry Syrup
First, we’ll make a vibrant blueberry syrup that will get swirled into the ice cream later. In a small saucepan, combine your fresh or frozen blueberries with sugar and a splash of lemon juice. Cook this mixture over medium heat, stirring occasionally, until the berries burst and the syrup thickens, which usually takes about 10 to 15 minutes. You want a syrup that’s rich and concentrated with that sweet, tangy blueberry flavor. Once it’s done, set it aside to cool completely. You can even make this a day ahead to save time.
Step 2: Infuse the Cream with Lavender
Now for that lovely floral note. In a separate, larger saucepan, gently heat your milk, heavy cream, and a portion of the sugar. Once the mixture is warm to the touch (not boiling), remove it from the heat and stir in your food-grade dried lavender. Cover the pot and let the lavender steep for about 20 to 30 minutes. This is where the magic happens, as the cream soaks up all that delicate, aromatic flavor. Be careful not to steep it for too long, or the taste can become a bit too strong.
Step 3: Thicken Your Ice Cream Base
To get that perfectly rich and scoopable texture, you need to create a custard base. In a separate bowl, whisk your egg yolks and the remaining sugar until the mixture is pale and slightly fluffy. Slowly temper the eggs by gradually whisking in a cup of the warm, lavender-infused cream. This prevents the eggs from scrambling. Once tempered, pour the egg mixture back into the saucepan with the rest of the cream. Cook over low heat, stirring constantly, until the base thickens enough to coat the back of a spoon.
Step 4: Strain and Chill the Base
This step is absolutely essential for a silky-smooth final product. Pour your thickened custard base through a fine-mesh sieve into a clean bowl. This will catch the lavender buds and any small bits of cooked egg, ensuring your ice cream is perfectly smooth. The next part requires patience: cover the base and let it chill in the refrigerator for at least four hours, but preferably overnight. A thoroughly chilled base is the secret to preventing ice crystals and achieving the creamiest texture.
Step 5: Churn to a Soft-Serve Texture
It’s finally time to churn. Pour your cold, strained ice cream base into your ice cream maker and churn according to the manufacturer’s instructions. The machine will whip air into the base as it freezes, transforming it from a liquid into a thick, creamy dessert. Just like the artisanal ice cream we craft at Pecan Jacks, this process is what creates that signature velvety mouthfeel. You’ll know it’s ready when it reaches the consistency of soft-serve ice cream, which typically takes about 20 to 25 minutes.
Step 6: Swirl in the Syrup and Freeze
For the final touch, we’ll add the blueberry syrup you made earlier. During the last minute of churning, you can slowly drizzle in about half of the syrup for a light purple hue. Then, transfer the ice cream to a freezer-safe container, alternating layers of ice cream with dollops of the remaining blueberry syrup. Use a knife or a spoon to gently swirl the layers together to create beautiful ribbons of blue. Cover and freeze for at least four hours, or until firm, before scooping and serving.
Common Mistakes to Avoid
Making artisan ice cream at home is a rewarding adventure, but like any new skill, there can be a few bumps along the way. I’ve certainly had my share of kitchen experiments that didn't quite go as planned! When it comes to a nuanced flavor like blueberry lavender, a few small missteps can make a big difference in the final product. Think of these as friendly tips to help you sidestep the common pitfalls and get straight to a delicious, creamy scoop. By keeping these points in mind, you’ll be well on your way to mastering this dreamy dessert and impressing everyone, including yourself.
Don't Over-Steep the Lavender
If you’ve ever worried that lavender might taste like soap, this tip is for you. The most common mistake is using too much lavender or steeping it for too long, which creates an overpowering, floral flavor. To get that perfect, subtle hint of lavender that complements the blueberry, less is truly more. I recommend you start with about one teaspoon of dried culinary lavender for your entire batch. You can always taste the infused cream and decide if you want a little more, but you can’t take the flavor out once it’s in there. This gentle approach ensures the lavender whispers instead of shouts.
Don't Skip the Chill Time
I know how tempting it is to pour your freshly made ice cream base straight into the churner. But trust me, patience is the secret ingredient for ultra-creamy ice cream. Chilling the base for at least six to eight hours (or even overnight) is a non-negotiable step. This crucial rest period allows the fat molecules in the cream to solidify and the flavors to meld together beautifully. When you skip the chill time, you often end up with an icy, less flavorful result. A properly chilled base churns faster and produces a much smoother, richer texture that feels like pure luxury.
Avoid Using Non-Food-Grade Lavender
This is a big one for both safety and flavor. Make sure the lavender you’re using is specifically labeled as "culinary grade" or "food-grade." Lavender intended for potpourri, sachets, or crafts is often treated with chemicals or preservatives that are not safe to eat. Beyond the safety concerns, non-culinary lavender can also have a harsh, bitter taste that will ruin your dessert. You can usually find culinary grade lavender in the spice aisle of well-stocked grocery stores, at specialty food shops, or easily online. It’s worth the small effort to source the right ingredient for a safe and delicious treat.
Watch Out for Over-Churning
Your ice cream machine is the key to achieving that perfect soft and creamy consistency, but it's possible to have too much of a good thing. Over-churning your ice cream base can ruin the texture, making it either grainy or icy. As the machine works, it incorporates air and freezes the mixture. If you let it go for too long, the delicate emulsion can break, or ice crystals can begin to form. The goal is to churn until the ice cream reaches a thick, soft-serve texture. At that point, it’s ready for the final freeze. Always follow your machine’s instructions and keep a close eye on it.
Secrets to the Creamiest Texture
You’ve put so much care into sourcing your ingredients and perfecting your flavors. Now, let’s talk about texture. That ultra-creamy, scoop-shop quality is what separates good homemade ice cream from great homemade ice cream. It’s all about managing those pesky ice crystals and giving your base the TLC it deserves. At Pecan Jacks, we know that the final texture is just as important as the flavor. These aren’t complicated steps, but they are the little secrets that make a world of difference. Follow these tips, and you’ll be rewarded with the silkiest, smoothest blueberry lavender ice cream you’ve ever made.
Why Chilling the Base Is Key
Patience is a virtue, especially in ice cream making. Chilling your ice cream base isn't a step you want to rush. After you’ve cooked and strained your mixture, it needs to get thoroughly cold in the refrigerator. Plan for at least six to eight hours, but if you can let it chill for up to 48 hours, even better. This extended chill time does two magical things. First, it allows the delicate lavender and sweet blueberry flavors to meld and deepen. Second, a colder base churns faster and more efficiently, which is crucial because a quick churn creates smaller ice crystals and a much creamier final product. It’s the secret to that luxurious, smooth mouthfeel.
The Vodka Trick for Extra Smoothness
Here’s a clever trick from the world of professional pastry chefs that works wonders at home. Adding a very small amount of vodka (about a tablespoon for a whole batch) to your ice cream base before churning can dramatically improve its texture. Alcohol has a lower freezing point than water, so it helps prevent large ice crystals from forming as the ice cream freezes. This results in a softer, smoother, and more scoopable treat right out of the freezer. Don't worry, the amount is so small you won't taste the alcohol. It’s an optional step, but one that can give your homemade creation an incredibly professional finish.
How to Prevent Freezer Burn
After all your hard work, you want to make sure your ice cream stays as fresh as the day you made it. The enemy of homemade ice cream is freezer burn, which happens when moisture escapes and refreezes on the surface. To prevent this, store your ice cream in a shallow, airtight container. Before you put the lid on, press a piece of parchment or wax paper directly onto the surface of the ice cream. This simple barrier minimizes air contact and helps maintain the ice cream's texture and flavor. Stored this way, your delicious blueberry lavender ice cream should stay perfectly creamy for up to two months.
How to Serve and Store Your Ice Cream
You’ve created a beautiful, aromatic batch of blueberry lavender ice cream. Now comes the best part: enjoying it. After all your hard work, the last thing you want is an icy texture or a scoop that’s impossible to pry from the container. How you serve and store your creation makes all the difference. With a few simple tricks, you can make sure every spoonful is as creamy and delicious as the first, rivaling the handcrafted scoops from our own Pecan Jacks kitchen. These steps will help you present your ice cream beautifully and keep it fresh for as long as possible.
Delicious Garnish and Pairing Ideas
A scoop of this ice cream is a treat on its own, but a few simple touches can make it truly special. For a fresh and simple finish, try adding a few fresh blueberries on top. The pop of color and juicy texture is a perfect complement. If you have any leftover blueberry lavender syrup, don't let it go to waste. A little drizzle over your scoops adds an extra burst of flavor and a beautiful, glossy finish. For a bit of crunch, this ice cream pairs wonderfully with a simple shortbread cookie or a delicate vanilla wafer. The buttery notes of the cookie are a fantastic contrast to the floral and fruity ice cream.
Tips for Getting the Perfect Scoop
Getting that perfect, round scoop isn’t just for looks; it’s about the texture and experience. For easy scooping, let the container sit on the counter for about five to ten minutes to soften slightly. This small step prevents you from struggling with rock-hard ice cream. Another classic trick is to dip your ice cream scoop in a cup of warm water before each scoop. The heat helps the scoop glide through the ice cream, creating a smooth, round ball every time. This ensures you get that satisfying, creamy texture from the very first bite, without compressing the ice cream and making it dense. It’s a simple move that makes serving feel effortless.
Storing Your Homemade Ice Cream
Proper storage is the key to keeping your homemade ice cream tasting fresh and creamy. Always store it in an airtight container to protect it from freezer odors. To prevent ice crystals from forming, press a piece of parchment or wax paper directly onto the surface of the ice cream before sealing the lid. This simple barrier is incredibly effective at stopping freezer burn in its tracks. For the best results, place the container in the coldest part of your freezer, which is usually the back, not the door where temperatures fluctuate. Stored this way, your blueberry lavender ice cream should stay delicious for up to two months.
Fun Variations to Try
Once you’ve mastered the classic blueberry lavender recipe, you can start playing with it. Think of the original recipe as a delicious foundation, ready for your own creative touches. The beauty of making artisan ice cream at home is that you get to be the head chef. You can adjust flavors, add new textures, and create a dessert that is perfectly suited to your taste. This is where the real fun begins, transforming a great recipe into something that is uniquely yours. Maybe you have a family member who adores citrus, or you're looking for a dessert that feels a bit more rustic and earthy.
Experimenting with variations is how you develop your own signature style in the kitchen. You can start small by swapping one sweetener for another, or go big by changing the entire format of the dessert. Consider the core components you can play with: the sweetness level, the brightness from the fruit, the addition of crunchy or chewy textures, and even the way you serve it. Each small change can lead to a delightful new discovery. Don't be afraid to try something new; the worst that can happen is you have a less-than-perfect batch of ice cream, which is still a pretty great outcome. The following ideas are some of my favorite ways to put a new spin on this floral, fruity ice cream, but let them be a starting point for your own kitchen creativity.
Blueberry Lavender with a Honey Drizzle
For a flavor that is truly special, try swapping some of the sugar in your base with honey. The floral notes of the honey pair beautifully with the lavender, while its natural sweetness deepens the flavor of the blueberries. This combination creates a delicate flavor that feels both rustic and refined. You can either incorporate the honey directly into your ice cream base before churning or gently drizzle it in as you transfer the churned ice cream to its container for the final freeze. A light-colored, mild honey like clover or orange blossom works best to avoid overpowering the other ingredients.
Lemon Zest and Blueberry Lavender Swirl
If you want to add a bright, zesty kick, a little bit of lemon is the perfect addition. The acidity of the lemon cuts through the richness of the cream and makes the blueberry flavor pop. To do this, simply cook your blueberries with lemon juice and a little zest to create your syrup. You can also add a teaspoon of fresh lemon zest to your cream and milk mixture as you’re steeping the lavender. The result is a scoop that is wonderfully fragrant, with a perfect balance of sweet, floral, and citrus notes that tastes like a sunny afternoon.
A No-Churn Blueberry Lavender Option
Don’t have an ice cream maker? No problem. You can easily adapt this recipe for a no-churn method. No-churn ice cream typically uses a base of sweetened condensed milk and freshly whipped heavy cream. This simple, no-egg method gives you a wonderfully creamy texture without any special equipment. Just prepare your lavender-infused cream and blueberry syrup as instructed. Let them cool completely, then gently fold them into your whipped cream and condensed milk mixture before freezing. It’s a straightforward way to get a delicious homemade ice cream with minimal fuss.
Lavender Blueberry Ice Cream Sandwiches
Turn your homemade ice cream into an even more impressive dessert by making ice cream sandwiches. The key is to choose a cookie that complements the ice cream without stealing the show. A simple sugar cookie, a buttery shortbread, or even a soft lemon cookie would be perfect. One of the best parts of making ice cream at home is getting to control every element. For easy assembly, spread the freshly churned ice cream in a parchment-lined baking dish and freeze until firm. Then, you can use a cookie cutter to cut perfect rounds of ice cream to place between your cookies.
The Joy of Homemade Artisan Ice Cream
There’s a special kind of magic in scooping up a bowl of ice cream that you made from scratch. It’s more than just a dessert; it’s a rewarding experience from start to finish. When you make your own artisan ice cream, you have complete control over what goes into it. You can choose the freshest berries, the richest cream, and know that every spoonful is free of any ingredients you can’t pronounce. It’s a simple way to ensure you’re enjoying a pure, high-quality treat.
But the real fun begins when you start playing with flavors. Making ice cream at home is your chance to be a flavor artist. You can go beyond the usual vanilla and chocolate and create something truly unique, like this delicate blueberry lavender combination. It’s an opportunity to experiment with sophisticated pairings that can impress your guests and delight your own taste buds. We love dreaming up our own gourmet ice cream flavors, and we know you will too.
The joy doesn't stop at the taste. There's immense satisfaction in seeing the vibrant swirl of blueberry syrup against the pale lavender cream. It’s a treat for the eyes before it even reaches your lips. Sharing your beautiful, homemade creation with friends and family turns a simple dessert into a sweet memory, a perfect scoop of happiness that you crafted with your own hands.
Related Articles
- How to Make Almond Ice Cream From Scratch
- 11 Unique Ice Cream Flavors for Adults to Try
- Who Makes Key Lime Ice Cream? 8 Brands to Know
Frequently Asked Questions
I don't have an ice cream maker. Can I still make this recipe? Yes, you absolutely can. You will just need to use a no-churn method. For a no-churn base, you typically whip about two cups of cold heavy cream until stiff peaks form. In a separate bowl, you whisk a can of sweetened condensed milk with your cooled, lavender-infused cream and blueberry syrup. Then, you gently fold the whipped cream into the condensed milk mixture until just combined. Pour it into a freezer-safe container and freeze until firm, which usually takes about six hours.
Why does my ice cream taste a little like soap? This is the most common concern when working with floral flavors, and it almost always comes down to one of two things: you used too much lavender, or you steeped it for too long. Lavender has a very potent flavor, and a little goes a long way. Start with a small amount, like one or two teaspoons, and steep for just 15 to 20 minutes. You can always taste the infused cream and decide if you want more flavor, but you can't remove it once it's too strong.
My ice cream turned out icy instead of creamy. What did I do wrong? An icy texture is usually caused by large ice crystals forming during the freezing process. The best way to prevent this is to make sure your ice cream base is thoroughly chilled, for at least four hours but preferably overnight, before you churn it. A very cold base freezes faster in the machine, which results in smaller ice crystals and a much smoother texture. Using full-fat dairy is also essential, as the fat content is what gives ice cream its rich, creamy mouthfeel and helps keep it from freezing solid.
Can I use a different fruit instead of blueberries? Of course. This recipe is a wonderful template for other fruit and floral combinations. Blackberries or raspberries would work beautifully with the lavender, and you would prepare them the same way by cooking them down into a thick syrup. You could even try a stone fruit like chopped peaches or cherries. Just remember to taste and adjust the sugar in your syrup, as different fruits have different levels of natural sweetness.
Is it really necessary to use full-fat cream and whole milk? For the creamiest, most luxurious result, I highly recommend sticking with full-fat dairy. The fat in the cream and milk is what coats the ice crystals as they form, keeping them small and preventing your ice cream from becoming icy. While you can technically make ice cream with lower-fat alternatives, the final product will be harder, icier, and less rich. Think of the full-fat dairy as the key to achieving that signature scoop-shop texture at home.


