How to Make Creamy Cheesecake Blueberry Ice Cream

Cory Mosley headshot
Author: Cory Mosley

Cory Mosley is the Vice President of Growth for Pecan Jacks. He supports franchise growth and brand strategy while helping protect the quality behind every scoop, bringing “A Sweet Day Is A Bite Away®” philosophy to customers across the country.

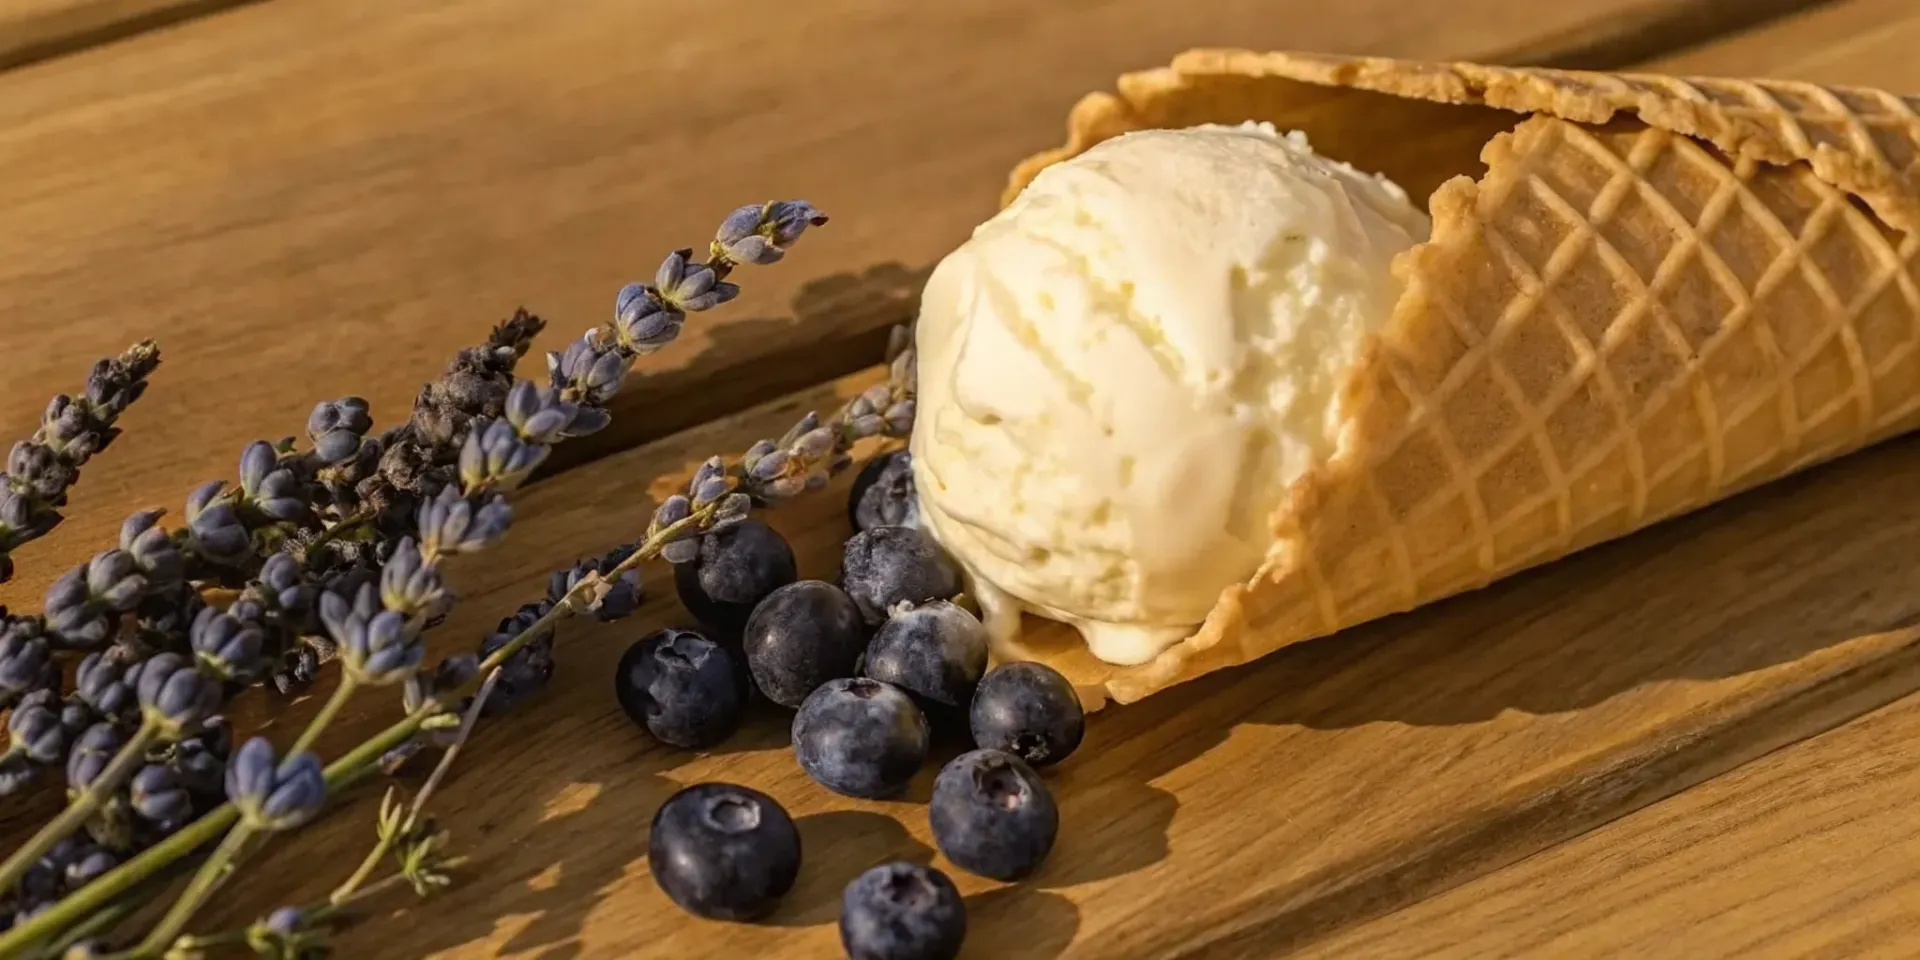
Some flavor combinations are simply iconic, and blueberry cheesecake is at the top of that list. It’s the perfect blend of creamy, tangy, sweet, and crunchy. You get the rich, velvety texture of the cheesecake base, the bright pop of a sweet blueberry ribbon, and the comforting, buttery crunch of a graham cracker crust in every single bite. This recipe is a celebration of that perfect trio. We’ll guide you through creating each element to ensure every flavor shines. If you’ve been searching for a dessert that hits all the right notes, you’ve found it. Let’s dive into making a truly unforgettable cheesecake blueberry ice cream together.

Key Takeaways

  • Build a Flawless Base: The secret to incredibly creamy ice cream is using full-fat ingredients like heavy cream and cream cheese. Just as important, make sure your custard base is thoroughly chilled, ideally overnight, before churning to keep ice crystals small and the texture smooth.
  • Layer Your Mix-ins, Don't Overmix: To get those perfect ribbons of blueberry sauce and pockets of graham cracker crunch, layer them with the ice cream base in your container. Use a knife to create a few gentle swirls, which keeps the flavors and textures distinct instead of blending them together.
  • Prevent Freezer Burn for Lasting Freshness: Your homemade ice cream lacks commercial preservatives, so proper storage is crucial. Always use an airtight container and press a piece of plastic wrap directly onto the ice cream's surface before sealing it to block air and prevent ice crystals.

What You'll Need for Blueberry Cheesecake Ice Cream

Before you start mixing, let's get all your ingredients in order. The secret to incredible homemade ice cream is breaking it down into its delicious parts. For this recipe, we're focusing on three key elements: a tangy cheesecake base, a sweet blueberry swirl, and a buttery graham cracker crunch. Having everything measured and ready to go makes the whole process smoother and a lot more fun. Think of it as setting up your very own ice cream artist’s palette. Using fresh, high-quality ingredients will make a huge difference in the final flavor, bringing you one step closer to a scoop shop-worthy treat right from your own freezer. At Pecan Jacks, we know that the best desserts start with the best components, and this recipe is no different. Each part plays a special role, from the creamy tang of the base to the bright pop of the fruit. Getting these elements right is the key to creating a balanced, delicious ice cream that tastes like it came from a professional kitchen. So take a moment to gather your tools and ingredients, and let's get ready to build this amazing dessert layer by layer.

For the Cheesecake Base

This is the heart of your ice cream, where that signature cheesecake flavor comes to life. You’ll want ingredients that create a rich, creamy, and slightly tangy foundation. For this part, you will need full-fat cream cheese for that authentic taste, heavy cream to give it a luscious, velvety body, and sweetened condensed milk, which adds sweetness while ensuring a perfectly smooth, scoopable texture. This simple trio works together to create a base that’s sturdy enough to hold our swirls and crunches. Many classic Blueberry Cheesecake Ice Cream recipes rely on this combination for a no-fail, delicious result.

  • 1 cup cream cheese, softened
  • 1 pint heavy cream
  • 1 can sweetened condensed milk

For the Blueberry Swirl

Next up is the vibrant, fruity ribbon that will run through your ice cream. A homemade blueberry swirl adds a burst of fresh flavor and beautiful color. We’ll cook down blueberries with sugar until they are sweet and jammy. A little cornstarch will help thicken the sauce into the perfect consistency for swirling, and a squeeze of fresh lemon juice will brighten everything up, making the blueberry flavor pop. Using frozen blueberries is a great option here, as they are picked at peak ripeness and available all year. This simple sauce is what makes a truly memorable Blueberry Cheesecake Ice Cream.

  • 2 cups frozen blueberries
  • 1 cup granulated sugar
  • 2 teaspoons corn starch
  • 1 tablespoon fresh lemon juice

For the Graham Cracker Crunch

What’s a cheesecake without its crust? This crunchy element adds a wonderful texture and the familiar, comforting flavor of a graham cracker crust. It’s incredibly simple to make but adds so much to the final scoop. All you need are some crushed graham crackers and melted butter. The butter helps bind the crumbs together and adds a rich, toasty flavor that perfectly complements the tangy base and sweet berries. This component is essential for capturing the full cheesecake experience in every bite. You can find this classic addition in almost any Blueberry Cheesecake Ice Cream Recipe you come across.

  • Graham crackers, crushed
  • Butter, melted

How to Make Your Ice Cream, Step-by-Step

Ready to create your own artisanal blueberry cheesecake ice cream? It’s easier than you think! We’ll walk through the process together, from creating a velvety base to swirling in that beautiful blueberry sauce. Just follow these five simple steps, and you’ll have a dessert that tastes like it came straight from a coastal creamery.

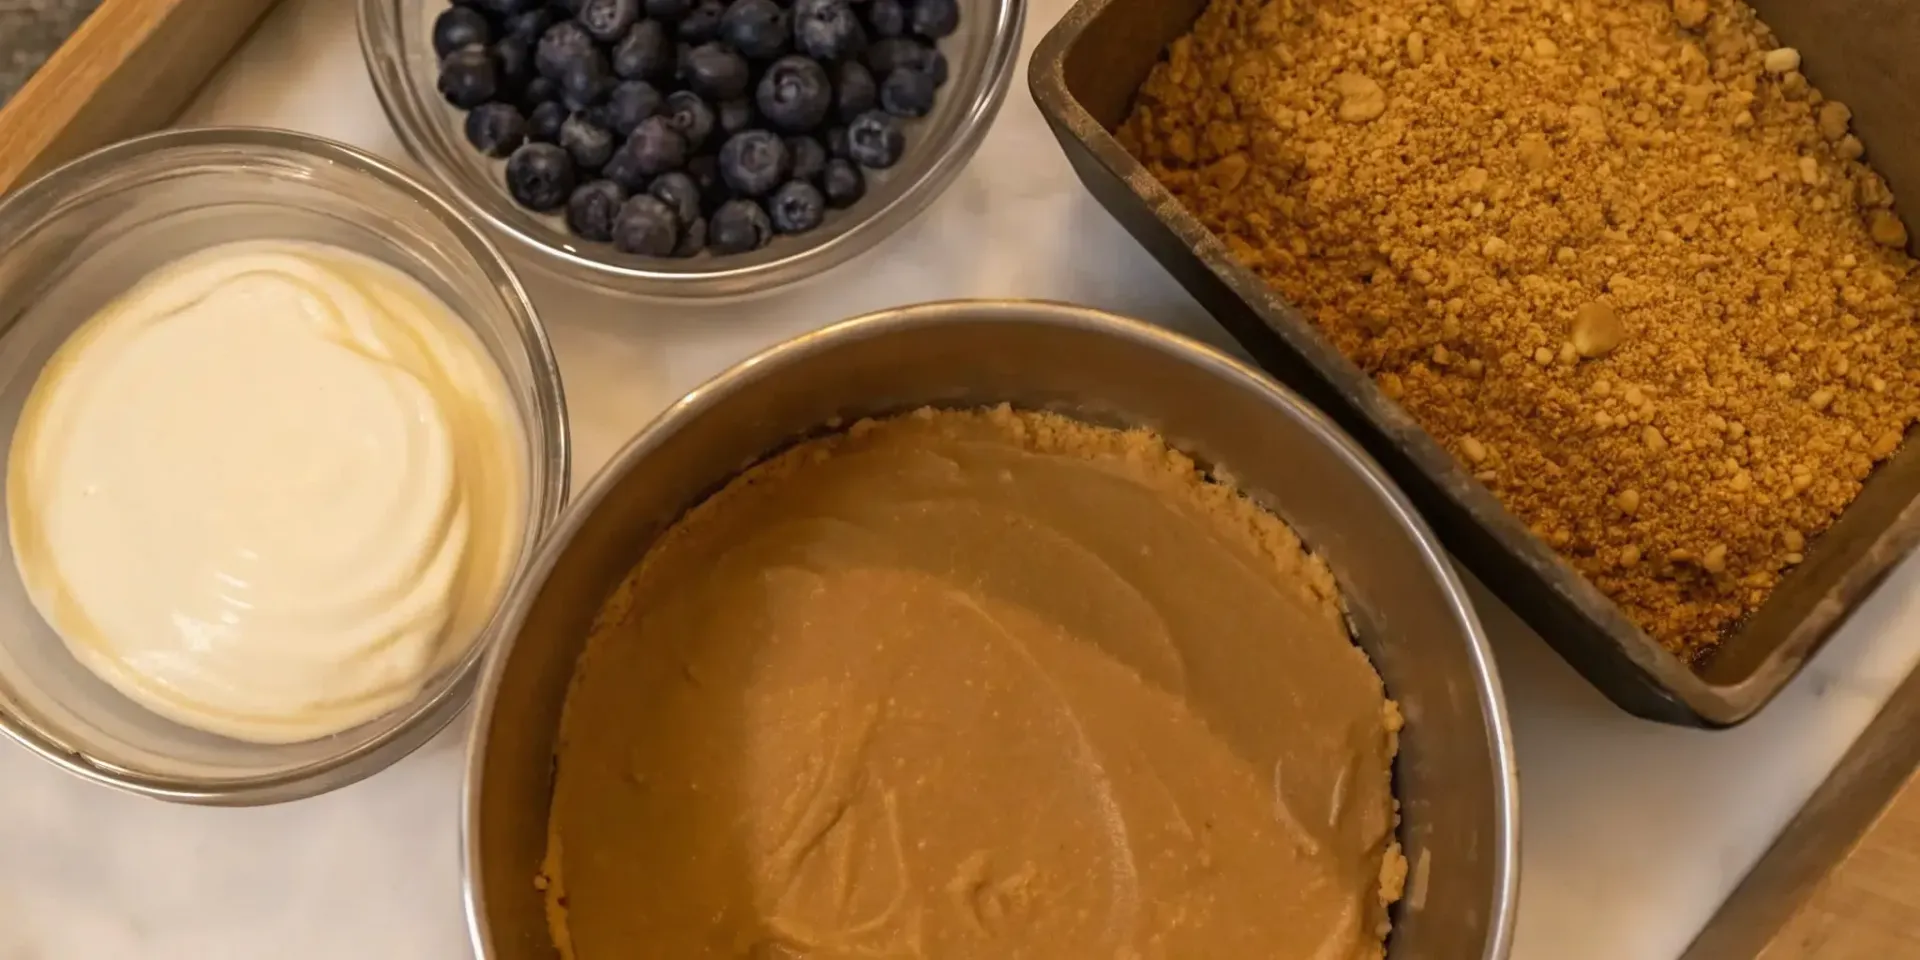
Step 1: Make the Cheesecake Custard

First things first, let’s create that rich, tangy cheesecake flavor. This step is all about making a smooth custard that will serve as the heart of your ice cream. In a saucepan, you’ll gently heat your milk, cream, and sugar. In a separate bowl, whisk together cream cheese until it’s completely smooth, then beat in your egg yolks. The key is to slowly temper the hot milk mixture into the eggs and cream cheese to prevent scrambling. Once everything is combined, you’ll cook the mixture until it thickens into a luscious custard base. This foundation is what gives the final product its signature creamy texture and authentic cheesecake taste.

Step 2: Simmer the Blueberry Sauce

Next up is the vibrant blueberry swirl that makes this ice cream so special. You can use fresh or frozen blueberries for this. Combine the berries in a small saucepan with a bit of sugar, a squeeze of fresh lemon juice to brighten the flavor, and a splash of water. Let it all simmer over medium heat, stirring occasionally until the berries begin to burst and the sauce thickens into a jam-like consistency. Making a great fruit sauce is simple, but the payoff is huge. Once it’s done, set it aside to cool completely. You want it chilled before you add it to the ice cream base so it creates distinct ribbons instead of melting in.

Step 3: Churn or Mix the Ice Cream Base

Now it’s time to turn your custard into actual ice cream. If you have an ice cream maker, pour your completely chilled cheesecake custard into the machine and churn according to the manufacturer’s directions. This usually takes about 20 to 25 minutes, or until it reaches a soft-serve consistency. If you’re going the no-churn route, you’ll whip heavy cream to stiff peaks and gently fold it into your chilled cheesecake base. This method incorporates air and creates a surprisingly light and creamy texture without any special equipment. Both paths lead to a delicious destination, so choose whichever one works best for you.

Step 4: Layer and Swirl Everything Together

This is where the magic happens. Grab a freezer-safe container and spread a layer of your freshly churned or mixed ice cream base across the bottom. Next, add dollops of your cooled blueberry sauce and a sprinkle of crushed graham crackers. Repeat these layers until you’ve used everything up. Then, take a butter knife or a skewer and gently drag it through the layers a few times to create those beautiful swirls. The goal is to create distinct ribbons of sauce and crunch, not to fully mix everything together. A light touch is all you need to get that perfect, artisanal look and taste in every scoop.

Step 5: Freeze Until Firm

The final step requires a little patience, but it’s well worth the wait. Cover your container with an airtight lid to lock in the freshness. For extra protection against pesky ice crystals, you can press a piece of plastic wrap or parchment paper directly onto the surface of the ice cream before sealing it. Place it in the coldest part of your freezer and let it firm up for at least six hours, though leaving it overnight is even better. This ensures it’s perfectly scoopable and allows all those delicious cheesecake and blueberry flavors to meld together beautifully. Then, all that’s left to do is enjoy your homemade creation.

Churn vs. No-Churn: Which Method Is for You?

So, you have your delicious cheesecake base and blueberry swirl ready to go. Now comes the big decision: to churn or not to churn? The great news is that there’s no wrong answer here. Both methods produce incredible homemade ice cream. Your choice really comes down to the equipment you have on hand and the final texture you’re aiming for.

The main difference is air. Churning, whether by hand or with a machine, constantly mixes the base as it freezes. This process breaks up ice crystals and incorporates air, resulting in a lighter, smoother, and fluffier ice cream, much like the scoops you’d get at our Pecan Jacks shops. The no-churn method skips this step, relying on the magic of whipped cream and condensed milk to create a creamy texture without a special machine. This version is typically denser and richer. Let’s break down what to expect from each approach so you can pick the perfect path for your pint.

The Ice Cream Maker Method

If you’re dreaming of that classic, scoop-shop texture, using an ice cream maker is the way to go. This method is all about creating the smoothest possible result. As the machine churns, it prevents large, crunchy ice crystals from forming, which is the secret to an ultra-creamy bite. While it requires a special piece of equipment, a good ice cream maker is a fantastic investment if you see more homemade ice cream in your future. It takes the guesswork out of the process and consistently delivers a light, airy texture that allows the cheesecake and blueberry flavors to shine. Just make sure your machine’s freezer bowl is completely frozen before you start.

The Simple No-Churn Method

Don’t have an ice cream maker? No problem at all. The no-churn method is your ticket to amazing homemade ice cream with minimal fuss and equipment. This technique is wonderfully straightforward and relies on a base of whipped heavy cream to incorporate air before freezing. The result is a denser, richer, and incredibly luscious ice cream. Think of it as being closer to a frozen mousse or semifreddo. It’s a fantastic option for anyone who wants to dive right into making ice cream without buying new gadgets. Plus, it’s practically foolproof, ensuring you get a delicious, creamy dessert every single time you make it.

How to Get That Perfect Artisanal Texture

Getting that dreamy, scoop-shop texture at home is totally achievable. It all comes down to a few key details that make a huge difference between grainy, icy homemade ice cream and the rich, creamy kind you’d find at a place like Pecan Jacks. It’s less about having fancy equipment and more about understanding the science behind a perfect scoop. The secret lies in managing the fat, the temperature, and the mix-ins.

When you focus on these elements, you control the size of the ice crystals that form as your ice cream freezes. Smaller crystals mean a smoother, creamier texture. We’ll walk through exactly how to manage each component, from choosing the right dairy to layering your swirls perfectly. With these simple techniques, you can create a blueberry cheesecake ice cream that has that signature artisanal quality we all crave.

Why Full-Fat Ingredients Are a Must

This is the number one rule for creamy ice cream, so listen up: now is not the time to skimp on fat. For that velvety, luxurious mouthfeel, you absolutely need to use full-fat ingredients like heavy cream and full-fat cream cheese. Fat is what coats the tiny ice crystals as they form, preventing them from clumping together and growing into large, crunchy chunks. This is what gives high-quality ice cream its dense and smooth consistency. Using milk, half-and-half, or low-fat cream cheese will result in a final product that’s more icy than creamy. Trust me, embracing the full-fat dairy is the most important step toward achieving that perfect artisanal texture.

The Importance of a Cold Base

Patience is a virtue, especially when it comes to making ice cream. Before you even think about churning or mixing, your cheesecake base needs to be completely and thoroughly chilled. I’m talking at least four hours in the refrigerator, but overnight is even better. A super-cold base freezes much faster, and a faster freeze time is your best friend. Why? Because it gives those pesky ice crystals less time to grow. A quick churn results in much smaller crystals, which translates directly to a smoother, creamier final product. This step is non-negotiable for both churn and no-churn methods, so don’t rush it.

Fresh vs. Frozen Blueberries

The great blueberry debate: fresh or frozen? The good news is that you can make a fantastic blueberry swirl with either one. Fresh blueberries offer a bright, seasonal flavor, but they can release a lot of water. Frozen blueberries are often picked at peak ripeness and can have a more concentrated flavor. The most important thing isn't which you choose, but how you prepare them. You’ll want to cook your blueberries down into a thick, jammy sauce. This concentrates the flavor and, crucially, evaporates excess water, which helps prevent icy patches in your finished ice cream.

Perfecting the Graham Cracker Swirl

There’s nothing better than hitting a crunchy pocket of graham cracker crust in a scoop of cheesecake ice cream. But there’s also nothing worse than a swirl that’s turned into a soggy, mealy mess. To keep that perfect crunch, the trick is all in the timing and the size. Use larger, bite-sized pieces of the crust instead of fine crumbs. Add them during the last 30 seconds of churning or gently fold them in by hand just before you put the ice cream in the freezer for its final firming-up. This minimizes contact time and helps the pieces stay distinct and wonderfully crunchy.

Common Mistakes (and How to Fix Them)

Even the most seasoned home cooks run into a little trouble now and then, especially with something as delicate as homemade ice cream. Don’t worry if your first batch isn’t perfect. Getting that creamy, dreamy texture you find in our artisan ice cream shops just takes a little practice and a few key tricks. Here are some of the most common hiccups people face when making blueberry cheesecake ice cream and, more importantly, how to fix them so you can get a scoop shop-quality result right from your own kitchen.

How to Prevent an Icy Texture

The biggest giveaway of homemade ice cream is often an icy, crunchy texture instead of a smooth, creamy one. This usually happens because of ice crystals. The best way to prevent them is to make sure your cream is very cold before you start. Using cold cream helps it whip up faster and hold its shape much better, which is essential for a silky-smooth final product. The team at Flavor Mosaic highlights this in their Blueberry Cheesecake Ice Cream recipe, noting that "Using cold cream whips faster and holds shape better." A well-chilled base is your best defense against unwanted iciness.

How to Fix a Lumpy Cheesecake Base

No one wants lumps in their cheesecake base. If you’re finding your cream cheese mixture isn’t perfectly smooth, the culprit is often overmixing. It’s tempting to keep whisking until every tiny speck is gone, but this can make the texture tough or grainy. Instead, focus on combining the ingredients until they are just incorporated. When adding delicate ingredients like whipped cream, you’ll want to fold them in gently with a spatula. As one recipe advises, you should "Fold gently to keep the texture light and creamy." This careful technique ensures everything is well-combined without ruining that light, airy consistency you’re aiming for.

How to Avoid an Over-Mixed Swirl

A beautiful, distinct ribbon of blueberry sauce running through your ice cream is part of the fun. If you stir too enthusiastically, you’ll end up with a uniformly purple ice cream instead of a pretty swirl. To get those perfect ribbons, layer your ice cream base and blueberry sauce in your container. Then, take a knife or a skewer and gently drag it through the layers just a few times. Less is definitely more here. Once you’ve created your masterpiece, patience is key. Letting the ice cream rest in the freezer allows "the flavors to meld and the texture to improve," which makes that swirl even more delicious when you finally dig in.

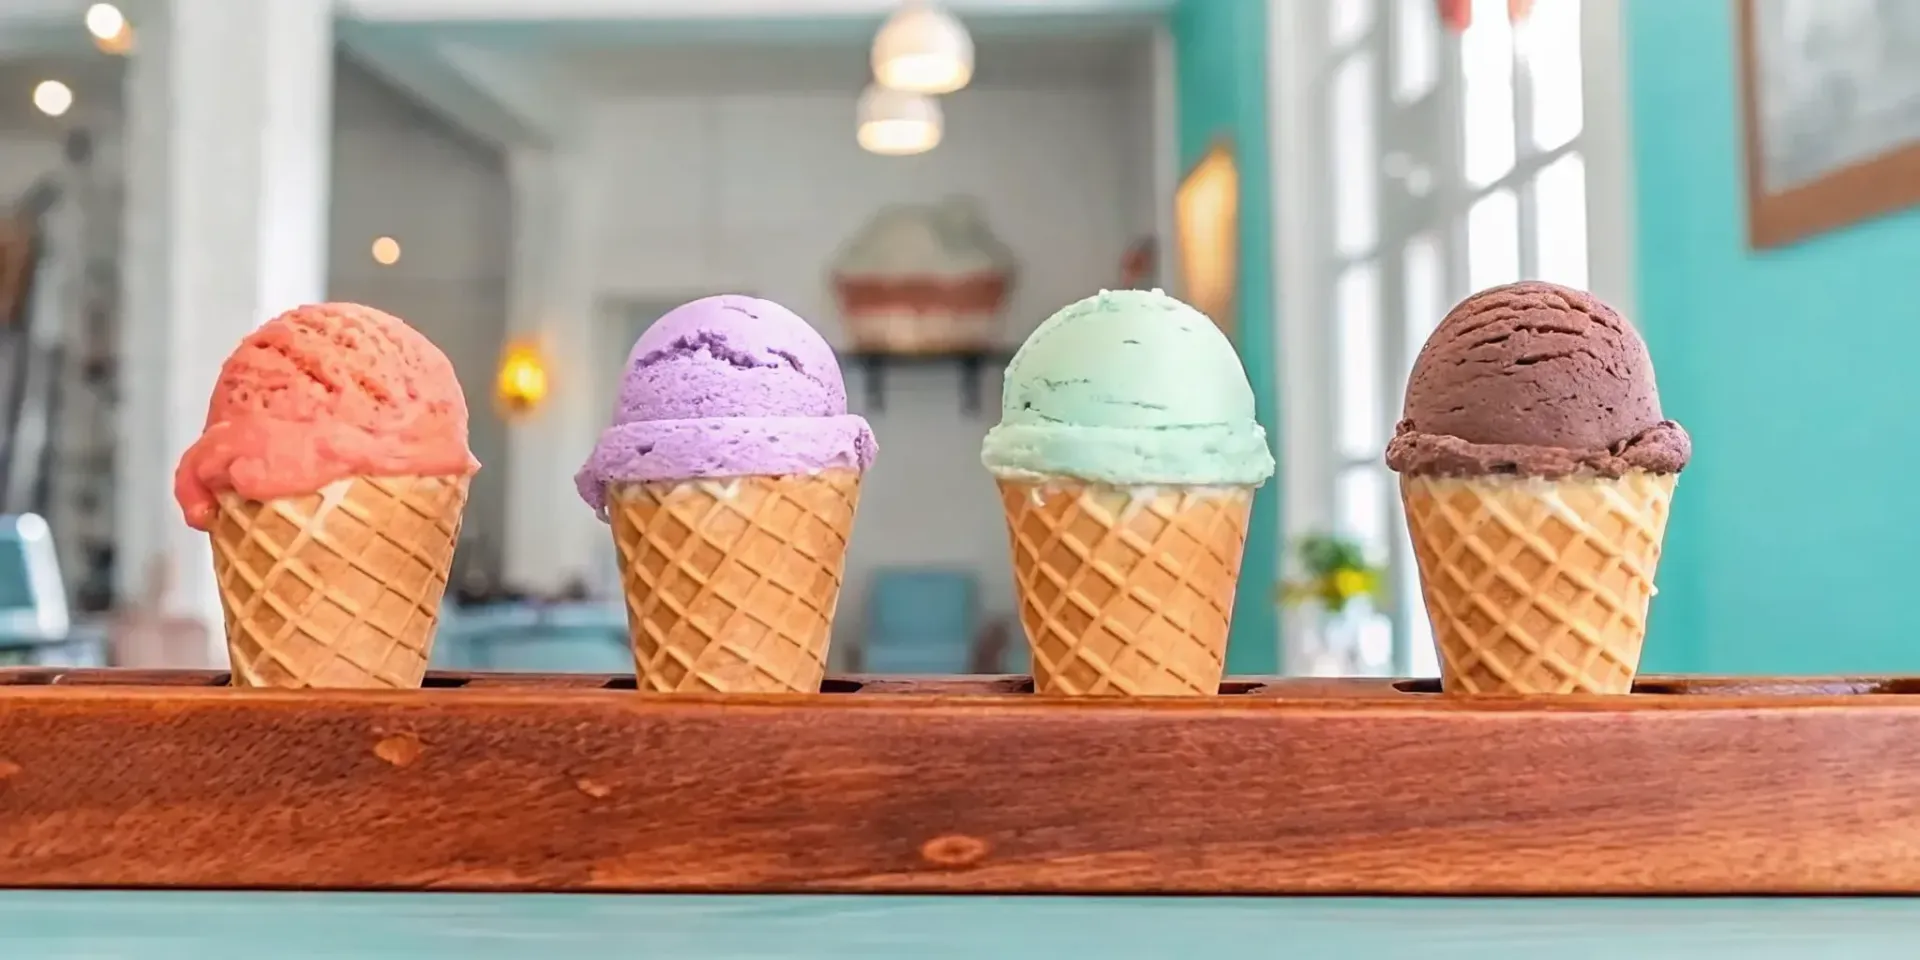
Flavor Variations and Serving Ideas

Okay, you've nailed the classic blueberry cheesecake ice cream recipe. It's creamy, swirled to perfection, and absolutely delicious. But why stop there? One of the best parts of making ice cream at home is the freedom to experiment. This is your chance to play chef and customize your creation to fit your exact cravings. Think of this recipe as a fantastic starting point, a solid foundation you can build upon. A few simple tweaks can introduce a whole new dimension of flavor or texture, turning a great dessert into an unforgettable one. At Pecan Jacks, we're always playing with flavor combinations to create our gourmet ice cream , and we want you to have that same fun at home.

Maybe you're a fan of bright, citrusy notes that cut through the richness, or perhaps you're all about that extra crunch that adds a satisfying texture to every bite. We'll explore some simple additions that can completely change the character of your ice cream. From adding a splash of lemon to folding in some decadent white chocolate, the possibilities are pretty much endless. We'll also get into some serving suggestions that will make your homemade treat feel like it came straight from an artisanal shop. Whether you're serving it in a simple cone or as part of an elaborate dessert platter, these ideas will help you present it beautifully. Ready to get creative in the kitchen? Let's look at a few ways to put your own spin on this amazing dessert.

Add Lemon or Vanilla

A little bit of citrus or a hint of vanilla can make a huge difference. Adding a squeeze of fresh lemon juice to your blueberry swirl will brighten up the entire flavor profile, giving it a refreshing, zesty kick that cuts through the richness of the cheesecake base. It’s a classic pairing for a reason. Alternatively, a splash of high-quality vanilla extract in the cheesecake custard will add warmth and depth, making the creamy notes even more pronounced. This simple addition creates a more complex and aromatic ice cream that feels incredibly luxurious.

Mix in White Chocolate or Almonds

If you're looking to add another layer of texture and flavor, consider some decadent mix-ins. Chunks of creamy white chocolate are a fantastic choice; they melt slightly into the ice cream, creating little pockets of sweetness that pair beautifully with the tart blueberries. For a bit of crunch, try adding toasted, slivered almonds. Their nutty flavor and satisfying texture provide a wonderful contrast to the smooth cheesecake base. Just be sure to fold in your mix-ins gently during the last few minutes of churning or before the final freeze to keep them perfectly distributed.

Topping and Pairing Suggestions

How you serve your ice cream can be just as important as how you make it. For a classic presentation, top your scoops with a handful of fresh blueberries and a sprinkle of crushed graham cracker crumbs to echo the flavors within. A drizzle of your leftover blueberry swirl also looks beautiful and adds an extra pop of fruitiness. If you want to get a bit fancier, try serving a scoop alongside a slice of lemon pound cake or a warm brownie. The combination of temperatures and textures is a guaranteed crowd-pleaser.

How to Store Your Homemade Ice Cream

You’ve put all that love and effort into creating a beautiful blueberry cheesecake ice cream, so let’s make sure every scoop is as perfect as the first. Storing homemade ice cream correctly is the secret to preserving that creamy, dreamy texture you worked so hard to achieve. Unlike the pints you buy at the store, your homemade version doesn’t have commercial stabilizers, which means it’s more delicate. But don’t worry, keeping it fresh is simple.

The key is to protect it from its biggest enemy: air. Air exposure leads to ice crystals, and nobody wants a crunchy, icy texture when they’re craving smooth cheesecake goodness. At Pecan Jacks, we take pride in the quality of our gourmet ice cream , and we want your homemade treats to get the same star treatment. The right container and a good spot in the back of your freezer (where the temperature is most consistent) are all you need to keep your creation delicious down to the very last spoonful. Think of it as the final, crucial step in the recipe.

The Best Way to Prevent Freezer Burn

Freezer burn is what happens when moisture evaporates from your ice cream and refreezes on the surface, creating those dreaded ice crystals that ruin the texture. To stop it from happening, your best defense is a good offense. Start with a quality airtight container. Shallow, flat containers are even better because they help the ice cream freeze quickly and evenly. For an extra layer of protection, press a piece of plastic wrap or parchment paper directly against the surface of the ice cream before you put the lid on. This simple trick creates a barrier that helps prevent freezer burn and keeps your ice cream tasting fresh and creamy.

How Long Your Homemade Ice Cream Lasts

Because your homemade ice cream is all-natural and free of preservatives, it’s best enjoyed fresh. For the absolute best flavor and texture, try to eat it within one week. It will still be good for up to two weeks, but you might notice some changes in quality after that first week. To help you keep track, get in the habit of labeling your container with the flavor and the date you made it. Following proper food storage safety guidelines ensures you’re serving your ice cream at its peak. Think of it as a wonderful excuse to gather friends and family to share your delicious creation while it’s perfectly fresh and creamy.

A Quick Look at Nutrition

Let's be honest, we're making cheesecake ice cream because it's a delicious, decadent treat, not a health food. But if you're curious about what you're scooping up, it's helpful to have a general idea. Think of this as a fun fact sheet for your dessert, not a strict nutritional guide. Every homemade batch will be a little different, and that's part of the magic. At Pecan Jacks, we believe in savoring every spoonful, and knowing a bit about the ingredients can make that experience even more enjoyable. So, let's take a quick peek at the numbers and explore a few simple tweaks you can make if you're aiming for a slightly lighter version of this classic.

A Breakdown of Calories, Fat, and Carbs

When you indulge in a scoop of homemade blueberry cheesecake ice cream, you're treating yourself to a rich and creamy dessert. Generally, a half-cup serving contains around 240 to 250 calories, with about 34 grams of carbohydrates and 12 grams of fat. Of course, these numbers can vary depending on your specific ingredients and portion size. The beauty of this ice cream is its decadent flavor profile, which comes from the combination of cream cheese, heavy cream, and sugar. Understanding the nutritional content helps you appreciate it as the special treat it is, perfect for celebrations or a quiet evening in. It’s all about balance and enjoying those sweet moments.

Tips for Making a Lighter Version

Want to lighten things up just a bit without losing that signature creamy texture? It's totally possible with a few smart adjustments. First, stick with full-fat or light cream cheese. While it might seem counterintuitive, fat-free versions contain more water and stabilizers, which can make your ice cream icy instead of smooth. Second, always use very cold heavy cream. Cold cream whips up faster and creates a more stable, airy base. Finally, be gentle when you combine your ingredients. Fold everything together just until it's mixed to maintain a light, fluffy consistency. Overmixing can deflate the base, making it dense. These small steps help you create a beautifully textured ice cream every time.

Related Articles

Frequently Asked Questions

Can I use a different fruit instead of blueberries? Absolutely. This recipe works wonderfully as a base for other fruit swirls. You could easily swap the blueberries for raspberries, strawberries, or even pitted cherries. The key is to cook your chosen fruit down into a thick, jam-like sauce, just as the recipe directs. This step is important because it concentrates the flavor and cooks off excess water, which helps prevent any unwanted icy patches in your finished ice cream.

Why is my homemade ice cream always rock-hard and difficult to scoop? This is a very common challenge with homemade ice cream since it doesn't contain the commercial stabilizers you find in store-bought pints. The easiest fix is to let the container sit on the counter for 5 to 10 minutes before you plan to serve it. This short amount of time is usually enough to soften it for perfect scooping without melting it. Also, make sure you're storing it in a proper airtight container to keep it as fresh as possible.

Do I really need an ice cream maker to get a good result? Not at all. While an ice cream maker creates a lighter, airier texture, the no-churn method is fantastic and requires no special equipment. By using whipped heavy cream, you incorporate air into the base before it freezes, resulting in a rich, dense, and incredibly creamy ice cream. It’s a wonderfully simple approach that delivers a delicious, high-quality dessert every time.

How do I get those pretty, distinct swirls instead of just purple-colored ice cream? The secret to a beautiful swirl is to be gentle and work with cold ingredients. Make sure your blueberry sauce is completely chilled before you begin layering it with the ice cream base. Instead of pouring the sauce, add it in dollops. Then, take a butter knife and drag it through the layers just a couple of times. Remember, you want to create ribbons, not fully mix everything together, so less is definitely more.

Can I reduce the amount of sugar in this recipe? You can, but it's good to know that sugar does more than just sweeten the ice cream. It also plays a crucial role in the texture by lowering the freezing point of the base, which is what keeps it from turning into a solid, icy block. If you reduce the sugar too much, your ice cream may freeze harder. If you'd like to experiment, try reducing the sugar by about one-quarter to see if you still like the final texture.

Overall Rating

0.0

0

reviews

By Cory Mosley June 11, 2026
At Pecan Jacks, our passion is crafting small-batch, artisan desserts that create moments of joy. We believe the best flavors come from real ingredients and a process filled with care. But you don’t need a professional kitchen to experience that same satisfaction. This guide is about bringing the spirit of the artisan ice creamery into your own home. We’re sharing our favorite methods and tips for creating the perfect pumpkin spice ice cream from scratch, a dessert that rivals any scoop shop. You’ll learn the secrets to a velvety smooth texture, how to balance the warm spices perfectly, and how to customize each batch to make it your own. Get ready to transform your kitchen into your new favorite ice cream parlor. Ready to take your first sweet bite? Key Takeaways Start with the Right Ingredients : For the best flavor and texture , always grab 100% pure pumpkin puree, not the pre-sweetened pie filling. A full-fat base like heavy cream or canned coconut milk is also essential for creating that rich, perfectly creamy scoop. Patience Is Key for a Smooth Texture : Chilling your ice cream base for at least four hours before churning is non-negotiable. This simple step prevents ice crystals from forming and allows the spices to meld together for a deeper, more delicious flavor. Make It Uniquely Yours : Think of the recipe as your starting point, not a strict rule. Get creative by adding fun mix-ins like praline pieces, adjusting the spice levels to your taste, or trying a dairy-free or bourbon-infused version to create your perfect fall dessert. What Is Pumpkin Spice Ice Cream? Imagine your favorite parts of fall: the cozy sweaters, the crisp air, and the warm, comforting scent of pumpkin pie. Now, picture all of that blended into a rich, creamy, frozen dessert. That’s pumpkin spice ice cream. It’s a seasonal treat that combines real pumpkin puree with a classic blend of autumn spices, all churned into a delightful ice cream base. Think of it as the cool, creamy cousin to the famous pumpkin spice latte. It captures the very essence of autumn in every spoonful, offering a sweet and spiced flavor that’s become a beloved tradition for many. What does it taste like? The best way to describe pumpkin spice ice cream is that it tastes like a frozen slice of creamy pumpkin pie. The flavor is a beautiful balance of earthy pumpkin, rich cream, and a warm hug of spices. You’ll taste the familiar notes of cinnamon, nutmeg, ginger, and a hint of cloves, all working together without overpowering the sweet pumpkin. A good homemade pumpkin ice cream is incredibly smooth, letting the authentic flavor of the pumpkin shine through. It’s sweet but not too sweet, and the spices leave a gentle, lingering warmth that makes you want to curl up with a blanket. Why we love it for fall There’s a reason we get so excited when pumpkin spice everything starts appearing on menus. This flavor is deeply tied to feelings of warmth, comfort, and nostalgia. For many of us, the taste of pumpkin spice brings back happy memories of family gatherings, Thanksgiving dinners, and fun autumn traditions. It has become the official flavor of the season, a signal that it’s time to enjoy the cozy moments that fall brings. The popularity of pumpkin spice is all about that comforting feeling it gives us, reminding us of friends, family, and home. It’s more than just a dessert; it’s a seasonal experience. Gather Your Ingredients for Pumpkin Spice Ice Cream Before you even think about plugging in your ice cream maker, let's talk about what goes into your mixing bowl. The secret to truly spectacular homemade ice cream isn’t some complicated technique; it’s starting with high-quality, well-chosen ingredients. Each component plays a starring role in the final flavor and texture. Getting your ingredient lineup right is the first and most important step toward creating a scoop of pumpkin spice ice cream that tastes like a crisp autumn day. Let’s walk through exactly what you’ll need to create your new favorite fall dessert. Choose the right pumpkin: puree vs. pie filling This might be the most important tip I can give you: grab a can of 100% pure pumpkin puree, not pumpkin pie filling. It’s an easy mistake to make, but pie filling comes pre-mixed with sugar and spices. Using it will throw off the balance of your recipe and make your ice cream overly sweet. A simple pumpkin puree gives you a clean slate, letting you control the sweetness and spice level. This ensures you get a genuine, rich pumpkin flavor that serves as the perfect foundation for your ice cream. Create the perfect spice blend The heart of any pumpkin spice recipe is, of course, the spice. This is what gives your ice cream that signature warmth and complexity. You can absolutely use a pre-made pumpkin pie spice blend from the store for convenience. But if you want to customize the flavor, I highly recommend making your own. A classic mix includes ground cinnamon, ginger, nutmeg, allspice, and cloves. Creating your own spice blend lets you adjust the ratios to your personal taste. Maybe you love a strong kick of ginger or prefer a cinnamon-forward flavor. This is your chance to play and make the recipe truly yours. Pick your creamy base: dairy and dairy-free The base you choose determines how rich and creamy your final product will be. For that classic, decadent ice cream texture we all love, heavy whipping cream is the way to go. It has the high fat content needed to create a smooth, luscious scoop that doesn't freeze into a solid block of ice. If you're looking for a dairy-free option, don't worry, you can still achieve a wonderful texture. Full-fat canned coconut milk is a fantastic substitute that provides creaminess and adds a subtle, complementary flavor. There are many great vegan pumpkin ice cream recipes that can guide you. Select your sweetener: sugar, maple syrup, and more Now for the sweet part. The type of sweetener you use can add another layer of flavor to your ice cream. While plain white sugar works, I find that brown sugar is a fantastic choice for pumpkin spice. It has a deeper, molasses-like flavor that beautifully complements the warm spices and earthy pumpkin. Another wonderful option is pure maple syrup. It adds a distinct, cozy sweetness that feels perfect for fall. You can even experiment with a combination of sweeteners to get the exact flavor profile you’re looking for. The key is to choose a sweetener that adds to the overall flavor profile rather than just adding sweetness. Recipe: Classic Churned Pumpkin Spice Ice Cream Ready to bring the taste of authentic, handcrafted ice cream into your kitchen? This classic churned recipe uses real roasted pumpkin and a rich custard base to create a dessert that’s miles ahead of anything you can buy in a tub. It takes a little patience, but the result is a creamy, perfectly spiced scoop of fall that’s worth every minute. At Pecan Jacks, we believe the best flavors come from the best ingredients, and this recipe is all about celebrating real pumpkin and warm spices. So, roll up your sleeves, pull out your ice cream maker, and let’s make something delicious together. Ingredients This recipe gets its deep, authentic flavor from roasted pumpkin, not canned filling. Using real pumpkin makes a huge difference in the final taste and texture. Here’s what you’ll need to gather: 1 small sugar pumpkin (about 2 pounds) or 1 cup of pumpkin puree 2 cups heavy cream 1 cup whole milk ¾ cup packed brown sugar 5 large egg yolks 2 teaspoons pumpkin pie spice (or your custom blend) 1 teaspoon vanilla extract ¼ teaspoon salt For an even smoother texture, you can add a tablespoon of glucose syrup or corn syrup to the custard base. This is a little trick that helps prevent ice crystals from forming in your finished ice cream . Instructions Prepare the Pumpkin: If using fresh pumpkin, roast it at 320°F (160°C) until tender, then puree. You'll need one cup. Warm the Cream: Gently heat the cream and milk in a saucepan. Make the Base: Whisk the egg yolks and brown sugar until light and creamy. Slowly whisk in about half of the warm cream to temper the eggs. Cook the Custard: Pour the egg mixture back into the saucepan. Add the pumpkin puree, spices, and salt. Cook over low heat, stirring, until it thickens. Chill Thoroughly: Strain the custard into a bowl and chill in the refrigerator for at least 4 hours, or overnight. Churn and Freeze: Churn the cold base in your ice cream maker until it resembles soft-serve. Transfer to a container and freeze for at least 4 hours until firm. How to perfect your custard base The secret to incredibly creamy, scoop-shop-quality ice cream is a perfect custard base. The key is to cook it gently so the egg yolks thicken the cream without scrambling. Using a double boiler is a great way to control the heat and prevent any mishaps. If you don't have one, you can create your own by placing a heatproof bowl over a saucepan with an inch of simmering water. As you cook the custard, stir it frequently with a wooden spoon or spatula. You’ll know it’s ready when the mixture is thick enough to coat the back of the spoon. To test it, run your finger through the custard on the spoon. If the line holds its shape without the custard running back together, it’s done. Recipe: Easy No-Churn Pumpkin Spice Ice Cream Don't have an ice cream maker? No problem at all. This no-churn recipe is your golden ticket to creamy, dreamy pumpkin spice ice cream right from your own freezer. The magic lies in using whipped cream and sweetened condensed milk to create a luscious base that freezes beautifully without any special equipment. While we cherish the traditional churning process in our Pecan Jacks kitchens, we love this simple method for its speed and delicious results. It’s the perfect way to satisfy a sudden craving for fall’s favorite flavor. Ingredients Here’s what you’ll need to get started. The key to a great no-churn ice cream is using cold ingredients and creating a light, airy base. 1 cup very cold heavy whipping cream: The colder, the better! This helps it whip up into stiff, airy peaks, which is the secret to a perfect light texture. 1 can (14 ounces) sweetened condensed milk: This is our sweetener and stabilizer all in one. It keeps the ice cream soft and scoopable instead of icy. ¾ cup 100% pure canned pumpkin puree: Be sure to grab pure pumpkin, not pumpkin pie filling. Pie filling has extra spices and sugar that will throw off the recipe. 1 teaspoon pumpkin pie spice: Use your favorite store-bought blend or mix your own. ½ teaspoon pure vanilla extract: A little vanilla makes all the other flavors pop. Instructions In just a few simple steps, you’ll have a delicious batch of homemade ice cream ready to freeze. Whip the cream. Pour your very cold heavy cream into a large bowl. Using a hand mixer or a stand mixer, whip the cream on high speed until stiff peaks form. This means when you lift the beaters, the cream holds its shape. Combine the base. In a separate bowl, whisk together the sweetened condensed milk, pumpkin puree, pumpkin pie spice, and vanilla extract until everything is smooth and well combined. Fold it all together. Gently fold the pumpkin mixture into the whipped cream with a spatula until just combined. Be careful not to overmix, as you want to keep all that lovely air you whipped into the cream. Freeze. Pour the mixture into a loaf pan or another freezer-safe container. Smooth the top, cover it tightly, and freeze for at least 4 to 6 hours, or until firm. Recipe: Dairy-Free and Vegan Pumpkin Spice Ice Cream Just because you’re skipping dairy doesn’t mean you have to miss out on the season’s best dessert. Making a rich, decadent, and completely vegan pumpkin spice ice cream at home is easier than you might think. The secret isn’t about what you’re leaving out; it’s about the wonderful, plant-based ingredients you’re putting in. With the right base, you can create a scoop that’s unbelievably creamy and packed with all the warm, aromatic spices of a classic pumpkin pie. This is the kind of dessert that makes everyone happy, whether they follow a vegan diet or are just curious to try a new take on a fall favorite. A great vegan pumpkin ice cream is all about celebrating those cozy flavors in a way that feels both indulgent and wholesome. You don’t need a long list of complicated ingredients, either. In fact, some of the best recipes are surprisingly simple, proving that you can create a truly memorable dessert with just a few pantry staples. Forget any notions of icy or bland dairy-free treats. We’re talking about a velvety, smooth ice cream that lets the pumpkin and spices shine, creating a perfect scoop of autumn in every bite. This recipe is your ticket to enjoying a classic fall flavor without any eggs or dairy, and the result is so satisfying you'll want to make it year after year. Choose the best dairy-free base The key to a luscious vegan ice cream is a base with enough fat to create that signature creamy mouthfeel. Full-fat coconut milk from a can is your best friend here. The high fat content churns up beautifully, creating a smooth texture that’s never icy. Another fantastic option is raw cashews that have been soaked in water and blended until silky smooth. This method creates an incredibly rich and neutral-flavored foundation that lets the pumpkin and spices take center stage. When done right, your dairy-free ice cream will be so creamy and full of flavor that no one will ever guess it’s made with only 5 ingredients and completely free of eggs and dairy. Tips for great texture Once you’ve nailed the creamy base, you can have fun playing with texture. A completely smooth ice cream is lovely, but adding a little crunch can make it even more satisfying. Consider folding in some toasted pumpkin seeds, your favorite granola, or even crushed gingersnap cookies after churning for a delightful contrast. For a truly southern-inspired twist, try adding chopped praline pieces. You can also make a dreamy, no-churn vegan ice cream using a blend of cashews and coconut milk, which sets up perfectly in the freezer without an ice cream maker. To finish, a simple sprinkle of cinnamon or extra pumpkin pie spice right before serving adds a final aromatic touch. Recipe: Bourbon-Infused Pumpkin Spice Ice Cream Ready to take your pumpkin spice game to the next level? This recipe adds a splash of bourbon for a warm, sophisticated flavor that’s strictly for the grown-ups. It reminds me of the creative, adult-infused ice cream flavors we love to craft in our own kitchen. The bourbon deepens the caramel notes of the brown sugar and adds a smooth finish that beautifully complements the pumpkin and spices. It’s the perfect dessert for a cozy fall evening or to impress guests at your next gathering. Let’s get churning. Ingredients Here’s what you’ll need to create this rich and creamy treat. Using dark brown sugar adds a wonderful molasses-like depth, but light brown sugar works in a pinch. For the bourbon, choose something you’d enjoy sipping on its own; a mid-range Kentucky bourbon is a fantastic choice. The quality of your ingredients really shines through in homemade ice cream, so go for the good stuff when you can. 2 cups heavy cream 1 cup whole milk 1 cup pumpkin purée ¾ cup dark brown sugar, packed 8 large egg yolks ¼ cup bourbon 1 teaspoon vanilla extract 1 teaspoon pumpkin pie spice Instructions Making a custard base is the secret to incredibly rich ice cream. The key is to go slow and steady. First, combine the cream, milk, and brown sugar in a saucepan over medium heat until warm and the sugar dissolves. While that’s heating, whisk your egg yolks in a separate bowl. To temper the eggs, slowly ladle about a cup of the warm cream into the yolks while whisking constantly. This prevents them from scrambling. Pour the egg mixture back into the saucepan and cook over low heat, stirring until it’s thick enough to coat a spoon. Remove from the heat and stir in the pumpkin purée, bourbon, vanilla, and spice. Strain the mixture into a clean bowl, cover it, and chill it in the fridge for at least four hours, or preferably overnight. Once it's completely cold, churn it in your ice cream maker and freeze until firm. How to Customize Your Pumpkin Spice Ice Cream One of the best parts of making ice cream at home is that you are in complete control. Think of your pumpkin spice ice cream recipe as a starting point, a delicious canvas waiting for your personal touch. This is your chance to create the pumpkin spice dessert of your dreams, whether you want it loaded with crunchy bits, drizzled with sauce, or perfectly spiced to your liking. You can make it as indulgent or as simple as you want. At Pecan Jacks, we spend our days perfecting our artisan desserts, and we believe that the little details make all the difference. The same is true for your homemade creations. Getting creative with mix-ins, toppings, and spices is how you transform a good recipe into a great one that you’ll want to make year after year. Let’s walk through some simple ways to make your pumpkin spice ice cream uniquely yours. Add fun mix-ins like chocolate chips or praline pieces The right mix-in can add a wonderful new dimension of flavor and texture to your creamy pumpkin base. Chocolate and pumpkin are a fantastic pair, so consider folding in some dark or semi-sweet chocolate chips during the last few minutes of churning. For a satisfying crunch, you could also add toasted pumpkin seeds or your favorite granola. If you want to bring in a taste of southern tradition, try crumbling in some authentic southern pralines for a sweet, nutty, and buttery bite that perfectly complements the warm spices. Just be sure to add your mix-ins when the ice cream is nearly frozen to keep them from sinking to the bottom. Get creative with toppings Toppings are the finishing touch that makes your bowl of ice cream feel like a special occasion. A simple sprinkle of cinnamon or a bit more pumpkin pie spice on top can amplify the cozy flavors of your dessert. For a bit of crunch, candied pecans are a classic choice that never disappoints. You can also add a drizzle of warm caramel or maple syrup for extra sweetness and a beautiful presentation. And of course, you can never go wrong with a generous dollop of freshly whipped cream. Don’t be afraid to mix and match to find your favorite combination. Adjust the spices to your liking The "spice" in pumpkin spice is a personal preference, and making it at home means you can get it just right. Your recipe will give you a great starting point, but feel free to experiment. If you love the warmth of cinnamon, add a little extra. If you prefer a bolder flavor, a pinch more nutmeg or clove might be what you need. The best way to find your perfect balance is to taste the custard base before you chill and churn it. This allows you to make adjustments until the flavor tastes exactly how you want it. Remember, you can always add more, so start small. Try low-sugar and natural sweetener swaps Making a delicious pumpkin spice ice cream doesn’t have to mean loading it with refined sugar. One of the most important tips is to always use 100% pure pumpkin puree, not pumpkin pie filling. Pumpkin pie filling comes pre-sweetened and spiced, which takes away your control over the final flavor and sugar content. For the sweetener itself, you can often substitute white sugar with natural alternatives like pure maple syrup or honey. These options not only reduce the refined sugar but also add their own subtle, complex flavors that work beautifully with pumpkin and spice. Avoid These Common Ice Cream Mistakes Making ice cream at home should be fun, but it can be frustrating when the texture doesn't turn out right. If you’ve ever ended up with an icy, grainy, or soupy dessert instead of a creamy scoop, you’re not alone. Usually, a few simple mistakes are the culprit. Getting that dreamy, velvety texture you find in an artisan scoop shop is totally achievable in your own kitchen. We’ve made countless batches of ice cream here at Pecan Jacks, and we’ve learned a few things along the way. Avoiding these common pitfalls will help you create a pumpkin spice ice cream that’s rich, smooth, and perfectly scoopable every single time. Think of these as your secret weapons for mastering homemade ice cream. With just a little extra care, you can sidestep the most frequent issues and get straight to the good part: enjoying a delicious, homemade treat. Don't skip the moisture-removal step Here’s a pro tip that makes a world of difference: get the extra water out of your pumpkin puree. Pumpkin has a high water content, and that water turns into ice crystals during freezing, which is the number one cause of an icy, rather than creamy, texture. It’s a quick step that pays off big time. Simply spoon your pumpkin puree onto a lint-free kitchen towel or a few layers of cheesecloth. Gently fold it up and squeeze over the sink. You’ll be surprised how much liquid comes out. This little trick ensures your ice cream base is concentrated with pure pumpkin flavor and has a much smoother, richer consistency. For a great visual, you can see how it's done in this pumpkin ice cream recipe . Use the right dairy base When a recipe calls for heavy cream and whole milk, it’s for a very good reason. The fat content in dairy is what gives ice cream its signature creamy, luxurious mouthfeel. While it might be tempting to substitute with half-and-half or lower-fat milk to save a few calories, it will unfortunately compromise the final texture. Fat doesn’t freeze as hard as water, so a higher fat content leads to a softer, more scoopable ice cream with fewer ice crystals. For that truly decadent, artisan quality, stick with full-fat dairy. It’s the foundation of all the best gourmet ice creams , including ours. Also, make sure your ice cream maker’s freezer bowl is completely frozen solid before you start. It usually needs at least 24 hours in the coldest part of your freezer. Chill the mixture before churning Patience is a virtue, especially in ice cream making. After you’ve prepared your ice cream base, you need to let it chill in the refrigerator for at least four hours, but overnight is even better. Skipping this step and pouring a lukewarm base into your ice cream maker is a recipe for a soupy mess. Chilling does two important things. First, it allows the flavors of the pumpkin and spices to meld together and deepen. Second, a thoroughly cold base will churn faster and freeze more evenly, resulting in a smoother texture with smaller ice crystals. A cold start is essential for a creamy finish, so don't rush this part of the process. How to temper eggs correctly If you’re making a classic custard-style ice cream, you’ll be working with egg yolks. This creates an incredibly rich and velvety base, but it also introduces the risk of accidentally scrambling your eggs. The key to avoiding this is a technique called tempering. It sounds fancy, but it’s really just about introducing the hot liquid to the eggs slowly. After warming your cream and milk, whisk your egg yolks and sugar together in a separate bowl. Then, very slowly, pour about a cup of the warm cream into the egg mixture while whisking constantly. This gently raises the temperature of the eggs without cooking them. Once combined, you can pour the tempered egg mixture back into the pot with the rest of the cream. This simple tempering method is your ticket to a flawless custard base. How to Serve and Store Your Homemade Ice Cream You’ve put in the work, and now it’s time for the delicious payoff. Serving and storing your homemade ice cream correctly ensures every scoop is as perfect as the first. Here’s how to get it right, from party-ready presentation to keeping it fresh for later. Serving ideas for fall gatherings Your pumpkin spice ice cream is a star on its own, but it also plays well with others. For a simple, crowd-pleasing dessert, set up a toppings bar with bowls of caramel sauce, whipped cream, and crushed gingersnaps or graham crackers. For a truly decadent treat, crumble some of our authentic southern pralines over the top for a sweet, nutty crunch. This ice cream is the perfect partner for classic fall desserts. Serve a scoop alongside a warm slice of apple crisp or pumpkin pie. If your ice cream is a little too firm straight from the freezer, just let it sit on the counter for about 10 minutes to soften before scooping. It’s a versatile dessert that’s perfect for any autumn get-together, from a cozy night in to a festive Thanksgiving feast. How to keep it fresh Homemade ice cream is best enjoyed fresh, but proper storage can keep it tasting great. Transfer your finished ice cream to an airtight, freezer-safe container to prevent ice crystals from forming. It will stay fresh for up to two weeks. After that, it’s still perfectly edible, but you might notice a slightly icier texture. For the best consistency, let your ice cream harden in the freezer for at least four hours after churning. If you can wait, freezing it for eight hours or overnight will give you a firmer, more scoopable texture, similar to the artisan ice cream we craft in our kitchen. If your ice cream isn’t setting up properly in your machine, your base mixture probably wasn’t cold enough. Just pop it back in the fridge to chill longer before churning again. Don't Feel Like Making It? Here's Where to Buy the Best Let’s be honest, sometimes the craving for pumpkin spice ice cream hits when you have zero energy to pull out the ice cream maker. When you want all the fall flavor without the fuss, turning to a store-bought option is the perfect solution. Whether you’re looking for a truly special artisan scoop or a reliable pint from your local grocery store, I’ve got you covered. Think of this as your shortcut to pumpkin spice bliss. You can skip the kitchen prep and get straight to the part where you’re curled up on the couch with a bowl of creamy, dreamy pumpkin ice cream. Try our artisan pumpkin spice ice cream at Pecan Jacks If you want to experience pumpkin spice ice cream at its absolute best, you have to try our handcrafted version. We take our time to create a rich, creamy base infused with real pumpkin and our signature blend of warm spices. It’s a seasonal favorite for a reason. Each scoop is a perfect balance of sweet, spiced, and velvety smooth, capturing that cozy autumn feeling we all love. This isn't just another flavor for us; it's a celebration of the season, made with the same care and quality ingredients as all our artisan ice cream . It’s a must-try for any true pumpkin spice fan. Other store-bought options to consider When you can't make it to a Pecan Jacks, your local grocery store has some great alternatives to satisfy your craving. Here are a few popular pints to look for in the freezer aisle: Trader Joe's Pumpkin Ice Cream: A seasonal superstar, this ice cream is known for its incredibly creamy texture and deep, authentic pumpkin flavor. It’s a simple, straightforward classic that never disappoints. Ben & Jerry's Pumpkin Cheesecake: If you like a little something extra in your scoop, this one’s for you. It swirls the classic taste of pumpkin with the tangy, rich flavor of cheesecake for a truly decadent treat. Publix Pumpkin Pie Ice Cream: Capturing the essence of a whole slice of pie, this ice cream is a Southern favorite that delivers all the comforting flavors of a Thanksgiving dessert in every spoonful. Homemade™ Brand Seasonal Recipe Pumpkin Pie Ice Cream: This delightful flavor offers a wonderful pumpkin pie experience that’s easy to find at stores like Smith's Food and Drug. Related Articles The Top 7 Alcoholic Ice Cream Brands, Ranked The Best Tipsy Ice Cream Brands & Flavors Pecan Jacks Ice Cream News: Expansions, Awards & More 5 Best Artisan Ice Cream Delivery Services 11 Unique Ice Cream Flavors for Adults to Try Ready to take your first sweet bite? Frequently Asked Questions Can I use a fresh pumpkin instead of canned puree? Absolutely! Using a roasted sugar pumpkin can give your ice cream a deeper, more complex flavor. Just roast the pumpkin until it's tender, scoop out the flesh, and puree it until it's completely smooth. The key is to make sure you remove as much water as possible by squeezing the puree in a cheesecloth or kitchen towel before adding it to your base. This step is crucial for a creamy, not icy, result. Why did my homemade ice cream turn out icy instead of creamy? An icy texture is usually caused by excess water freezing into large crystals. The two most common culprits are using a pumpkin puree with too much water or not chilling your custard base long enough before churning. Squeezing the moisture from your puree and chilling your base in the refrigerator for at least four hours (overnight is even better) will help you achieve a much smoother, creamier scoop. Do I really need an ice cream maker to make this at home? Not at all! While an ice cream maker helps create a classic churned texture, you can get fantastic results without one. The no-churn recipe uses whipped heavy cream and sweetened condensed milk to create a light, airy base that freezes beautifully. It’s a wonderfully simple method that gives you a rich, scoopable ice cream with minimal effort. When is the best time to add mix-ins like nuts or chocolate chips? For the best texture, you should fold in your mix-ins during the last few minutes of churning, or just before you transfer the ice cream to its container for the final freeze. If you add them too early, they can get broken down or sink to the bottom. Waiting until the ice cream is thick, like soft-serve, ensures your additions stay suspended and evenly distributed throughout every scoop. How long will my homemade pumpkin spice ice cream stay fresh? For the best flavor and texture, you should enjoy your homemade ice cream within two weeks. Be sure to store it in an airtight container placed in the coldest part of your freezer to prevent ice crystals and freezer burn. While it will still be safe to eat after two weeks, you might notice the texture becomes a bit less creamy over time.
By Cory Mosley June 11, 2026
The story of strawberry ice cream begins long before modern freezers. The first recorded mention dates back to 1744, when a Maryland governor served a dessert of frozen strawberries and ice to his guests. It really hit the big time when First Lady Dolley Madison served a magnificent strawberry creation at an inaugural ball, giving the dessert a major status boost. It became a symbol of sophisticated taste before eventually becoming a fixture in ice cream parlors across the country. This journey from exclusive parties to family dessert tables is a sweet piece of American history. Making your own homemade strawberry ice cream is more than just following a recipe; it’s about connecting with a tradition of simple, quality ingredients and a little creativity. Ready to take your first sweet bite? Key Takeaways Cook Your Strawberries for Better Flavor : To avoid an icy texture and get a truly rich strawberry taste, don't add raw berries to your base. Macerating them in sugar and then gently cooking them concentrates their flavor and removes excess water, which is the secret to a creamy finish. Don't Skimp on the Fat : For a truly creamy texture, using full-fat dairy like heavy cream and whole milk is essential. The fat is what prevents large, crunchy ice crystals from forming, so stick with the good stuff for a smooth, scoopable result. Master the No-Churn Method : You don't need a special machine to make great ice cream. The easiest method involves folding freshly whipped cream into a base of sweetened condensed milk and your strawberry puree, which creates a surprisingly smooth texture after freezing. Why Is Strawberry Ice Cream So Beloved? There’s something universally comforting about a scoop of strawberry ice cream. Its sweet, fruity flavor and cheerful pink hue bring back memories of sunny days and simple pleasures. It’s a flavor that feels both nostalgic and timeless, earning its spot as a cornerstone of classic desserts. In fact, strawberry is one of the three iconic flavors in Neapolitan ice cream , sharing the carton with vanilla and chocolate for a reason: it’s a crowd-pleaser. But what makes a truly great strawberry ice cream isn’t just the flavor, it’s the texture and the use of real, quality fruit. The difference between an artificial-tasting, icy dessert and a creamy, bursting-with-flavor scoop comes down to technique. At Pecan Jacks, we believe in using the best ingredients and time-honored methods to create our artisan ice cream , and the same principles apply when you’re making it at home. Getting that perfect strawberry flavor involves more than just stirring some berries into a cream base. It’s about choosing the right fruit, preparing it properly, and understanding how to concentrate its natural sweetness. Let’s walk through the simple but crucial steps that will make your homemade strawberry ice cream unforgettable. Fresh vs. Frozen Strawberries: Which Wins? When it comes to making the best strawberry ice cream , fresh, ripe strawberries are the gold standard. If you can get your hands on in-season berries that are fragrant and red all the way through, you’re already halfway to a delicious result. Their natural sweetness and lower water content create a more intense flavor. However, don’t feel like you have to wait for summer to make this treat. High-quality frozen strawberries are an excellent alternative. They are picked and frozen at peak ripeness, so they often have a deeper, more concentrated flavor than out-of-season fresh berries you might find at the store. The key is to let them thaw completely before you start so you can prepare them properly for the ice cream base. How to Macerate Strawberries for Maximum Flavor Macerating is a simple technique that makes a huge difference in your ice cream’s flavor. It sounds fancy, but it just means letting your chopped strawberries sit in sugar for a little while. After hulling and dicing your berries, toss them in a bowl with a bit of sugar (and a squeeze of lemon juice, if you like) and let them rest for about 15 to 20 minutes. During this time, the sugar draws out the natural juices from the fruit, creating a beautiful, syrupy liquid. This process softens the berries and creates a rich, natural strawberry syrup that will infuse your entire ice cream base with authentic fruit flavor, far better than any artificial flavoring ever could. Why Cooking Your Strawberries Is a Game-Changer This step is the secret to avoiding a common homemade ice cream problem: iciness. Strawberries have a high water content, and if you add them raw to your ice cream base, that excess water will turn into ice crystals in the freezer. The result is a crunchy, icy texture instead of a smooth, creamy one. To prevent this, gently cook your macerated strawberries on the stove until they soften and the liquid thickens slightly. This cooks off some of the water and concentrates the flavor even more. For the perfect texture, you can blend about half of the cooked strawberry mixture until smooth and leave the other half chunky. Let it cool completely before adding it to your ice cream base for a creamy, dreamy final product. The Sweet History of Strawberry Ice Cream Strawberry ice cream feels like such a timeless, classic treat, doesn't it? It’s the flavor many of us grew up with, a scoop of pure, simple happiness. But this beloved dessert has a surprisingly long and fascinating story. Long before it became a staple in freezers and scoop shops like ours, it was a rare delicacy enjoyed by society's elite. Its journey from exclusive parties to family dessert tables is a sweet piece of American history, filled with innovative cooks and even a few First Ladies. It’s a great reminder that the best things often start with simple, quality ingredients and a little creativity. From the White House to Your House The story of strawberry ice cream begins long before modern freezers. The first recorded mention dates all the way back to 1744, when Maryland's governor, Thomas Bladen, served a dessert made of frozen strawberries and ice to his guests. It was a simple concept, but it laid the groundwork for the creamy treat we know today. As time went on, creative cooks continued to refine the recipe. In the early 1800s, a freed slave named Sallie Shadd, who ran a popular tearoom, was known for using fresh berries to both flavor and color her frozen dairy desserts, helping to shape the history of ice cream in America. How It Became an American Classic Strawberry ice cream really hit the big time when it made its way to the White House. In 1813, First Lady Dolley Madison served a magnificent strawberry ice cream creation at her husband's second inaugural ball. This single event gave the dessert a major status boost, making it the talk of the town and a symbol of sophisticated taste. A few decades later, Mary Todd Lincoln continued the tradition by hosting "Strawberry Parties," where the sweet, pink ice cream was the star of the show. By the 1900s, it was no longer just for presidents and parties. Strawberry ice cream became a fixture in ice cream parlors across the country, solidifying its role as a true American classic that Dolley Madison helped popularize. What You'll Need for the Creamiest Homemade Ice Cream The secret to incredibly smooth, rich ice cream isn't just a fancy machine; it's all about the ingredients. The difference between a grainy, icy dessert and a luxuriously creamy one comes down to a little bit of kitchen science. At Pecan Jacks, we've spent years perfecting our recipes, and we know that starting with the right foundation is everything. Using high-quality, full-fat ingredients is the first step toward creating a scoop that rivals what you’d find in our artisan ice cream shop . We believe everyone deserves to experience the joy of truly great ice cream, whether it's from our kitchen or yours. Think of your ice cream base as the canvas for your strawberry masterpiece. Each component has a specific job, from adding richness to preventing ice crystals from forming. Getting these elements right will give you that signature melt-in-your-mouth texture we all crave. It's less about complicated techniques and more about understanding what each ingredient brings to the party. When you choose the right dairy, sweeteners, and enhancers, you're setting yourself up for success before you even start churning. Below, we’ll walk through the key players that will help you achieve the creamiest possible results at home, turning your kitchen into your very own creamery. Why Full-Fat Dairy Is a Must This is the number one rule for creamy ice cream: don't skimp on the fat. While it might be tempting to reach for skim milk or half-and-half to make a "lighter" version, you'll likely end up with an icy, hard-to-scoop dessert. Full-fat dairy, like whole milk and heavy whipping cream, is essential. The fat molecules in the cream interfere with water molecules, which helps prevent large ice crystals from forming as the mixture freezes. This is what gives ice cream its smooth, dense, and satisfying texture. So, for this recipe, treat yourself and go for the good stuff. Your taste buds will thank you. The Power of Egg Yolks and Condensed Milk For an even richer and more custard-like base, egg yolks are a fantastic addition. They act as a natural stabilizer, helping to bind the fat and water together for an exceptionally smooth consistency. This method, often used in French-style ice cream, creates a velvety texture that feels truly decadent. If you're looking for a simpler, no-cook alternative, sweetened condensed milk is your best friend. It provides sugar, milk, and solids all in one, creating a thick base that's perfect for no-churn recipes . It’s a brilliant shortcut that delivers creamy results with minimal effort. Sweeteners, Enhancers, and Other Secret Weapons Beyond the dairy, a few other ingredients can make a huge difference. Sugar does more than just sweeten your ice cream; it also lowers the freezing point of the mixture, which keeps it softer and easier to scoop. For an extra creamy boost, try adding a tablespoon of refined coconut oil. Make sure it's "refined" so it doesn't add any coconut flavor. This little trick adds fat and creates an even silkier texture. Finally, don't forget a pinch of salt and a splash of vanilla extract. Salt brings out the sweetness of the strawberries, while vanilla adds a layer of aromatic depth that complements the fruit beautifully. Our Go-To Homemade Strawberry Ice Cream Recipe There’s something truly special about a scoop of homemade strawberry ice cream. It tastes like sunshine and sweet memories all rolled into one. While we pour our hearts into crafting every batch of our artisan ice cream here at Pecan Jacks, we also believe in the joy of making things yourself. Sharing food is a love language, and this recipe is our way of sharing a little piece of our kitchen with yours. It’s a classic for a reason, and we’ve tweaked it over the years to get it just right. This recipe is straightforward and focuses on what matters most: incredible flavor from simple, high-quality ingredients. It’s about capturing the essence of perfectly ripe strawberries in a rich, creamy base. Think of it as a foundation for creating your own sweet traditions. Whether you’re making it for a family gathering or just a quiet night in, the process is almost as rewarding as the first bite. This is more than just a dessert; it’s an experience that brings people together, which is a huge part of our family’s story. Ingredients To create a truly delicious strawberry ice cream, you need ingredients that can shine. The key is to use fresh, full-fat components to get that signature creamy texture and rich flavor. Low-fat substitutes will unfortunately lead to an icy, less satisfying result. Here’s what you’ll need to get started: Fresh strawberries: The star of the show. Heavy whipping cream: This provides the rich, luxurious mouthfeel. Half-and-half: Balances the heavy cream for the perfect consistency. Granulated sugar: For classic sweetness. Honey or light corn syrup: A touch of this helps keep the ice cream smooth and scoopable. Fresh lemon juice: Just a squeeze brightens the strawberry flavor. Vanilla extract: Adds a layer of aromatic warmth. A pinch of salt: Enhances all the other flavors. Step-by-Step Instructions Making ice cream is a simple process of chilling and churning. The magic happens when you give your ingredients time to meld together. Follow these steps for a perfect batch every time. Prepare the strawberries: Hull and chop your strawberries. In a bowl, gently mix them with the sugar, honey, and lemon juice. Let this mixture sit for about 20 minutes to draw out the natural juices. Create the base: Mash the strawberries to your desired consistency. For a smoother ice cream, use a blender; for a chunkier texture, a potato masher works great. Combine everything: In a large bowl, whisk the strawberry mixture with the heavy cream, half-and-half, and vanilla extract until it’s all combined. Churn: Pour your base into an ice cream maker and churn according to the manufacturer’s directions , usually for about 15 to 20 minutes. Freeze: The ice cream will have a soft-serve consistency at this point. For a firmer texture, transfer it to an airtight container and freeze for at least four hours. Tips for a Perfectly Creamy Texture The difference between good and great homemade ice cream often comes down to a few small details. An icy texture is the most common frustration, but it’s easy to avoid. Here are a few secrets we’ve learned over the years to guarantee a smooth, creamy scoop every single time. Use full-fat dairy: This is the most important rule. The fat in heavy cream and whole milk is essential for preventing large ice crystals from forming. Don’t skip the sugar: Sugar does more than sweeten; it lowers the freezing point of the mixture, which helps maintain a softer, creamier texture. Add egg yolks: For an even richer, custardy base, you can create a cooked custard with tempered egg yolks. This adds stability and an incredibly smooth finish. Chill everything: Make sure your ice cream base is thoroughly chilled in the refrigerator (at least four hours) before churning. A cold base churns faster and freezes more evenly. How to Make Strawberry Ice Cream Without an Ice Cream Maker So, you’re craving rich, creamy, homemade strawberry ice cream but don’t have an ice cream maker? Don’t worry, you’re not out of luck. Some of the best ice cream can be made with just a few simple tools you already have in your kitchen. The secret is creating a base that resists ice crystals and freezes into a perfectly scoopable texture, no special equipment required. The goal is to incorporate air and keep the ice crystals small, which is exactly what an ice cream maker does automatically. We can achieve a similar effect with a little patience and the right technique. At Pecan Jacks, we’re all about using quality ingredients and time-tested methods to create our handcrafted gourmet ice cream , and you can apply that same spirit at home. Whether you use a blender or just a bowl and a whisk, these methods will get you incredibly close to that classic churned texture. It just takes a little kitchen creativity. Let’s walk through a few of my favorite ways to make delicious strawberry ice cream without a machine. The No-Churn Method This is probably the most popular and foolproof way to make ice cream without a machine. The magic lies in two key ingredients: sweetened condensed milk and heavy whipping cream. The condensed milk provides the sweetness and creamy base, while the whipped cream adds air and lightness, mimicking the effect of churning. You simply whip the cream to stiff peaks, fold it into your strawberry and condensed milk mixture, and freeze. It’s a straightforward process that delivers a surprisingly smooth result. This easy strawberry ice cream recipe is a perfect example, as it "doesn't require an ice cream maker, eggs, or special techniques or equipment!" It’s a fantastic starting point for any beginner. The Blender Method If you have a high-powered blender, you can achieve a wonderfully smooth texture. This method often involves blending frozen strawberries with your dairy base until it’s completely smooth. For an even creamier finish, you can prepare your strawberry base separately, chill it, and then gently fold in freshly whipped cream until it’s all one beautiful, fluffy mixture. Once combined, you just need to pour it into a freezer-safe container, cover it, and let it set. This technique is great for incorporating the fruit seamlessly into the base, ensuring you get that rich strawberry flavor in every single bite. The Freezer-Stir Method This technique is a bit more hands-on, but it’s a classic for a reason. It works with almost any ice cream base, including traditional custard-style recipes. The idea is to manually break up ice crystals as the ice cream freezes. You pour your chilled ice cream base into a shallow, freezer-safe dish and place it in the freezer. Every 30 to 45 minutes, you take it out and stir it vigorously with a whisk or a fork, breaking up any frozen bits and making it smooth. You repeat this process for a few hours until it’s firm but scoopable. It takes patience, but the result is a super creamy texture that’s well worth the effort. Tips for No-Churn Success No matter which method you choose, a few simple tips can make a huge difference. First, always start with cold ingredients. Your heavy cream will whip up much better if it’s thoroughly chilled, and a cold base will freeze faster and more evenly. When you’re ready to freeze, use a shallow container, like a loaf pan or a brownie pan. This increases the surface area and helps the ice cream freeze quickly, which is key to preventing large ice crystals. Before you even start, pop your empty container in the freezer to get it ice-cold. Finally, be sure to chill the strawberry custard mixture completely before folding in your whipped cream or starting the freezing process. Solving the Icy Homemade Ice Cream Problem There’s nothing more disappointing than pulling your homemade ice cream from the freezer only to find it’s a block of ice crystals. We’ve all been there. The good news is that a creamy, dreamy texture is totally achievable. The secret lies in understanding what causes those pesky ice crystals in the first place and knowing how to prevent them during the making and storing process. With a few simple adjustments, you can ensure every scoop is as smooth as the last. What Causes Ice Crystals? The goal of making ice cream is to create many tiny ice crystals, not a few large ones. Big, crunchy crystals are what give ice cream that dreaded icy texture. This usually happens for a few key reasons. First, the fat and sugar content might be too low. Fat coats the ice crystals and keeps them small, which is why using lower-fat milk can lead to an icier result. Second, the mixture may not have been churned long enough. Churning breaks up ice crystals as they form and incorporates air, which is essential for a smooth finish. Finally, improper storage can ruin a perfectly good batch after the fact. Common Mistakes and How to Avoid Them If your strawberry ice cream turns out icy, it’s likely due to a few common slip-ups. One major culprit is not cooking the strawberries long enough, which leaves too much water in your base. Water is the enemy of creamy ice cream. Another frequent issue is swapping out full-fat dairy for lower-fat options. While it might seem like a healthier choice, using whole milk and heavy whipping cream is non-negotiable for that classic, rich texture. You can also get an icy result if you don’t churn the ice cream long enough, so be sure to follow your machine’s instructions until the mixture is thick and frozen. How to Store Your Ice Cream for Lasting Creaminess How you store your ice cream is just as important as how you make it. To protect your hard work, transfer the finished ice cream into a shallow, airtight container. Press a piece of plastic wrap or wax paper directly onto the surface of the ice cream before sealing the lid. This extra layer prevents air from touching the surface, which helps stop ice crystals from forming. For even more protection, you can wrap the entire container in foil. Store it in the coldest part of your freezer (usually the back) for up to two weeks for the best flavor and texture. Fun Strawberry Ice Cream Variations to Try Once you’ve mastered the classic homemade strawberry ice cream, you can start having some real fun in the kitchen. The basic recipe is a perfect canvas for all sorts of delicious experiments. Think of it as your starting point for creating a signature flavor that’s all your own. From rich and decadent to fresh and herbaceous, there are so many ways to put a personal spin on this beloved treat. Let’s explore a few of my favorite variations to get your creative juices flowing. Strawberry Cheesecake If you love strawberry cheesecake, you are going to adore this ice cream. This variation combines the tangy, creamy goodness of cheesecake with the sweet, fruity pop of fresh strawberries. You can achieve this by swirling a rich cream cheese mixture into your strawberry ice cream base. For extra texture and that signature graham cracker crust flavor, try mixing in crushed graham crackers or shortbread cookies toward the end of the churning process. It’s like getting two incredible desserts in one perfect scoop. Strawberry Basil and Strawberry Lavender This might sound a little unusual, but trust me on this one. Adding fresh herbs is a fantastic way to introduce a sophisticated, aromatic twist to your strawberry ice cream. Basil brings a subtle, peppery sweetness that beautifully complements the strawberries, while lavender adds a delicate floral note that feels elegant and refreshing. You can infuse these flavors into your cream base by gently heating it with the herbs and letting it steep before you churn. It’s a simple step that creates a truly memorable, gourmet-style ice cream experience . Dairy-Free and Vegan Options No one should have to miss out on delicious homemade ice cream. Creating a creamy, dreamy dairy-free strawberry ice cream is easier than you think. Simply swap the heavy cream and milk for full-fat coconut cream or a blend of coconut and almond milk. To get that rich sweetness without dairy, sweetened condensed coconut milk works wonders. This version is perfect for friends and family who are vegan or have a lactose intolerance, ensuring everyone can enjoy a scoop of homemade happiness. Get Creative with Mix-Ins and Toppings This is where you can really let your personality shine. Your pantry is a treasure trove of potential mix-ins that can add incredible flavor and texture. Think about folding in mini chocolate chips, crushed sandwich cookies, chopped nuts, or even chunks of white chocolate. You could also create a swirl using strawberry jam, balsamic glaze, or a rich chocolate fudge sauce. Don’t be afraid to get creative with your strawberry ice cream and see what amazing combinations you can come up with. Homemade vs. Store-Bought: What's the Difference? Let’s be real, sometimes grabbing a pint of strawberry ice cream from the grocery store freezer is the easiest option. But when you have a little time, making it at home is a completely different experience. The biggest difference between homemade and store-bought comes down to one thing: the ingredients. When you make it yourself, you control what goes in. You can use the freshest, juiciest strawberries at their peak, which gives your ice cream a vibrant, authentic flavor that’s hard to replicate. A great homemade recipe always puts fresh fruit front and center, resulting in that creamy, dreamy texture we all crave. Many mass-produced ice creams rely on strawberry-flavored syrups, artificial flavors, and preservatives to achieve their taste and shelf stability. While not all store-bought options are created equal, the homemade version almost always wins on pure, unadulterated flavor. Plus, there’s a special kind of satisfaction that comes from churning your own batch. It’s a process rooted in care, much like the way we craft our own gourmet ice cream flavors. It’s less about convenience and more about creating a truly memorable treat from scratch, knowing exactly what you and your family are enjoying. The Artisan Difference So, where does artisan ice cream fit in? Think of it as the bridge between homemade and typical store-bought. Artisan ice cream, like the kind we proudly make at Pecan Jacks, is all about craftsmanship. It’s typically made in small batches using high-quality, often local, ingredients. This approach allows for a focus on creating rich textures and unique flavors you won’t find in mass-produced pints. It’s a philosophy that celebrates the ingredients and the process. This dedication to quality means you get a scoop that’s bursting with real flavor, not just sweetness. For us, being an artisan ice creamery means honoring tradition while playing with new ideas, ensuring every bite is as delicious as the last. What to Look for When Buying Ice Cream If you’re going the store-bought route, you can still find some fantastic options if you know what to look for. The first step is to become an ingredient list detective. For the best flavor, you’ll want to see real strawberries or strawberry puree listed near the top. According to food experts, a high-quality ice cream will always prioritize real fruit over artificial flavoring. Be wary of brands with a long list of stabilizers, gums, and artificial colors. While some of these are necessary for texture and shelf life, a shorter, more recognizable ingredient list is usually a sign of a better product. Finally, trust your taste buds. A truly great strawberry ice cream will have a creamy, not icy, texture and a flavor that tastes like actual strawberries, not candy. How to Serve and Pair Your Strawberry Ice Cream You’ve put in the effort to make the creamiest, most flavorful strawberry ice cream from scratch. Now comes the really fun part: serving it up. While a spoon straight from the container is always a valid choice (we’ve all been there), the right presentation or pairing can turn your homemade treat into a truly memorable dessert. Whether you’re a fan of timeless classics or you like to experiment with bold new flavors, there are so many ways to enjoy your creation. Let’s get into some of our favorite ways to serve and pair strawberry ice cream. At Pecan Jacks, we believe that a great dessert is all about quality and creativity, from our handcrafted ice cream to the way it’s enjoyed. Your homemade strawberry ice cream deserves the same thoughtful treatment. Classic Cones and Sundaes There’s a reason the classics never go out of style. Serving your homemade strawberry ice cream in a crispy waffle cone is a simple pleasure that’s hard to beat. It’s also a star player in a sundae. As one of the three core flavors in classic Neapolitan ice cream , strawberry plays beautifully with both chocolate and vanilla. For an amazing sundae, start with a generous scoop (or two) and add toppings like fluffy whipped cream, a handful of fresh, sliced strawberries, and a drizzle of rich chocolate or hot fudge sauce. It’s a perfect, nostalgic treat for any occasion. Surprising (and Delicious) Pairings Ready to think outside the cone? Strawberry’s sweet and slightly tart profile makes it a fantastic partner for some unexpected flavors. For a comforting dessert, try a scoop alongside a warm slice of strawberry rhubarb pie; the combination is absolutely heavenly. You can also blend it into a thick, refreshing milkshake. If you’re feeling a bit more adventurous, create unique flavor combinations by pairing your ice cream with savory ingredients. A drizzle of balsamic reduction adds a tangy depth that cuts through the creaminess, while a few fresh basil leaves can introduce a surprising, peppery-sweet herbal note. Don't be afraid to experiment. Related Articles How to Make Almond Ice Cream From Scratch The 4 Best Liquor Infused Ice Cream Brands to Try What Is a Tipsy Scoop? Everything to Know Who Makes Key Lime Ice Cream? 8 Brands to Know Pecan Jacks Ice Cream News: Expansions, Awards & More Ready to take your first sweet bite? Frequently Asked Questions Do I really have to cook the strawberries first? I know it feels like an extra step, but this is the secret to getting that perfectly creamy texture. Raw strawberries contain a lot of water, and that water turns into crunchy ice crystals in the freezer. Gently cooking your berries first cooks off some of that excess water and concentrates their natural flavor, which means your final product will be smoother, creamier, and taste more like strawberries. My ice cream is still soft after churning. What went wrong? You probably didn't do anything wrong at all. This is a completely normal and expected part of the process. An ice cream maker’s job is to churn and chill the base until it reaches the consistency of soft-serve. For that firm, scoopable texture you get at an ice cream shop, you need to transfer it to an airtight container and let it freeze for at least four hours. This "ripening" stage is what allows it to set properly. Can I use this recipe with other types of berries? Absolutely. This recipe works beautifully as a base for other fruits. Raspberries, blackberries, or even a mix of your favorite berries would be delicious. Just keep in mind that some fruits, like raspberries and blackberries, have a lot of seeds. For a perfectly smooth texture, you might want to strain the cooked fruit mixture through a fine-mesh sieve before adding it to your cream base. What is the biggest mistake to avoid when making no-churn ice cream? The most common slip-up with no-churn recipes involves the whipped cream. For this method to work, you need to whip your cold heavy cream until it forms stiff peaks. This incorporates the air that a traditional churner would. The second part of the mistake is being too aggressive when combining it with the other ingredients. You have to gently fold the whipped cream into your strawberry base to keep all that air you just created, which is what gives the ice cream its light, scoopable texture. How long will my homemade ice cream stay fresh? For the best flavor and texture, you should plan to enjoy your homemade ice cream within two weeks. Unlike store-bought versions, your creation doesn't have commercial stabilizers and preservatives. After a couple of weeks in the freezer, you might notice the texture starting to get a little icy. Storing it in a shallow, airtight container with plastic wrap pressed directly on the surface will help keep it creamy for as long as possible.
By Cory Mosley June 10, 2026
What is it about strawberry shortcake ice cream that makes it so irresistible? It’s a flavor that seems to have it all. You get the bright, fruity tang from real strawberries, the luscious, velvety texture of a high-quality cream base, and the delightful, crumbly bite of buttery shortcake pieces. It’s a dessert within a dessert. This combination of textures and tastes works in perfect harmony, making every spoonful a balanced and satisfying experience. It’s a modern take on a classic dessert that people have adored for generations. Let’s look at what makes this flavor a timeless treat and how you can create that magic at home. Ready to take your first sweet bite? Key Takeaways The flavor's appeal is a textural trio : What makes strawberry shortcake ice cream so special is the satisfying combination of sweet strawberry swirls, a rich and creamy base, and the soft bite of cake crumble. Achieve a creamy no-churn texture at home : The secret to a smooth, scoopable result is using full-fat ingredients, completely chilling your strawberry swirl, and gently folding the layers together to maintain an airy base. Use the recipe as a creative base : Once you master the classic, use it as a starting point for new creations, such as making an ice cream cake, swapping in seasonal fruits like peaches, or adding a nutty crunch with toasted pecans. What Makes Strawberry Shortcake Ice Cream So Irresistible? There’s something special about strawberry shortcake ice cream. It’s more than just a flavor; it’s a feeling. It combines the sweet taste of summer berries, the richness of cream, and the comforting texture of cake into one perfect scoop. This flavor has a way of tasting both nostalgic and new all at once, which is why it’s a favorite for so many of us. What makes it so universally loved? It’s a combination of its classic roots, its celebratory feel, and that unbeatable trio of textures and flavors. It’s a dessert that tells a story, and every spoonful is a delicious chapter. Let’s look at what makes this ice cream a timeless treat. Reimagining a Classic Dessert Strawberry shortcake ice cream is a modern tribute to a dessert that people have adored for centuries. The history of strawberry shortcake traces back to the 1800s, when it first appeared as a simple, beautiful way to enjoy fresh fruit. By turning this classic into a frozen treat, we get to experience those same beloved flavors in a completely new way. It’s like taking a piece of culinary history and giving it a fresh, creamy spin. Each bite connects us to generations of people who have celebrated sweet moments with strawberries and cream, making it feel both familiar and exciting. What Sets It Apart from Other Flavors While there are plenty of fruit-flavored ice creams, strawberry shortcake stands out because it feels like a celebration. Traditionally, strawberry shortcake was the go-to dessert to honor the spring and summer fruit harvests . That joyful, seasonal spirit is churned right into the ice cream. It’s not just strawberry; it’s strawberry plus cake, which gives it a festive, dessert-within-a-dessert quality. This flavor evokes sunny days, picnics, and happy gatherings, making it a refreshing and cheerful choice that feels more special than a simple scoop of fruit ice cream. The Perfect Trio: Strawberries, Cream, and Crumble The magic of this flavor lies in its perfect combination of textures and tastes. You get the bright, sweet tang from swirls of real strawberry, the rich and velvety smoothness of the ice cream base, and the soft, buttery bite of shortcake or crumble pieces. The original dessert was a simple biscuit served with fruit and sweetened cream, and the ice cream version captures the essence of that original dessert beautifully. This trio works in perfect harmony, ensuring every spoonful is interesting, balanced, and incredibly satisfying. It’s a textural dream that keeps you coming back for more. Make Your Own No-Churn Strawberry Shortcake Ice Cream There’s something magical about strawberry shortcake ice cream. It’s the taste of summer, combining sweet berries, rich cream, and buttery cake all in one perfect scoop. While we love crafting our own artisanal ice cream at Pecan Jacks, we also believe in the joy of making delicious treats at home. This no-churn recipe is surprisingly simple and doesn’t require any special equipment. Just follow these four easy steps, and you’ll have a freezer full of homemade happiness. Step 1: Prepare the Strawberries First, let’s create that beautiful, jammy strawberry swirl. You’ll start by cooking down fresh, chopped strawberries with a bit of sugar and a squeeze of lemon juice in a saucepan. Adding a spoonful of strawberry preserves will give the mixture an even deeper, more concentrated fruit flavor. Let it simmer until it thickens into a syrupy consistency. The most important part of this step is allowing the strawberry mixture to cool down completely before you move on. This ensures your ice cream base stays light and airy. This step infuses your ice cream with a rich strawberry flavor that is both sweet and perfectly tangy. Step 2: Whip Up the Creamy Base The secret to a velvety no-churn ice cream is a two-part base. In a large bowl, you’ll beat cold heavy whipping cream until it forms stiff peaks. Think of the consistency of a firm whipped topping. In a separate bowl, whip softened cream cheese until it’s completely smooth, then mix in sweetened condensed milk and a touch of vanilla extract. Gently fold the whipped cream into the cream cheese mixture until just combined. Be careful not to overmix, as you want to keep all that air you just whipped in. This creamy base is essential for achieving that luscious, scoopable texture without an ice cream maker. Step 3: Create the Shortcake Crumble What’s strawberry shortcake without the cake? For the crumble, you’ll want to create a crunchy, buttery texture that stays crisp in the ice cream. The easiest way to do this is by crushing Golden Oreos or Nilla wafers into coarse crumbs. For an extra burst of flavor and a lovely pink hue, mix in some crushed freeze-dried strawberries. This simple addition really brings the whole "shortcake" experience to life. This combination adds a delightful crunch and a bit of texture that perfectly complements the smooth cream and sweet berries, making every bite interesting. Step 4: Layer, Swirl, and Freeze Now for the fun part: assembly! Grab a loaf pan or another freezer-safe container. Start by spreading a layer of the creamy base on the bottom. Then, dollop spoonfuls of your cooled strawberry mixture and a sprinkle of the shortcake crumble on top. Repeat these layers until you’ve used everything up. To get that classic look, gently run a knife through the layers to create swirls for a beautiful presentation . Cover the container tightly with plastic wrap and freeze for at least six hours, or preferably overnight. This gives the flavors time to meld together and the ice cream to set perfectly. Secrets to the Perfect Creamy Texture The difference between good homemade ice cream and great homemade ice cream often comes down to a few small details. Getting that perfectly smooth, rich texture you find at your favorite scoop shop isn't about having a fancy machine; it's about technique. These are the little secrets we use in our own kitchens to make sure every batch of no-churn ice cream is unbelievably creamy and delicious. Follow these tips, and you’ll be amazed at the professional-quality results you can achieve right at home. It’s all about giving your ingredients and your process a little extra care to prevent ice crystals and create that signature velvety feel. Start with High-Quality, Full-Fat Ingredients This is my number one rule for no-churn ice cream: don't skimp on the fat. For that signature rich and creamy texture, you absolutely need to use high-quality, full-fat ingredients. Heavy whipping cream and full-fat sweetened condensed milk are the power couple behind a perfectly smooth base. The fat is what keeps large, crunchy ice crystals from forming, ensuring your ice cream stays soft and scoopable. Using low-fat substitutes will result in a harder, icier texture that just doesn't compare. Think of it this way: great ingredients are the foundation of any delicious ice cream recipe , and this one is no exception. It’s a simple switch that guarantees a luxurious final product every single time. Chill Your Strawberry Mixture Completely Patience is a virtue, especially when it comes to ice cream. Before you even think about adding your strawberry mixture to the whipped cream base, you must make sure it’s completely chilled. Adding anything warm or even room temperature will deflate the light, airy cream you just worked to whip up. This can compromise the final texture, making it dense or icy. After you’ve cooked down your strawberries, let them cool on the counter and then pop them in the fridge for at least an hour. A thoroughly chilled mixture will blend seamlessly into the cold base, keeping everything light and creamy. This step is non-negotiable for achieving that perfect, scoopable consistency we all crave. Master the Gentle Fold to Keep Swirls Intact To get those beautiful, distinct ribbons of strawberry running through your ice cream, the key is to fold, not stir. Over-mixing will just blend the fruit puree into the base, turning the whole thing pink. We want swirls! Using a spatula, gently fold the strawberry mixture and crumble into the cream base just a few times. The goal is to create streaks of flavor, not a uniform mixture. This technique ensures you get a little bit of everything in each bite: creamy vanilla, bright strawberry, and buttery crumble. It’s this careful layering that gives the ice cream its gorgeous look and complex flavor profile. Think of it as painting with flavor, where each component gets to shine on its own. Use Plastic Wrap to Prevent Ice Crystals Here’s a simple trick that makes a world of difference. To keep your ice cream perfectly creamy during its time in the freezer, press a piece of plastic wrap directly onto the surface before putting the lid on. This prevents air from coming into contact with the ice cream, which is what causes pesky ice crystals and freezer burn to form on top. A grainy texture can ruin an otherwise perfect batch, so this extra step is well worth it. This little tip helps protect your creation and ensures it tastes just as fresh and smooth on day three as it did on day one. It’s a professional secret that’s incredibly easy to do at home. Balance Your Crumble-to-Cream Ratio The "shortcake" part of this ice cream is just as important as the strawberry and cream. Finding the right balance is key to getting that perfect texture contrast in every scoop. Instead of mixing all the crumble in at once, try layering it. Add a third of your ice cream base to the container, then sprinkle on some of your strawberry puree and shortcake crumble. Repeat this process two more times to create distinct layers of flavor and texture . This method ensures the crumble stays crisp and doesn't get soggy, giving you delightful pockets of buttery crunch to complement the smooth, creamy base. Each spoonful becomes a fun discovery of different tastes and textures. Creative Twists to Try Next The classic recipe is fantastic on its own, but it's also the perfect canvas for your sweet creations. Once you have the basic technique down, feel free to play with different fruits, textures, and flavors. Here are a few of my favorite ideas to get you started on your next kitchen adventure. Turn It Into an Ice Cream Cake Why stop at a scoop? Transform your no-churn ice cream into a show-stopping ice cream cake. Simply line a loaf pan or cake pan with plastic wrap, then press in a layer of store-bought pound cake. Spread a thick layer of your strawberry shortcake ice cream on top. Repeat the layers if you like, then freeze until firm. For the final touch, top it with fresh whipped cream and an extra sprinkle of your shortcake crumble. It’s an easy way to create a dessert that makes for a beautiful presentation at any party. Swap Your Fruit: Peaches, Raspberries, and More While strawberries are the star of this classic, don't be afraid to experiment with other fruits. This recipe works beautifully with summer peaches, tangy raspberries, or even a mix of your favorite berries. You can also get creative with the base by swirling your fruit puree into a lemon or vanilla ice cream for a different flavor profile. Think of it as a template for whatever fruit is in season. A peach cobbler ice cream could be your next delicious project! Add a Nutty Crunch with Pecans For a delightful contrast in texture, a nutty crunch is always a good idea. A handful of toasted, chopped pecans adds a rich, buttery flavor that pairs wonderfully with the sweet strawberries and creamy base. You could also try adding sliced almonds or even pistachios. To take it a step further, mix in some thin banana slices or add an extra drizzle of strawberry jam along with the nuts for a truly complex and satisfying bite. Go Decadent with Chocolate and Strawberries If you're a chocolate lover, this one's for you. The combination of chocolate and strawberry is timeless for a reason. Try swapping the vanilla shortcake crumble for a chocolate cookie or brownie crumble. You could even add mini chocolate chips into the ice cream base for little bursts of richness in every bite. For another fun twist, use your ice cream to make sandwiches between two soft sugar cookies. It’s a playful way to serve a decadent dessert . Craving It Now? Our Favorite Store-Bought Options While making your own ice cream is a rewarding kitchen project, sometimes you just need a sweet fix without the prep time. I get it completely. For those moments when the craving for strawberry shortcake ice cream hits hard and fast, the grocery store freezer aisle has some fantastic options. It’s great to have a few reliable choices on hand for busy weeknights, impromptu celebrations, or just when you don’t feel like pulling out the mixing bowls. The beauty of store-bought ice cream is the sheer variety. You can find everything from the simple, nostalgic bars that taste like childhood summers to complex, gourmet pints loaded with high-quality ingredients and interesting textures. It really comes down to what you're in the mood for. Do you want something light and classic, or rich and decadent? A simple bar or a pint packed with chunks and swirls? We've tasted our way through quite a few, and these are the ones that consistently stand out. Here are a few of our go-to favorites when we need that delicious strawberry, cream, and crumble combination right away. For an Artisanal Treat: Pecan Jacks When you want to treat yourself to something truly special, look no further than our own take on this classic flavor. At Pecan Jacks, we pour our family’s passion for quality into every batch of our artisanal ice cream . We believe in using top-tier ingredients to create a strawberry shortcake experience that’s rich, creamy, and full of authentic flavor. It’s a gourmet option that stands out from the crowd, offering a taste of coastal charm and handcrafted quality in every spoonful. Think of it as the difference between a quick snack and a memorable dessert you’ll want to savor. It’s the perfect way to indulge in a high-quality treat that feels both comforting and sophisticated. For a Nostalgic Classic: Good Humor Sometimes, all you want is the taste of childhood summers, and nothing delivers that feeling quite like a Good Humor bar. This is the quintessential strawberry shortcake bar that many of us grew up with, instantly recognizable with its pink strawberry center and signature crunchy crumble coating. It’s a simple, straightforward, and utterly satisfying treat. You can still find these classic Strawberry Shortcake bars in most grocery store freezers, ready to transport you back to the days of chasing down the ice cream truck. It’s a reliable go-to for a reason, offering a perfect balance of creamy, fruity, and crunchy textures that always hits the spot. For a Chunky Sundae: Ben & Jerry's If your ice cream philosophy is "the more, the merrier," then Ben & Jerry's has you covered. Their Sundae Straw-Bae Shortcake is less of a simple flavor and more of a full-blown dessert experience in a pint. This indulgent creation is loaded with sweet cream ice cream, generous chunks of shortcake cookies, and thick strawberry swirls, all topped with a delightful shortcake crumble. It’s a chunky and satisfying option for anyone who loves a lot of texture and mix-ins in their ice cream. Every bite is a new discovery, making it a fun and decadent choice when you’re in the mood for something extra. For a Snack Cake Twist: Little Debbie & Hudsonville What happens when a classic snack cake meets creamy ice cream? Pure magic. The collaboration between Little Debbie and Hudsonville Ice Cream brings the beloved flavor of Strawberry Shortcake Rolls to the freezer aisle. This pint perfectly captures the essence of the iconic snack, blending sweet ice cream with cake pieces and that familiar strawberry swirl. It’s a fun, whimsical take on the flavor that’s perfect for anyone who loves a good mashup. This pint-sized version of the iconic Strawberry Shortcake rolls is a delightful way to enjoy a nostalgic treat in a completely new and refreshing form. How to Serve and Store Your Creation You’ve put in the work, and now your delicious strawberry shortcake ice cream is frozen and ready to enjoy. The final step is serving and storing it properly to make every scoop as perfect as the first. Whether you’re planning a simple dessert for yourself or a showstopper for a party, these tips will help you get the most out of your homemade creation. From creative toppings to smart storage that prevents freezer burn, here’s how to handle your ice cream like a pro. After all, a treat this good deserves to be savored in the best way possible. Find the Perfect Topping Combinations One of the best parts about this ice cream is its versatility. You can serve it straight from the container, or you can get creative with toppings and presentations. For a fun twist, make ice cream sandwiches using soft sugar cookies or classic vanilla wafers. You can also build incredible sundaes by adding extra fresh strawberries, a dollop of whipped cream, or a drizzle of white chocolate sauce. If you want to add a southern-inspired crunch, try crumbling some of our gourmet pralines over the top. The possibilities are endless, so feel free to experiment and find the combinations you love most. Make It Party-Ready as an Ice Cream Cake If you want to impress your guests at your next get-together, transform your no-churn ice cream into a beautiful ice cream cake. It’s surprisingly simple to assemble and looks fantastic. Start by lining the bottom of a loaf pan with slices of a rich pound cake. Next, spread your softened strawberry shortcake ice cream evenly over the cake layer. For an extra layer of flavor and texture, you can add more cooled, roasted strawberries or even some crushed cookies. Freeze the cake until it’s firm, then slice and serve. It’s a guaranteed crowd-pleaser that takes minimal effort for a maximum wow factor. Keep It Creamy: Storage Tips to Avoid Freezer Burn To keep your homemade ice cream tasting fresh and creamy, proper storage is key. The main goal is to prevent freezer burn, which creates those unwanted ice crystals. Transfer your finished ice cream to an airtight, freezer-safe container. Before sealing the lid, press a piece of plastic wrap or parchment paper directly onto the surface of the ice cream. This simple trick creates a barrier that stops ice crystals from forming. Your no-churn ice cream will stay delicious in the freezer for up to two weeks, though it’s so good, it probably won’t last that long Ready to take your first sweet bite? Frequently Asked Questions Why did my homemade ice cream turn out icy instead of creamy? An icy texture is a common problem, and it usually comes down to two things: fat content and temperature. For a super creamy result, you must use full-fat ingredients like heavy whipping cream and sweetened condensed milk; the fat is what prevents large ice crystals from forming. Also, make sure your cooked strawberry mixture is completely cold before you fold it into the whipped cream base. Adding anything warm will cause the cream to deflate and lead to an icier final product. Can I use frozen strawberries for the recipe? Yes, you can definitely use frozen strawberries if fresh ones aren't available. Just be sure to thaw them completely and drain off any excess water before you start cooking them down. This step is important because too much water can make your strawberry swirl thin and prevent it from thickening properly, which could affect the texture of your finished ice cream. What really makes strawberry shortcake ice cream different from regular strawberry ice cream? While regular strawberry ice cream is delicious, it typically focuses on just two main notes: fruit and cream. Strawberry shortcake ice cream is a more complete dessert experience in a scoop. It captures the essence of the classic pastry by including a third element: the buttery, slightly crumbly texture of cake. It’s that combination of smooth cream, bright fruit, and soft cake pieces that makes it feel so special. How can I prevent the shortcake crumble from getting soggy in the ice cream? The secret to a crisp crumble is to layer it, not mix it all in. When you assemble the ice cream, spread a layer of the cream base, then add dollops of the strawberry swirl and a sprinkle of the crumble. Repeat this process until your container is full. This method keeps most of the crumble pieces from being fully saturated in the cream, so they maintain their delightful crunch. How long will my homemade no-churn ice cream last in the freezer? When stored properly, your homemade ice cream will stay fresh and delicious for up to two weeks. The best way to store it is in an airtight container. For extra protection against freezer burn, press a piece of plastic wrap or parchment paper directly onto the surface of the ice cream before you put the lid on. This simple step prevents ice crystals from forming and keeps every scoop tasting perfectly creamy.