How to Make the Perfect Southern Pralines Recipe

Cory Mosley headshot
Author: Cory Mosley

Cory Mosley is the Vice President of Growth for Pecan Jacks. He supports franchise growth and brand strategy while helping protect the quality behind every scoop, bringing the “Sweet Day Is A Bite Away” philosophy to customers across the country.

There’s a beautiful science behind what makes a Southern praline so uniquely delicious. It’s not just about the ingredients, but how they transform with heat and timing. The difference between a grainy praline and a perfectly smooth one comes down to controlling sugar crystallization. Hitting that exact "soft ball" temperature is what creates the signature texture that’s firm yet melts the moment it hits your tongue. At Pecan Jacks, we’ve spent years perfecting this craft. This guide is more than just a southern pralines recipe; it’s a look into the simple science that makes it work, giving you the confidence to master this timeless Southern confection in your own kitchen.


Ready to take your first sweet bite?


Key Takeaways

  • Precision Is Key for Texture: The ideal praline texture comes from cooking the sugar to exactly 236°F. Use a candy thermometer for accuracy and prepare your workspace beforehand, because you'll need to scoop the pralines quickly before they set.
  • Small Details Make a Big Difference: Improve your pralines with a few simple techniques. Toasting the pecans brings out their nutty flavor, a pinch of baking soda prevents a grainy texture, and stirring the mixture off the heat is what creates that signature creamy finish.
  • Embrace the Happy Accidents: Don't throw away a batch that isn't perfect. Pralines that are too soft make an incredible sauce for ice cream, and crumbly ones can be used as a crunchy topping or mix-in. There's no such thing as a failed batch, just a delicious new creation.


What Are Southern Pralines?

If you’ve ever strolled through a Southern city like Savannah or New Orleans, you’ve likely been tempted by the sweet, buttery aroma of pralines being made. So, what exactly are they? A Southern praline is a treasured confection that perfectly captures the spirit of Southern hospitality in a single bite. Think of it as a delightful cross between a creamy fudge and a nutty cookie. The classic recipe features pecans suspended in a rich, sugary base made from butter, sugar, and cream or milk. When cooked just right, the mixture is dropped by the spoonful onto parchment paper to cool, forming flat, round patties that are both rustic and elegant.

The result is a candy with a signature texture: a slightly firm exterior that gives way to a soft, melt-in-your-mouth center. It’s this creamy, almost crumbly consistency that makes them so irresistible and different from any other treat. While there are many variations, the heart of the praline is always the perfect harmony between toasted pecans and sweet, buttery caramel notes. It’s a simple candy, but one that requires care and tradition to get just right. At Pecan Jacks, we honor this tradition by crafting our authentic Southern pralines with the finest ingredients, ensuring every piece delivers that classic, comforting flavor you expect from a true Southern classic.


The Story Behind This Southern Classic

The praline has a surprisingly worldly history that begins in 17th-century France. The original confection was created for a French diplomat and was made with almonds coated in caramelized sugar. When French settlers arrived in New Orleans, they brought their culinary traditions with them, including the recipe for pralines. However, almonds were scarce in Louisiana, while pecan trees grew in abundance. Creative local chefs adapted the recipe, swapping almonds for native pecans and adding cream to create a softer, fudgier candy. This new creation quickly became a beloved local specialty, cementing its place in the city’s rich culinary heritage.


What Makes Pralines Different From Other Candies?

What sets a Southern praline apart from other candies is its one-of-a-kind texture and flavor. Unlike their French ancestors, which are essentially nuts coated in a hard, crunchy caramel shell, Southern pralines are defined by their creaminess. The magic happens during the cooking process, where the sugar is cooked to the "soft-ball" stage, resulting in very fine sugar crystals. This technique creates a smooth, velvety base that isn’t chewy like caramel or hard like toffee. The combination of brown sugar, butter, and cream gives it a deep, rich flavor that perfectly complements the earthy taste of toasted pecans. This unique texture makes every bite a truly decadent experience.


Key Ingredients for Perfect Pralines

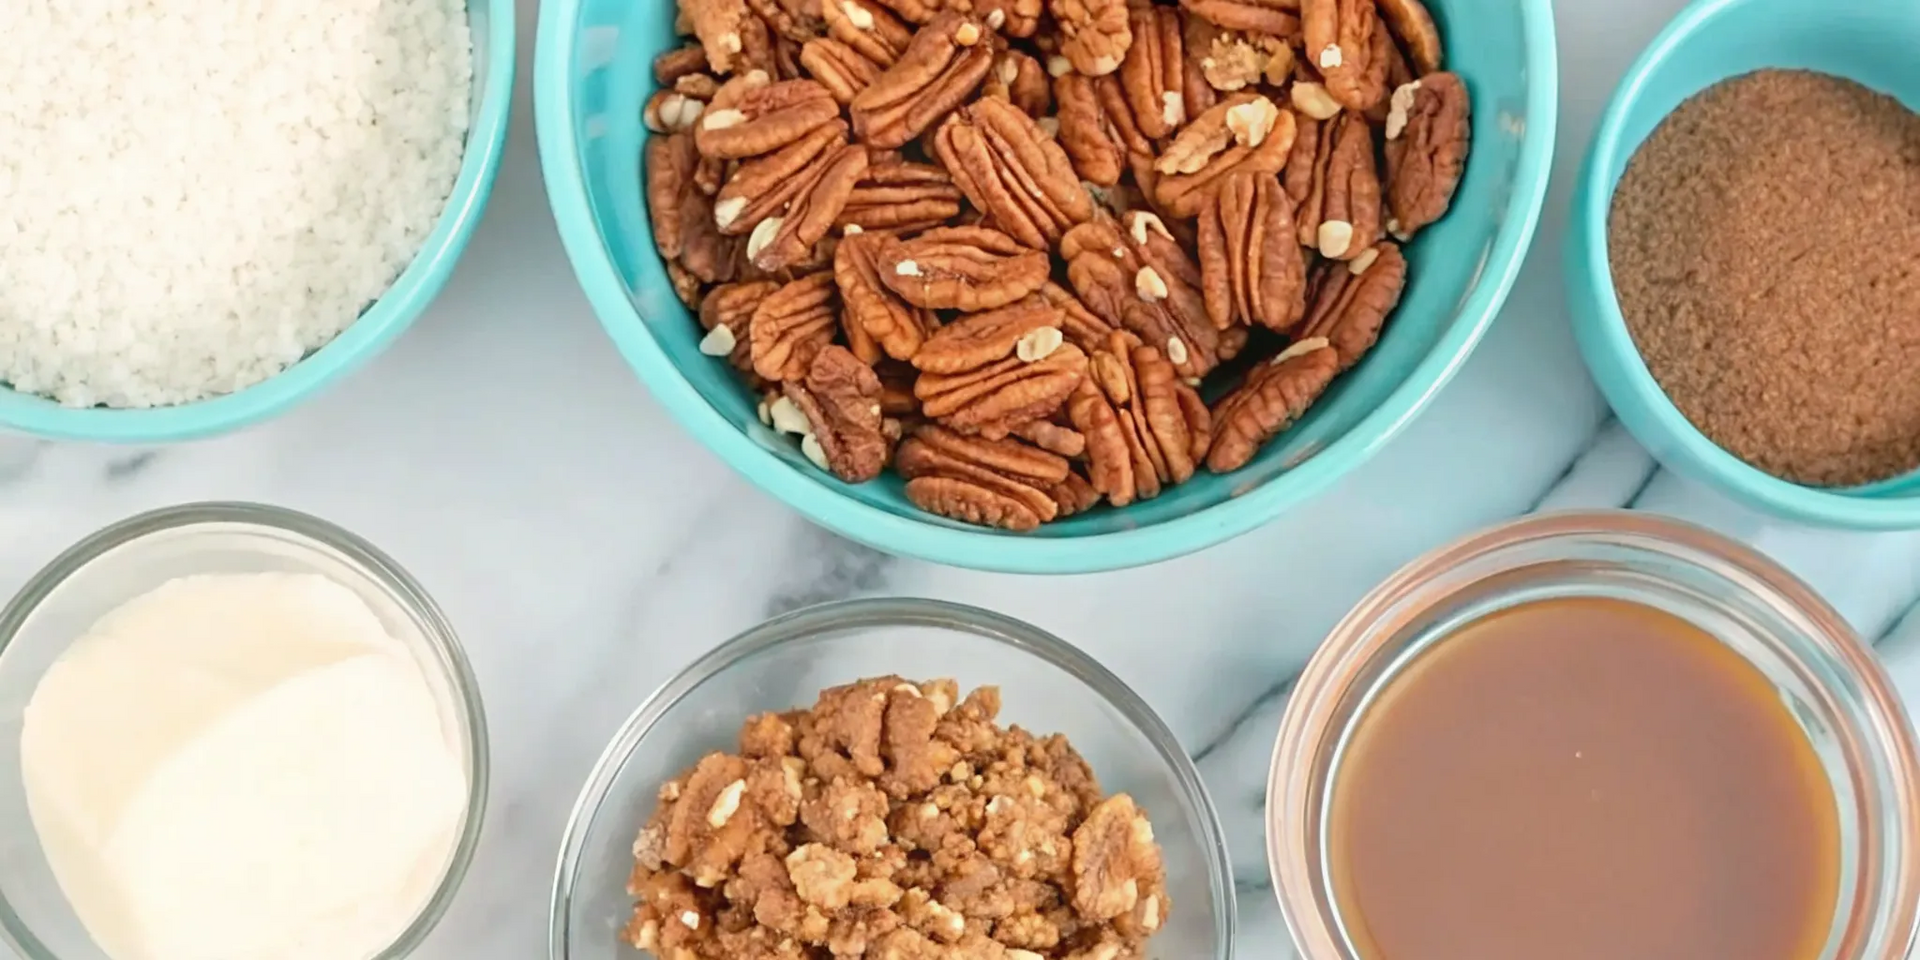
The magic of a perfect Southern praline isn’t in a long, complicated list of ingredients. In fact, it’s quite the opposite. A truly memorable praline comes from using a few simple, high-quality ingredients and understanding the role each one plays. When every component is chosen with care, they work together to create that classic melt-in-your-mouth texture and rich, buttery flavor we all love. At Pecan Jacks, we believe that starting with the best ingredients is the most important step in crafting any of our gourmet pralines, and this recipe is no exception.

Before you even turn on the stove, getting to know your ingredients is the key to success. Think of it as assembling your all-star team. You need the right kind of sugar for sweetness and structure, butter for richness, and of course, the star of the show: pecans. Each one has a specific job to do, and when they’re all working in harmony, the result is pure candy perfection. Let’s break down what makes each ingredient so important.


What Each Ingredient Does

Every ingredient in a praline recipe serves a purpose. Pecans are the heart of the candy, providing that signature nutty flavor and satisfying crunch. For the sweet base, a mix of white and brown sugar is ideal; this combination gives you a deep, caramel-like taste without making the final product grainy. Butter is essential for a rich flavor and helps keep the pralines perfectly soft. Many classic recipes call for evaporated milk, which adds to the creamy consistency. The real secret weapon, however, is a tiny pinch of baking soda. It helps create a smoother texture, enhances the beautiful caramel color, and prevents the sugar from crystallizing.


How to Choose the Best Pecans

Since pecans are the main event, you’ll want to choose the best ones you can find. Look for fresh, plump pecan halves. They not only look beautiful in the finished pralines but also provide the best texture. The quality of your nuts makes a huge difference, as stale or broken pieces won't deliver that rich, buttery flavor that defines a great praline. For an even deeper, nuttier taste, try toasting the pecans before you add them to the sugar mixture. This simple step takes just a few minutes in the oven or a dry skillet and awakens the natural oils in the nuts, making their flavor much more pronounced. It’s a small detail that makes a world of difference.


A Step-by-Step Southern Praline Recipe

Making authentic Southern pralines is a tradition we cherish, and it's one you can master right in your own kitchen. The process is a beautiful blend of science and art that comes down to precision and timing. It might seem intimidating at first, but it’s really about following the steps carefully. Think of it as a sweet little dance between you and the sugar. Once you get the rhythm down, you’ll be whipping up batches of these classic treats like a pro. Ready to get started? Let’s walk through the process together, from setting up your station to scooping that last perfect praline.


Prepare Your Workspace and Tools

Before you even think about turning on the stove, get your station ready. This isn't a step you can skip. Once the praline mixture reaches the right temperature, you have to move quickly before it sets. Lay out sheets of parchment or wax paper on your countertop. Have two spoons or a cookie scoop nearby, ready to portion out the pralines. Make sure all your ingredients are measured and within arm's reach. This simple prep work, a technique chefs call mise en place, is the secret to a stress-free candy-making session and will save you from a frantic scramble later.


Cook the Sugar Mixture to Perfection

Now for the most crucial part: cooking the sugar. In a heavy-bottomed saucepan, combine your sugar, milk, and butter. Stir constantly over medium heat until the sugar dissolves and the mixture comes to a boil. This is where your candy thermometer becomes your best friend. Clip it to the side of the pan and continue to cook, stirring occasionally, until the mixture reaches the soft-ball stage, or exactly 236°F. Hitting this precise temperature is what gives pralines their signature creamy, yet firm, texture. Once it’s there, immediately remove the pot from the heat.


Add the Pecans and Finish the Pralines

With the pot off the heat, it’s time to act. Add your vanilla and pecans to the hot sugar mixture. Now, begin stirring continuously with a wooden spoon. You’ll stir for about three to five minutes. You're looking for the mixture to cool slightly, thicken, and lose some of its glossy sheen. As soon as you notice this change, start dropping spoonfuls onto your prepared parchment paper. Work fast, because the mixture will begin to harden right in the pot. Let the pralines sit at room temperature for about 30 minutes to an hour until they are completely firm and ready to enjoy.


What Temperature Should You Cook Pralines To?

If there’s one secret to making truly perfect pralines, it’s all about temperature. The magic number you’re aiming for is exactly 236°F. Hitting this precise temperature is what ensures your pralines set up with that signature creamy, yet firm, texture. It’s the sweet spot where the sugar has dissolved completely but hasn’t gotten so hot that it becomes hard and brittle.

Think of it as a science experiment where precision is key. A few degrees too low, and your pralines might end up soft and gooey. A few degrees too high, and they could turn out grainy or hard as a rock. This is why a candy thermometer isn't just a suggestion; it's an essential tool for success. It takes all the guesswork out of the process and lets you know the exact moment your sugar mixture is ready for the next step. At Pecan Jacks, we know that getting our authentic Southern pralines just right comes down to these important details.


What Is the Soft Ball Stage?

You’ll often hear praline recipes mention cooking the sugar to the "soft ball stage." This is simply the candy-making term for a specific temperature range, typically between 235°F and 240°F. It’s called this because if you were to drop a tiny bit of the hot syrup into a glass of cold water, it would form a soft, pliable ball that flattens when you take it out.

Reaching this stage is the critical moment that determines the final texture of your pralines. It’s the point where there's just the right amount of water left in the sugar syrup to create a candy that’s firm enough to hold its shape but soft enough to melt in your mouth. This is what gives pralines their distinct, irresistible consistency.


How to Use a Candy Thermometer Correctly

Your candy thermometer is your best friend for this recipe, so you want to make sure you’re using it correctly. First, when you clip it to the side of your pot, ensure the tip is fully submerged in the sugar mixture but isn't touching the bottom of the pan. If it touches the bottom, you’ll get a falsely high reading, which can throw off your whole recipe.

Second, have your parchment-lined baking sheets and scoop ready to go before you start cooking. Once your mixture hits 236°F, things move very quickly. You’ll need to work fast to scoop the pralines onto the paper before they begin to set in the pot. A little preparation makes the final steps smooth and stress-free. For more tips, you can find great guides on using a candy thermometer properly.


How to Know When Your Pralines Are Ready

Knowing the exact moment your pralines are ready is the secret to achieving that signature creamy, yet firm, texture. It’s a delicate balance, but once you know what to look for, you can get it right every time. This isn't about guesswork; it's about paying close attention to temperature and a few key visual cues. This step is where the magic really happens, transforming a simple pot of sugar and pecans into an unforgettable Southern treat. Getting this part right ensures your pralines will set up perfectly, with that classic melt-in-your-mouth quality.


Key Visual Cues and Texture Changes

The most reliable way to know your praline mixture is ready is by using a candy thermometer. You’re aiming for the mixture to reach exactly 236°F. Once it hits this magic number, pull the pot off the heat right away. Now, it’s time to stir. You’ll want to stir continuously for about three and a half minutes. This part is crucial because over-stirring can make your pralines hard and grainy instead of creamy. The goal is a praline that melts in your mouth but still has a firm, snappy texture, letting the pecans add a delightful crunch.


How to Do the Drop Test

After you’ve finished stirring, it’s time to work quickly and test the consistency. This is where the drop test comes in. Using a spoon, quickly drop small dollops of the praline mixture onto a sheet of parchment paper. You’ll know they’re ready if they start to hold their shape and lose their glossy shine as they begin to cool. If you notice the mixture in the pot starts to thicken or seize up while you’re scooping, don’t panic. You can easily fix this by stirring in a teaspoon or two of very hot water to loosen it back up.


Common Praline-Making Mistakes to Avoid

Making pralines is a beautiful Southern tradition, but let's be honest, it can be a little tricky. Candy making is a science, and even a small misstep can change your results. But don't let that scare you! Most issues come down to just a few common mistakes that are easy to sidestep once you know what to look for. Think of it less like baking a forgiving batch of cookies and more like a fun chemistry experiment where the delicious outcome is all about precision.

From getting the temperature just right to knowing when to stop stirring, a few key details make all the difference between a grainy mess and a perfectly smooth, melt-in-your-mouth praline. We’ve all had a batch that didn’t quite turn out, but learning from those little slip-ups is part of the process. By paying close attention to temperature, timing, and even the weather, you can confidently create pralines that taste like they came straight from a coastal candy kitchen. Let’s walk through the most common pitfalls so you can avoid them on your way to praline perfection.


Avoid Temperature and Timing Errors

In the world of candy making, a candy thermometer is your most trusted tool. For pralines, the magic number is 236°F. Hitting this temperature precisely is non-negotiable because it ensures the sugar has reached the perfect concentration for setting up properly. Just a few degrees off in either direction can lead to pralines that are either rock-hard or stubbornly gooey. Equally important is your timing. Once the candy mixture is ready, it begins to set very quickly. Before you even turn on the stove, make sure you have your parchment paper laid out and your scoop or spoons ready to go. This preparation ensures you can portion out the pralines smoothly and swiftly without a frantic last-minute scramble.


Perfect Your Stirring Technique

The stirring you do after the pot comes off the heat is just as crucial as the cooking itself. This step cools the sugar and encourages the right crystal structure to form, giving pralines their signature creamy-yet-firm texture. You’ll want to stir the mixture continuously for about three to four minutes. As you stir, you’ll feel it start to thicken and lose its glossy sheen. Be careful not to over-stir, as that can make the pralines hard and sugary. If a batch doesn't set and stays too soft, don't throw it out! A gooey praline sauce is an absolutely divine topping for a bowl of our gourmet ice cream or can even be rolled into little truffle-like balls once chilled.

Understand How Weather Affects Your Pralines

Have you ever noticed how some recipes warn against making candy on a rainy day? There’s a good reason for that. Sugar is hygroscopic, which means it loves to attract and absorb moisture from the air. On a humid day, your praline mixture can pull in extra moisture, which can prevent it from setting correctly and leave you with a soft, tacky texture. For the best and most predictable results, try to make your pralines on a day with low humidity. A clear, dry day provides the ideal environment for the sugar to cool and crystallize exactly as it should, giving you that perfect praline snap and creamy finish.


Pro Tips for the Perfect Texture

Getting that perfect, melt-in-your-mouth praline texture is what it's all about. It’s that sweet spot between creamy and firm, never grainy or sticky. While the recipe itself is straightforward, a few small adjustments can make a huge difference in your final result. These are the little secrets that candy makers swear by, and they’ll help you get consistently delicious pralines every single time.


Toast Pecans for a Deeper Flavor

This simple step is a total game-changer for flavor. Raw pecans are great, but toasting them brings out a rich, deep nuttiness that perfectly complements the sweet caramel. It only takes a few minutes and adds an incredible layer of complexity to your pralines. You can spread them on a baking sheet and toast them in the oven at 350°F for about 5-10 minutes, or just toss them in a dry skillet over medium heat until they’re fragrant. Just be sure to watch them closely so they don’t burn! This extra effort is what makes homemade candy feel truly special and gives you that authentic Southern praline taste.


Use Baking Soda for a Smooth Texture

If you’ve ever wondered how to get that perfectly smooth, creamy praline that never feels gritty, a tiny pinch of baking soda is the secret. When you add it to the hot sugar mixture, it creates a chemical reaction that helps prevent large sugar crystals from forming. This is key to avoiding a grainy texture. The baking soda also contributes to a richer caramel color and a slightly softer bite, making your pralines absolutely irresistible. It’s a simple trick that many Southern cooks use to guarantee a perfect batch of pralines every time.

How to Stir Pralines After Cooking

Once you pull your praline mixture off the heat, the work isn’t quite done. The way you stir the candy as it cools is crucial for developing that signature texture. Let it cool for a minute or two, then begin stirring continuously with a wooden spoon. You’re looking for the mixture to lose its glossy sheen and start to thicken and look slightly opaque. This process can take anywhere from 3 to 5 minutes. Stirring too little will result in pralines that don’t set properly, while over-stirring can make them seize up and become crumbly. Mastering this final stirring step is what creates that perfect creamy, yet firm, consistency.


Creative Praline Variations to Try

Once you’ve mastered the classic Southern praline, the real fun begins. Making a recipe your own is one of the best parts of candy making, and this one is perfect for a little creative flair. A few simple tweaks can transform your pralines into a completely new treat that reflects your personal taste. Think of the traditional recipe as your starting point for delicious discovery.

Whether you’re a die-hard chocolate fan, love a hint of spice, or want to try a different kind of crunch, there are so many ways to customize your pralines. You can start small by swapping one ingredient, or go all out and create a signature flavor combination. Below are a couple of our favorite ideas to get you started on your candy-making adventure.


Add Chocolate and Spices

If you want to add a little more depth to your pralines, look no further than your pantry. Swapping light brown sugar for dark brown sugar will give your candy a richer, more complex molasses flavor. For a smoother texture, try adding a tiny pinch of baking soda to the sugar mixture. It’s a little secret that helps intensify the caramel flavor and keeps the final product from getting grainy. And for all the chocolate lovers out there, we know a thing or two about amazing chocolates. Try stirring in some cocoa powder with your dry ingredients or drizzling melted dark chocolate over the cooled pralines for an extra decadent finish.


Experiment with Different Nuts and Flavors

While pecans are the star of the Southern praline, they weren’t the original nut. The history of pralines actually begins in France with almonds. When the recipe made its way to New Orleans, chefs swapped almonds for the plentiful local pecans. This bit of history is all the permission you need to experiment with other nuts. Toasted almonds, walnuts, or even macadamia nuts make wonderful substitutes. You can also add a new dimension of flavor by stirring in a teaspoon of vanilla extract, a splash of bourbon, or a bit of coffee extract along with the pecans. These small additions can create a truly unique and memorable treat.


How to Store Homemade Pralines

After you’ve perfected your batch of creamy, pecan-filled pralines, the last thing you want is for them to go stale before you can enjoy every last one. Proper storage is the simple secret to keeping them tasting just as fresh as the day you made them. It’s all about protecting that delicate, melt-in-your-mouth texture you worked so hard to achieve. With just a few easy steps, you can make sure your pralines stay delicious for days, or even months, to come.

At Pecan Jacks, we know a thing or two about keeping our authentic southern pralines perfectly fresh, and we’re happy to share our tips with you. The right storage method will preserve their flavor and consistency, ensuring every bite is a perfect one.


The Best Way to Keep Pralines Fresh

The key to keeping your pralines fresh is to protect them from air and moisture. These two elements are the main culprits behind pralines becoming sticky or grainy. To do this, let your pralines cool completely on the parchment paper. Once they are firm and at room temperature, place them in a single layer inside an airtight container. If you need to stack them, separate each layer with a sheet of wax paper or parchment paper to prevent them from sticking together. Store the container in a cool, dry place away from direct sunlight, like a pantry or cupboard. Avoid the refrigerator, as the humid environment can make them soft and weepy.


How Long Do Homemade Pralines Last?

When stored correctly at room temperature, your homemade pralines should stay fresh for up to two weeks. This makes them a great treat to make ahead for parties or to give as gifts. If you want to keep them for longer, the freezer is your best friend. To freeze your pralines, wrap them individually in plastic wrap and then place them in a freezer-safe airtight container or bag. They will maintain their wonderful flavor and texture for up to three months. When you’re ready to enjoy them, simply take them out of the freezer and let them thaw at room temperature for a couple of hours.


How to Troubleshoot Your Pralines

Even the most seasoned candy makers run into a little trouble now and then, so don’t be discouraged if your first batch of pralines isn’t picture-perfect. Candy making is a science, and small things like humidity or a few degrees in temperature can change your results. The good news is that most praline problems are easy to fix, and even the "mistakes" are still delicious.

Think of it this way: there’s no such thing as a failed praline, just a happy accident waiting to become an incredible dessert topping or a new kind of treat. Before you toss a batch that seems too soft or one that hardened too quickly, let’s walk through a couple of simple rescue missions. We’ll cover the two most common issues: texture troubles (too gooey or too crumbly) and a seized sugar mixture. With these tips, you’ll know exactly what to do to save your southern confections.


Fix Pralines That Are Too Gooey or Crumbly

If your pralines don’t set up properly and remain gooey, it usually means the sugar mixture didn’t quite reach the soft ball stage. But don’t worry, you’ve just made a fantastic sauce! Warm it up slightly and pour it over a scoop of your favorite Pecan Jacks ice cream for an unforgettable sundae. You can also roll the gooey candy into small balls and dust them with cocoa powder to create delicious praline truffles.

On the flip side, if your pralines are dry and crumbly, the mixture likely got a little too hot or was stirred too much after cooking. This is another easy fix. Simply chop up the crumbly pieces and use them as a crunchy mix-in. Soften a pint of vanilla ice cream, fold in the praline crumbles, and refreeze it for a custom praline-and-cream flavor that’s impossible to resist.


Save a Seized Praline Mixture

Have you ever been scooping your pralines onto parchment paper only to have the mixture suddenly become thick, grainy, and impossible to work with? That’s called seizing, and it happens when the sugar crystallizes too quickly. It can feel like a race against the clock, but there’s a simple trick to salvage it.

Keep a small bowl of very hot water nearby while you’re scooping. If you notice the mixture starting to seize, just stir in a teaspoon or two of the hot water. This will help loosen the candy back to a smoother, scoopable consistency. Add the water slowly, just a little at a time, until it’s workable again. This quick fix, found in many classic praline recipes, can save your batch and help you get those perfectly shaped patties.


Related Articles


Ready to take your first sweet bite?


Frequently Asked Questions

What's the most important thing to get right when making pralines? Without a doubt, it's temperature control. Candy making is a science, and getting your sugar mixture to exactly 236°F is the key to that perfect creamy, yet firm, texture. A few degrees too low and they won't set properly; a few degrees too high and they can become hard or grainy. Using a candy thermometer takes the guesswork out of the process and is the single most important step for success.


Why did my pralines turn out grainy instead of smooth? A grainy texture is usually caused by sugar crystals forming incorrectly. This can happen for a couple of reasons: the mixture might have been cooked too high, or it might have been over-stirred after being taken off the heat. Stirring is a delicate balance. You need to stir just enough for the mixture to thicken and lose its gloss, but stopping before it seizes up. A tiny pinch of baking soda in the recipe can also help prevent large sugar crystals from forming, ensuring a smoother finish.


My pralines are gooey and won't set. Can I save them? Absolutely! If your pralines are too soft, it typically means the sugar mixture didn't get quite hot enough. While you can't make them firm up at this point, you've accidentally created a phenomenal praline sauce. Gently warm it up and pour it over a bowl of vanilla ice cream for an incredible dessert. You can also chill the mixture, roll it into small balls, and dust with cocoa powder for easy praline truffles.


Can I make pralines without a candy thermometer? While some traditional recipes rely on visual cues or the cold water test, it's a very difficult skill to master. For consistent, reliable results, a candy thermometer is truly your best friend. It gives you the precision needed to hit that 236°F sweet spot every time, which is what separates a perfect batch from a frustrating one. Investing in one is well worth it if you plan to make candy regularly.


Is it okay to use a different nut instead of pecans? Of course! While pecans are the heart of the classic Southern praline, the original French recipe actually used almonds. Feel free to experiment with other nuts you enjoy. Toasted walnuts or even macadamia nuts would be delicious substitutes. Just be sure to toast them first to bring out their best flavor before adding them to the sugar mixture.


Overall Rating

0.0

0

reviews

By Cory Mosley April 24, 2026
Think about your favorite ice cream shop. It’s more than just a place to get a sweet treat, right? It’s a spot for family outings, first dates, and celebrating small wins. The best ice cream companies understand this powerful connection. They know that a warm, welcoming atmosphere and genuinely friendly service are just as important as what’s in the cone. It’s about creating a community and a place where people feel at home. This loyalty isn’t accidental; it’s built through a consistent commitment to quality, creativity, and making every customer feel valued from the moment they walk through the door. Ready to take your first sweet bite? Key Takeaways Prioritize Real Ingredients : The best ice cream starts with a simple, high-quality ingredient list. Look for recognizable items like fresh cream and real fruit, as this is the key difference between a premium, handcrafted scoop and a budget pint filled with artificial additives. Look for More Than Just a Scoop : A truly great ice cream company creates a complete experience. Seek out shops that offer loyalty programs and exciting seasonal flavors, which turn a simple treat into a fun and rewarding tradition. Find a Flavor for Every Craving : The best brands cater to all tastes by offering everything from comforting classics to inventive new combinations. They also provide delicious and creamy dairy-free options, ensuring everyone can enjoy a fantastic scoop. What Makes an Ice Cream Company Great? What separates a good ice cream from a truly great one? It’s more than just being cold and sweet. The best ice cream companies create an experience that starts long before your first bite. It’s a combination of incredible ingredients, masterful craftsmanship, and a genuine passion for making people happy. From the texture of the scoop to the smile you get at the counter, every detail matters. When a company gets these things right, they don't just sell a dessert; they create a memory. Let's look at the key elements that turn a simple scoop into something special. It Starts with Quality Ingredients and Handcrafted Magic The foundation of any amazing ice cream is what goes into it. You can truly taste the difference when a company uses high-quality, real ingredients instead of artificial flavorings and fillers. Think fresh cream, real fruit, and rich, decadent chocolate. At Pecan Jacks, we believe the best flavors come from the source, which is why our gourmet ice cream is crafted with honest ingredients. This commitment to quality is often paired with a handcrafted approach. Small-batch production allows for greater attention to detail, ensuring every pint is churned to perfection. It’s this dedication that creates a flavor and texture that mass-produced brands just can't replicate. The Perfect Scoop: Texture, Creaminess, and Creative Flavors A truly great ice cream is a delight for the senses. The texture should be smooth and creamy, melting perfectly on your tongue without feeling icy or gritty. This perfect consistency is a sign of expert craftsmanship. But beyond texture, flavor is king. While classic flavors done right are always a treat, the best companies aren't afraid to get creative. They experiment with unique combinations that surprise and delight you. From Southern-inspired classics like Butter Pecan to innovative adult-infused pints , the flavor possibilities are endless. A great ice cream brand offers something for everyone, including delicious dairy-free options, so no one has to miss out. More Than Just Ice Cream: The Customer Experience The best ice cream shops feel like a home away from home. A warm, welcoming atmosphere and friendly service can make your visit just as sweet as the treat itself. It’s about creating a place where families and friends can gather and make memories. Great companies also show they appreciate their customers. Programs like Pecan Jacks Rewards make every purchase feel a little more special, giving you perks and free desserts just for enjoying your favorite treats. This focus on the customer experience builds a loyal community and turns a simple ice cream run into a cherished tradition. It’s this combination of a fantastic product and genuine care that defines a truly great ice cream company. Our Ranking of the Best Ice Cream Brands After countless taste tests and a deep appreciation for what goes into a truly great scoop, we’ve put together our definitive ranking. While there are many brands out there, the top spot belongs to those who combine passion, quality, and creativity into every pint. It’s about more than just a sweet treat; it’s about an experience that begins with the very first spoonful. So, who takes the crown? It might not surprise you that we have a clear favorite. Why Pecan Jacks is Our #1 Pick Call us biased, but we believe we’ve earned the top spot. Pecan Jacks is built on a foundation of small-batch production and an unwavering commitment to quality. We’re not just making ice cream; we’re crafting moments of joy inspired by our family’s coastal roots. This dedication means every flavor is developed with care, from classic Southern pralines to our innovative adult-infused creations. We believe in making premium, handcrafted ice cream and candy that tells a story. It’s a difference you can taste, and it’s why we proudly place ourselves at the very top of the list. What Sets Artisanal Shops Apart from Grocery Store Pints? Walk down the freezer aisle, and you’ll find pint containers with ingredient lists a mile long. Many are packed with fillers, gums, and artificial flavors designed to imitate the real thing. Artisanal shops like ours take a different approach. We believe the best flavors come from the best ingredients, which is why our lists are refreshingly short and simple. When you choose a handcrafted ice cream, you’re choosing a treat made with integrity. You can learn more about our family’s commitment to honest, real ingredients that make every scoop a pure and delicious experience. The Difference You Can Taste: Handcrafted vs. Mass-Produced The real magic of handcrafted ice cream is in the flavor. Mass-produced brands often rely on shortcuts, but high-quality ice cream gets its taste from the source: real vanilla beans, fresh strawberries, and rich cocoa. This commitment to authenticity creates a depth of flavor that simply can’t be replicated. At Pecan Jacks, our handcrafted process allows us to create unique Southern-inspired flavors , dairy-free options, and even adult-infused pints that you won’t find anywhere else. It’s a hands-on approach that ensures every batch is rich, creamy, and packed with genuine taste. Premium vs. Budget Pints: What's the Real Difference? Ever find yourself staring into the freezer aisle, wondering if that pricey pint of ice cream is really worth the splurge? It’s a fair question. While both premium and budget options promise a sweet, frozen treat, what’s inside the carton can be worlds apart. The difference goes far beyond the brand name; it comes down to the science of creaminess, the quality of the ingredients, and the care put into every batch. Premium ice cream offers a richer, denser, and more flavorful experience, while budget brands often rely on fillers and a lot more air to keep costs down. Let's break down exactly what sets them apart, so you know what you’re getting in every spoonful. Butterfat and Overrun: The Science of Creaminess The secret to incredibly smooth, rich ice cream lies in two key factors: butterfat and overrun. Butterfat is exactly what it sounds like, the natural fat from milk and cream. Premium ice creams have a high butterfat content, which gives them that luxurious, velvety texture that coats your tongue. Budget-friendly options typically use less cream and more milk, resulting in a lower fat content. Overrun refers to the amount of air churned into the ice cream base. A lower overrun means less air and a more dense, creamy product. Artisanal shops like Pecan Jacks specialize in low-overrun ice cream, so you get a pint packed with flavor. Mass-produced brands often whip in more air to increase volume, sometimes meaning half of your container is just air. Real vs. Artificial Ingredients: What You're Paying For Take a look at the ingredient list on a budget pint, and you might find a long list of stabilizers, gums, and artificial flavors. These are used to mimic the texture and taste of real ingredients without the associated cost. Now, look at a premium pint. The list is usually much shorter and filled with things you recognize: cream, milk, sugar, real vanilla beans, or fresh strawberries. When you invest in a premium ice cream, you’re paying for real, wholesome ingredients. The flavor doesn’t come from a lab; it comes from the quality of the chocolate, the ripeness of the fruit, and the purity of the vanilla. This commitment to artisanal quality is what creates a truly memorable taste, free from any chemical aftertaste. Decoding the Price on the Pint So, why the big price gap? It all comes back to the quality of ingredients and the production process. Real cream, pure cane sugar, and fresh fruit simply cost more than corn syrup and artificial flavorings. Crafting ice cream in small batches with low overrun is also a more hands-on, time-consuming process compared to mass production on an assembly line. Think of it this way: you’re not just paying for ice cream, you’re paying for an experience. The higher price reflects the superior ingredients, the richer texture, and the authentic flavor that comes from a carefully crafted recipe. When you treat yourself to a premium pint, you’re choosing quality over quantity and getting a dessert that is satisfying in every sense of the word. The Most-Loved Ice Cream Flavors What makes an ice cream flavor a fan favorite? Sometimes it’s the comforting nostalgia of a classic scoop, and other times it’s the thrill of a brand-new, wild combination. Taste is deeply personal, but across the country, a few clear winners emerge, from timeless staples to regional treasures. Whether you’re a purist or an adventurer, there’s a perfect flavor waiting for you. It’s all about finding that scoop that brings a smile to your face and makes you want to come back for more. The Classics That Never Go Out of Style You know the ones. They’re the flavors that have been there for us through thick and thin: creamy vanilla, rich chocolate, and sweet strawberry. These classics are popular for a reason. They offer a sense of comfort and reliability that never disappoints. But a classic doesn’t have to be boring. When made with exceptional ingredients, a simple flavor can be truly special. Take Butter Pecan, for example. It’s a rich, traditional flavor that becomes extraordinary when done the Pecan Jacks way, with perfectly toasted pecans and velvety cream. These are the classic flavors that form the foundation of any great ice cream shop. Creative Flavors for the Adventurous Palate For those who love a little excitement, creative flavors are where the magic happens. These are the scoops that mix in chunks of cookies, swirls of caramel, and bits of candy to create a totally new experience. It’s about more than just taste; it’s about texture, surprise, and a bit of fun. Think of Pecan Jacks' Monster ice cream, a bold, fun-packed flavor that blends cotton candy ice cream with Chips Ahoy cookies. It’s a combination you might not expect, but it’s one you won’t forget. Trying an inventive flavor is a great way to discover your next favorite and see just how creative ice cream can be. From Coastal Creations to Regional Favorites Have you ever noticed how ice cream tastes can change from one place to another? It’s true! Different parts of the country have their own unique favorites. These regional preferences show how our local culture can shape our cravings. For instance, Blue Bell is a go-to brand in many southern states, while Ben & Jerry's is the top choice throughout New England. Here at Pecan Jacks, our coastal roots inspire flavors that capture the sweet, relaxed feeling of a day at the beach. Whether it’s a local scoop shop or a nationally loved brand, regional pride often plays a big part in what we love to eat. How to Find Great Dairy-Free Options Whether you're fully plant-based or just looking to cut back on dairy, the world of vegan ice cream has completely transformed. Gone are the days of icy, bland alternatives that left you feeling disappointed. Now, you can find rich, creamy, and inventive flavors that stand shoulder-to-shoulder with their dairy-based counterparts. The key is knowing what to look for. With a little insight, you can easily find a scoop that satisfies your sweet tooth without compromise. It’s less about what’s left out and more about the incredible ingredients that are put in. Delicious Plant-Based Alternatives That Don't Disappoint Today, finding a plant-based ice cream that’s genuinely delicious is easier than ever. Artisanal shops are leading the charge, using bases like oat, coconut, and almond milk to create incredibly creamy textures that rival traditional dairy. It’s all about creativity and quality. At Pecan Jacks, we've put just as much love into our dairy-free options as our classic flavors, proving you never have to settle. Whether you're vegan or just avoiding dairy, you can find satisfying, handcrafted scoops that don't feel like a compromise. What to Look for in a Vegan Ice Cream When you're on the hunt for the perfect pint, flip it over and read the label. The best vegan ice creams start with a simple, recognizable ingredient list. Look for real ingredients like actual vanilla beans, fresh fruit purées, or rich cocoa instead of a long list of artificial flavors and fillers. A shorter list often means the makers are focused on quality over cutting corners. This commitment to using top-quality ingredients is what separates a truly great scoop from an average one. It ensures you get an authentic, enjoyable flavor in every spoonful. What Do Customers Say About Their Favorite Ice Cream? We all have that one ice cream shop. It’s the place you recommend to friends, the one you crave on a hot day, and the spot that just feels like home. But what is it that turns a simple scoop shop into a beloved favorite? It’s more than just delicious flavors (though that’s a huge part of it). It’s about the entire experience, from the moment you walk in the door to the last bite of a waffle cone. When you look at what people say about their go-to ice cream brands, a few key themes pop up again and again. It comes down to a powerful combination of trust, taste, and a little bit of magic that makes a brand feel special. Let’s explore what makes us fall in love with an ice cream company and what keeps us coming back for more. What People Love Most in a Scoop Shop Familiarity plays a big role in our choices. It’s no surprise that well-known names often top the charts. Recent data shows that brands like Ben & Jerry's and Dairy Queen are among the most popular ice cream brands in the U.S., largely because we know exactly what to expect. We trust them to deliver a consistent, satisfying treat every time. This reliability is comforting. Whether it’s a classic flavor you’ve loved since childhood or a fun new creation, you know you’re in good hands. That sense of trust is the foundation of any great scoop shop experience. Why We Stay Loyal to Our Favorite Brands Once we find a brand we love, we tend to stick with it. This loyalty is about more than just habit; it’s an emotional connection. We stay loyal because a brand’s story, quality, and unique personality resonate with us. This connection can be so strong that some brands become regional icons. For example, Blue Bell is the most searched ice cream brand in over 20 states, proving just how deep local pride can run. Loyalty is earned when a shop consistently delivers amazing flavors and an experience that makes you feel like part of a community, turning a simple dessert into a cherished tradition. How to Find Seasonal Flavors and Sweet Deals Once you’ve found an ice cream company you love, the experience doesn't have to end with their standard menu. The best shops are always creating something new, offering special deals, and finding ways to make every visit feel special. Staying in the loop about seasonal offerings and loyalty perks is the best way to get the most out of your sweet tooth. It’s how a simple ice cream run becomes a fun discovery, giving you a chance to try new things and get rewarded for being a fan. Getting Rewarded for Your Sweet Tooth If you find yourself visiting the same ice cream shop often, you should absolutely see if they have a loyalty program. These programs are designed to thank you for being a regular customer, often with points that add up to free scoops, discounts, or exclusive offers. With the Pecan Jacks Rewards Program , for instance, every purchase brings you closer to perks and free desserts. It’s a simple way to make your regular treat feel even more special. Joining is usually free and easy, so it’s always worth asking about. It’s a small step that can lead to some seriously sweet benefits down the road. Don't Miss Out on Limited-Time and Holiday Flavors One of the best parts of visiting an artisanal ice cream shop is discovering flavors that are only available for a short time. These seasonal specials often capture the taste of a holiday or a specific time of year, from pumpkin spice in the fall to peppermint bark in the winter. It’s a chance to step outside your comfort zone and try something truly unique. Pecan Jacks is known for its creative, handcrafted Southern-inspired flavors , which often include adult-infused pints and dairy-free options that rotate throughout the year. Always make sure to ask what’s new or check the seasonal menu so you don’t miss out on your next favorite flavor. How Ice Cream Is Evolving The world of ice cream is constantly churning out fresh ideas. While we'll always love the classics, brands are listening to what customers want, and that means more than just new flavors. Today, the best ice cream companies are thinking about how their treats fit into our lifestyles, from offering options that meet specific dietary needs to adopting practices that are kinder to the planet. It’s an exciting time for ice cream lovers, as our favorite dessert becomes more thoughtful, inclusive, and delicious than ever. This shift isn't just about following trends; it's about a deeper connection between what we eat and our personal values. We're more curious about where our food comes from, the ingredients used, and the impact our choices have on the environment. Great ice cream makers are responding by being more transparent and intentional. They're crafting products that not only deliver on taste and texture but also give us peace of mind. Whether it's a perfectly creamy pint of dairy-free chocolate or a scoop made with locally sourced ingredients, the evolution of ice cream is all about creating a better, more satisfying experience from the first lick to the last. Lighter Options for Health-Conscious Fans It’s clear that people want to feel good about the treats they enjoy. In response, many ice cream makers are creating amazing vegan, dairy-free, and lighter alternatives that appeal to a wider audience. You’ll notice many of these options have incredibly short ingredient lists, which is great for anyone with allergies or those who simply want a pure, simple dessert without fillers or gums. This move toward healthier frozen desserts reflects a bigger trend of transparency in the food we eat, letting you indulge in a scoop of happiness without a second thought. Sustainable Scoops and Eco-Friendly Practices Caring about what’s in our cone now extends to how it was made. The ice cream industry is making big moves in sustainability, and we love to see it. At Pecan Jacks, our focus on small-batch production and premium ingredients is part of our commitment to quality and thoughtful crafting. This approach is becoming more important as people look for unique flavors from brands that align with their values. It’s not just small shops, either. Even the top ice cream brands are implementing more eco-friendly practices, showing a widespread shift toward environmental responsibility that makes every scoop a little sweeter. Related Articles 5 Best Artisan Ice Cream Delivery Services The 7 Best Shops for Gourmet Chocolates Online How to Make the Perfect Southern Pralines Recipe Handcrafted Pralines 101: The Ultimate Guide Ready to take your first sweet bite? Frequently Asked Questions What's the biggest difference between premium ice cream and the cheaper stuff at the grocery store? The main difference comes down to two things: ingredients and air. Premium, artisanal ice cream is made with a high percentage of cream and very little air whipped in, which makes it dense, rich, and full of flavor. Budget brands often use less cream and whip in a lot more air to increase the volume, so you're literally paying for a pint that might be half air. You're also paying for real ingredients, like fresh fruit and pure vanilla, instead of artificial flavorings. Why should I try a dairy-free ice cream if I'm not vegan? Think of it as exploring a whole new world of flavor and texture. Modern dairy-free ice creams, especially those made with oat or coconut milk, are incredibly creamy and delicious in their own right. Sometimes, a plant-based foundation allows other flavors, like deep chocolate or bright fruit, to stand out in a different and exciting way. It's not about settling for an alternative; it's about discovering another fantastic way to enjoy a frozen treat. What does "handcrafted" or "small-batch" really mean for my ice cream? When you see terms like "handcrafted" or "small-batch," it means there's a much greater level of personal attention going into your dessert. Instead of being mass-produced on a giant assembly line, the ice cream is made in smaller quantities. This allows the makers to perfect the texture, ensure ingredients are mixed in just right, and maintain a higher standard of quality. It’s the difference between a carefully prepared meal and something from a factory. Besides the flavor, what makes an ice cream shop a place you want to return to? A great ice cream shop creates an experience that makes you feel good. It’s about the warm welcome you get when you walk in, the friendly service, and the clean, happy atmosphere where you can relax with family and friends. Things like loyalty programs also make a big difference because they show a company appreciates its customers. It’s this combination of a fantastic product and genuine care that turns a first-time visit into a regular tradition. How can I make sure I don't miss out on the best, most interesting flavors? The most exciting flavors are often the ones that are only around for a limited time. The best way to find them is to simply ask what's new or seasonal when you visit a shop. Many artisanal places create special flavors for holidays or to celebrate local ingredients. You can also join a shop's rewards program or follow them online, as they'll usually announce new and unique creations there first.
By Cory Mosley April 23, 2026
The classic chocolate-covered vanilla bar is just the beginning. Once you master the basic technique, a whole world of creative possibilities opens up. You can experiment with different flavor pairings, add crunchy mix-ins like nuts or cookies, or swirl in a layer of caramel or fruit sauce for a surprise inside. This recipe is a canvas for your culinary creativity. Think of it as your chance to design the ultimate dessert, perfectly tailored to your tastes. We’ll show you how to create the perfect base of ice cream inside chocolate and then give you plenty of ideas for making it uniquely your own. Ready to take your first sweet bite? Key Takeaways Start with quality ingredients for the best results : The secret to a great chocolate-covered treat is simple: use chocolate you love and a rich, creamy ice cream. For a shell with that perfect snap, mix a little coconut oil into your melted chocolate. Pay attention to temperature and technique : You can create a flawless chocolate shell at home by letting your melted chocolate cool slightly before using it. This simple step prevents cracks and gives you a glossy, professional finish. Don't be afraid to experiment : The real fun begins when you customize your treats. Add a layer of caramel or peanut butter under the shell, or sprinkle crushed nuts, cookies, or pralines on top for a delicious, crunchy texture. What is Chocolate-Covered Ice Cream? Let's talk about one of the most perfect dessert combinations out there: chocolate-covered ice cream. It’s a simple concept that delivers a seriously satisfying experience, combining the cold, creamy texture of your favorite gourmet ice cream with the rich, snappy coating of chocolate. The magic is all in the contrast. That first crack of the chocolate shell gives way to the smooth, melting ice cream inside, creating a moment of pure dessert bliss that’s hard to beat. Whether you’re a fan of dark, milk, or white chocolate, there’s a perfect pairing waiting for you. This delightful treat isn't just one thing, either. It comes in many forms, from classic ice cream bars you grab from the freezer to delicate, bite-sized bonbons perfect for a party. You can even find cones cleverly lined with a layer of chocolate, adding an extra bit of goodness to every bite. At its heart, chocolate-covered ice cream is all about pairing two beloved flavors in a way that makes both of them even better. It’s a timeless classic that continues to inspire new and creative dessert ideas, proving that some of the best things in life are simple, sweet, and covered in chocolate. The Secret to a Perfect Chocolate Shell The key to that amazing, crisp chocolate shell isn't as complicated as you might think. The secret lies in creating a thin, even layer that hardens almost instantly when it touches the cold ice cream. A popular and easy method involves gently melting your favorite dark chocolate. Once it's smooth, you can pour it into a cup or even a Ziploc bag. From there, you just coat the inner sides of your container, creating a chocolate mold. Pop it in the freezer until it’s completely set, and you have a perfect, delicate shell ready to be filled with ice cream. This simple technique is what gives you that satisfying snap. Popular Styles: From Bars to Bonbons Chocolate-covered ice cream comes in a few classic styles you probably already know and love. Think of the iconic ice cream bar, with its thick chocolate shell encasing a block of creamy vanilla or chocolate ice cream. Then there are ice cream bonbons, which are a bit more elegant. These are small, frozen scoops of ice cream dipped into a melted chocolate mixture. The result is a thin, crisp coating that cracks perfectly with each bite. You can find great recipes for bonbons that show you how to get that signature snapping texture at home. These bite-sized treats are perfect for sharing or for when you just want a little something sweet. Beyond the Bar: Lined Cones and Stracciatella The fun doesn't stop with bars and bonbons. Some of the most creative ideas involve working chocolate into other ice cream treats. Have you ever had a waffle cone lined with chocolate on the inside? It’s a brilliant way to prevent drips and add a rich chocolatey finish to your last bite. Another classic style is stracciatella), an Italian gelato flavor. To make it, melted chocolate is drizzled directly into the churning gelato base. The cold temperature causes the chocolate to harden instantly, creating thin, irregular shards that mix throughout the ice cream. It adds a wonderful texture and a subtle chocolate flavor to every spoonful. Your Essential Ingredient Checklist Creating the perfect chocolate-covered ice cream starts with the right ingredients. Think of this as your go-to shopping list for success. While the list is short, the quality of each item makes a huge difference in the final product. From the satisfying crack of the chocolate shell to the creamy ice cream inside, choosing well is the first step toward a truly delicious homemade treat. Let’s walk through what you’ll need to get started. Choosing the Right Chocolate for That Perfect Snap The star of the show is, of course, the chocolate. The type you choose will define the entire flavor profile and texture of the shell. For a rich, classic taste, bittersweet or dark chocolate is a fantastic choice, as it provides a deep flavor that balances the sweetness of the ice cream. If you prefer something sweeter, milk chocolate works beautifully, while white chocolate offers a creamy, vanilla-forward alternative. For that signature snappy finish, look for a good quality chocolate bar or wafers designed for melting. This will give you a smooth, even coat that hardens perfectly. Crafting a Creamy Ice Cream Base Your ice cream needs to be firm and flavorful enough to stand up to its chocolate coating. While making your own is rewarding, you can get amazing results with a high-quality store-bought pint. The key is to choose a dense, creamy ice cream that won’t melt too quickly when you’re dipping it. At Pecan Jacks, we craft our gourmet ice cream to be exceptionally rich and smooth, making it the perfect foundation for your creations. Whether you go for a classic vanilla or a double chocolate, starting with a great base is essential. Why Coconut Oil is Your Secret Weapon Have you ever wondered how that magic shell at the ice cream shop hardens instantly? The secret is coconut oil. Just a small amount melted into your chocolate is the key to creating a shell that sets quickly and has a delightful snap. As one recipe from Serious Eats notes, melted chocolate is often combined with coconut oil to ensure a snappy finish. The oil thins the chocolate, making it easier to dip and coat your ice cream evenly. As it cools, the coconut oil solidifies, creating that perfect, crisp shell. Get Creative with Mix-Ins and Flavors This is where you can really have fun and make the recipe your own. Once your ice cream is coated in chocolate, but before it fully sets, you can add all sorts of delicious toppings. You can easily change the flavor by adding things like mini marshmallows, chopped nuts, or crushed cookies for extra texture and taste. Think about sprinkling on some flaky sea salt to complement dark chocolate or adding colorful sprinkles for a festive touch. For a truly southern-inspired treat, try crumbling some of our authentic pralines or brittles over the top for a sweet, nutty crunch. How to Make Chocolate-Covered Ice Cream at Home Ready to bring the magic of the candy kitchen into your own home? Making chocolate-covered ice cream is a fun project for a quiet afternoon or a great way to get the whole family involved. One of the best parts about making treats yourself is that you have complete control over the ingredients. You can choose high-quality chocolate, your favorite Pecan Jacks ice cream flavor, and any mix-ins you can dream up. It’s a chance to get creative and make something truly special. While it might seem like a dessert best left to the pros, creating that perfect chocolate shell is easier than you think. The key is understanding a few simple techniques that guarantee success. Forget about messy, uneven coatings or chocolate that cracks before you can even take a bite. We’re going to walk through the methods that work every time. Whether you’re dreaming of a classic dipped bar with a satisfying crackle, an elegant chocolate-lined cup for a dinner party, or a cone with a secret layer of fudge inside, we have the techniques to help you get there. These methods are simple, reliable, and will give you delicious, professional-looking results that will have everyone asking for your secret. Let’s get started. Mastering the Classic Dipped Shell Remember the satisfying crack of a chocolate shell from your favorite childhood ice cream bar? You can easily recreate that at home. The trick is to create a thin, frozen layer of chocolate that shatters when you bite into it. Start by gently melting your favorite dark chocolate. Pour the melted chocolate into a Ziploc bag, then carefully spread it around to coat the inner sides. Seal the bag and lay it flat in the freezer until the chocolate is completely set. This method creates that nostalgic 'crackling' chocolate shell that provides the perfect texture contrast to your creamy ice cream filling. It’s a simple technique with a seriously impressive result. How to Make Chocolate-Lined Cups and Molds For a treat that’s as beautiful as it is delicious, try making chocolate-lined cups. This method is perfect for creating individual desserts. First, melt your chocolate in the microwave or a double boiler. The key to a glossy finish and a satisfying snap is to let the chocolate cool slightly, to around 86–90°F (30–32°C), before using it. Pour a spoonful of the cooled chocolate into your cups or silicone molds. Gently rotate them to ensure an even coating covers the entire inside surface. Pop them in the freezer for about 10 to 15 minutes, and you’ll have a perfect chocolate vessel ready to be filled with your favorite ice cream. Nailing the Magic Shell Technique If you’ve ever enjoyed a waffle cone with a surprise layer of chocolate inside, you know how delightful that extra touch can be. This "magic shell" technique is all about creating a chocolate coating that stays just a little soft against the cone, offering a perfect contrast to the cold ice cream. It’s a signature touch at many classic sweet shops, and it’s surprisingly simple to do at home. Just coat the inside of your cone with melted chocolate before you add the ice cream. The warmth of the cone keeps the chocolate from freezing solid, giving you that perfect, fudgy layer in every bite, much like the famous chocolate-on-the-inside waffle cones that inspired this method. A Simple Recipe to Get You Started Feeling inspired? Here’s a straightforward recipe to make your first batch of chocolate-covered ice cream. For the creamy filling, you’ll need 500 grams of whipping cream, 40 grams of sifted cocoa powder, one teaspoon of vanilla extract, and 200 grams of condensed milk. For the shell, you’ll need 200 grams of dark chocolate. First, create your chocolate shells using the bag method described above. While they freeze, whip up your filling. Once the shells are firm, carefully pour the ice cream mixture inside, seal the bags properly, and freeze them in an upright position for at least four hours. The result is a delicious chocolate-covered ice cream treat that’s ready to enjoy. What Are the Best Ice Cream and Chocolate Pairings? Pairing chocolate and ice cream is an art form where you get to be the artist. The right combination can turn a simple dessert into a truly memorable experience. It’s all about balancing flavors and textures, whether you’re sticking with the classics or trying something totally new. Think about how the rich bitterness of dark chocolate can cut through a sweet ice cream, or how creamy milk chocolate can complement a nutty flavor. The fun is in the experimentation. You can match intensities, like a bold dark chocolate with a rich coffee ice cream, or create a delightful contrast, like a sweet white chocolate with a tart raspberry sorbet. At Pecan Jacks, we love playing with flavors, from our classic southern pralines to our unique adult-infused ice cream . Let’s explore some pairings to inspire your next homemade creation. Timeless Pairings You'll Love Some combinations are classics for a reason: they just work. Think of the simple perfection of vanilla bean ice cream dipped in a rich, dark chocolate shell. The vanilla’s floral notes are the perfect canvas for the chocolate’s deep flavor. Another favorite is mint ice cream with dark chocolate, where the cool, refreshing mint is balanced by the chocolate’s intensity. For a truly classic Italian approach, try making Stracciatella), where melted chocolate is drizzled into the ice cream base, creating fine, crunchy ribbons. These pairings are comforting, familiar, and always a crowd-pleaser. Bold Combinations for the Adventurous Eater Ready to step outside the box? This is where things get really exciting. Try pairing a salty, buttery caramel ice cream with a bittersweet dark chocolate shell to create a complex sweet-and-savory bite. You can also draw inspiration from global cuisines with flavors like ube (purple yam) or mango sticky rice. Imagine a tangy passion fruit sorbet covered in white chocolate or a spicy Mexican chocolate ice cream with a hint of cinnamon and chili dipped in a semi-sweet shell. Don’t be afraid to mix in textures, like crunchy cookie pieces or cereal, for an extra layer of fun. Delicious Dairy-Free and Lighter Options You don’t need dairy to create a decadent chocolate-covered treat. Plant-based ice creams made from coconut cream, oat milk, or almond milk offer an incredibly smooth and creamy base that pairs beautifully with chocolate. A coconut cream orange bar, for example, tastes amazing dipped in dark chocolate. These options are often made with wholesome ingredients and can be lower in sugar without sacrificing flavor. You can find fantastic non-dairy chocolate ice creams that are rich in fiber and taste just as indulgent as their dairy counterparts, proving that everyone can enjoy a delicious frozen dessert. What Are the Most Popular Flavors? When it comes to ice cream, some flavors are timeless classics for a reason. But part of the fun is discovering new and exciting combinations that surprise your taste buds. People are looking for everything from comforting, familiar tastes to bold, adventurous pairings. It seems our collective sweet tooth is craving both nostalgia and novelty. Let's explore some of the flavors that are winning hearts and freezers everywhere, from the tried-and-true favorites to the delightfully unexpected. Whether you're a purist or an adventurer, there's a perfect scoop waiting for you. All-Time Favorite Combinations You can never go wrong with vanilla, chocolate, or strawberry. These flavors are the foundation of the ice cream world, and they pair beautifully with a crisp chocolate shell. But today, even these classics are getting a gourmet makeover. Think rich, dark chocolate with a sprinkle of sea salt, or creamy vanilla bean paired with swirls of gooey caramel. There's a growing appreciation for high-quality, natural ingredients. Many new ice cream launches feature "natural" or "organic" labels, showing that people want indulgent treats that still feel wholesome. It’s all about finding that perfect balance between a delicious treat and mindful eating, which is why we focus on crafting our ice cream with the best ingredients we can find. Flavors That Bring Back Childhood Memories There’s something magical about a flavor that takes you right back to childhood. That’s why dessert-inspired ice creams are so popular. Flavors packed with cookies, brownie bits, or colorful cereal pieces offer a fun, textural experience that feels both familiar and exciting. Salted caramel, once a gourmet secret, has become a beloved staple that perfectly blends sweet and savory. We're also seeing a rise in flavors inspired by global cuisines , like ube or mango sticky rice, which introduce delightful new profiles to the dessert scene. It’s a delicious way to travel the world, one scoop at a time. Festive Flavors for Every Season Just like with fresh produce, some ice cream flavors just taste better during certain times of the year. Think refreshing lemon or sweet peach in the summer, spiced pumpkin or apple crumble in the fall, and rich peppermint or gingerbread during the winter holidays. This seasonal approach is a hallmark of artisanal ice cream shops, which pride themselves on using the best ingredients available. The demand for premium and artisanal ice creams is growing because people are happy to invest in high-quality, innovative products. This trend also includes more non-dairy and vegan options, ensuring everyone can enjoy a delicious frozen treat, no matter the season. Tips for Professional-Looking Results Want your homemade treats to look like they came straight from a gourmet candy kitchen? It’s totally achievable. The secret isn’t fancy equipment; it’s all about technique. Getting that perfect, glossy chocolate shell that cracks just right when you bite into it comes down to a few key details. Paying attention to temperature and application will make all the difference, turning your simple ice cream bars into stunning desserts that are ready for their close-up. We’ll walk through the simple steps the pros use to get that flawless finish every single time. How to Temper Chocolate for a Glossy Shine If you’ve ever wondered how chocolatiers get that beautiful sheen on their creations, the answer is tempering. Tempering is a process of heating and cooling chocolate to specific temperatures, which stabilizes the cocoa butter crystals. This might sound technical, but it’s what gives the chocolate a smooth, glossy finish and that satisfying "snap" when you break it. Without tempering, chocolate can look dull or streaky and have a softer, waxy texture. Taking the time to temper your chocolate is the single most important step for achieving a professional look and feel for your ice cream treats. Finding the Perfect Chocolate Temperature The key to perfect tempering is precision. After melting your chocolate, you need to let it cool to the right "working temperature" before you start dipping or coating. For most dark and milk chocolates, this sweet spot is between 86–90°F (or 30–32°C). Using a digital thermometer is the best way to get it just right. This specific temperature range ensures the cocoa butter has formed stable crystals, which is essential for that glossy shine and crisp texture. If the chocolate is too hot, it won't set properly; if it's too cold, it will be thick and difficult to work with. Techniques for a Smooth, Even Shell Once your chocolate is tempered, it's time to create the shell. For a truly satisfying treat, you want a thick, even coating that delivers a loud "CRACK" with every bite. If you're using molds, pour in the tempered chocolate and gently rotate the mold to cover the entire surface. Let it set before adding your favorite ice cream flavor . For dipped bars, make sure each one is fully submerged and let the excess drip off before placing it on parchment paper to set. A second dip can help create an even thicker, more durable shell that holds up perfectly. Ready to Get Creative? Try These Variations Once you’ve mastered the basic chocolate-covered ice cream, it’s time to start playing. The real magic happens when you introduce new textures and flavors that reflect your personal taste. Think of the classic recipe as your canvas. You can add a bit of crunch, a swirl of sauce, or even a sophisticated, grown-up twist to create a truly memorable dessert. These simple variations are a great way to put your own signature on your homemade treats and surprise everyone with something uniquely delicious. Add Some Crunch with Nuts and Cookies A little texture can completely change the experience of biting into a chocolate shell. Adding a crunchy element creates a satisfying contrast to the smooth ice cream and snappy chocolate. Before your chocolate sets, try sprinkling on some crushed nuts, like almonds or pecans, for a classic pairing. For a different kind of crunch, you can use crispy rice cereal, crushed cookies, or even bits of our own handcrafted southern pralines. Simply stir your crunchy mix-ins directly into the melted chocolate before dipping, or sprinkle them over the top of the wet chocolate for a more decorated look. Experiment with Layers of Flavor and Sauce Why stop at just ice cream and chocolate? Adding a thin layer of sauce between the two can introduce a wonderful new dimension of flavor. Imagine a gooey ribbon of salted caramel, a rich swirl of peanut butter, or a bright fruit coulis hiding just beneath the chocolate shell. You can get really creative here by pairing unconventional flavors. Try a layer of marshmallow fluff for a s'mores-inspired treat or a coffee-infused caramel for a mocha vibe. These dessert-inspired elements make each bite an indulgent experience. For inspiration, check out the gourmet ice cream flavors we craft in our own kitchen. Create Your Own Adult-Infused Treats For a dessert that’s strictly for the grown-ups, try adding a splash of your favorite liqueur. This is a fantastic way to create sophisticated flavors for a dinner party or a special night in. You can infuse the ice cream base itself or add a bit of liqueur to the melted chocolate shell. A hint of bourbon in dark chocolate pairs beautifully with vanilla bean ice cream, while a coffee liqueur can deepen the flavor of a chocolate or coffee base. We love this concept so much that we developed our own line of adult-infused ice cream , perfecting combinations that deliver on taste and texture. Common Mistakes and How to Avoid Them Even the most seasoned home bakers run into a little trouble now and then, especially when working with chocolate and ice cream. The good news is that most common issues are easy to fix with a few simple tricks. Getting that perfect, glossy chocolate shell and creamy, smooth ice cream filling is totally achievable. It’s all about paying attention to a couple of key details, like temperature and texture. Think of it this way: you’re asking two very different ingredients, cold ice cream and warm chocolate, to work together. A little patience goes a long way. The difference between a homemade treat and a professional confection often comes down to these small details. A little extra care can prevent a thin, spotty shell or a cracked surface, ensuring your final product is something you're proud to share. Whether you’re dealing with a shell that’s too thin, one that cracks, or an ice cream base that isn’t quite right, we’ve got you covered. Let’s walk through some of the most frequent hiccups and exactly how to solve them, so your homemade treats look and taste like they came straight from a professional candy kitchen. How to Fix Thin or Spotty Chocolate A thin, patchy chocolate shell can be a real letdown. You want a coating that’s thick enough to provide that satisfying crack when you bite into it. If your shell looks a little see-through, it likely means the chocolate layer is too thin. The easiest fix is to apply a second coat. After pouring your first layer of chocolate into the mold, let it set briefly in the freezer for a few minutes. Then, take it out and add a second layer, making sure to cover any thin spots. This double-layer method creates a sturdy, even shell that holds up beautifully to the ice cream filling. Say Goodbye to Cracked or Uneven Shells There’s nothing more frustrating than seeing your perfect chocolate shell crack right after you’ve filled it. This usually happens when the melted chocolate is too warm when it comes into contact with the cold mold or ice cream. The temperature shock causes it to become brittle and crack. To avoid this, let your melted chocolate cool down to about 86–90°F (30–32°C) before you use it. This simple step is the secret to achieving a shiny finish and a solid snap. Properly cooled chocolate is much more stable and less likely to crack, giving you a flawless, professional-looking result every time. Keeping Your Ice Cream Smooth and Creamy The texture of your ice cream filling is just as important as the chocolate shell. For a truly decadent treat, you want a filling that’s rich and velvety, not icy or lumpy. When making your ice cream base, be careful not to over-whip the cream. You’re looking for a consistency that’s thick enough to hold its shape but can still be poured easily. If you do notice any lumps in your mixture, don’t worry. Just pour it through a fine-mesh strainer before churning or freezing. This ensures a perfectly smooth texture, just like the gourmet ice cream we make here at Pecan Jacks. How to Store and Serve Your Homemade Treats You’ve mixed, melted, and molded your way to creating beautiful chocolate-covered ice cream. Now for the final, crucial steps: storing and serving. How you handle your treats from this point on makes all the difference in their final taste, texture, and appearance. A little care in the freezer and on the plate ensures all your hard work pays off, resulting in a dessert that’s as delightful to look at as it is to eat. Whether you’re saving them for a quiet night in or wrapping them up for a friend, these tips will help you preserve that perfect, just-made quality. How to Freeze Your Treats for the Best Texture Proper freezing is the secret to maintaining that creamy ice cream and snappy chocolate shell. Once you’ve filled your chocolate-lined molds or bags, seal them well and place them in the freezer standing upright, not lying flat. This helps them set in a uniform shape without getting squished. Let them freeze for at least four hours, or preferably overnight, to ensure they are completely firm. For longer storage, transfer your finished treats to an airtight container. This is the best way to prevent freezer burn and keep your creations from absorbing any unwanted flavors from the freezer. Plating and Presentation Tips We eat with our eyes first, and a thoughtful presentation can make your homemade desserts feel like they came straight from a gourmet shop like Pecan Jacks . You don’t need to be a professional food stylist to make your treats look stunning. A simple drizzle of melted chocolate or caramel sauce over the top adds an elegant touch. You could also add a sprinkle of flaky sea salt, chopped nuts, or colorful sprinkles for extra texture and visual appeal. For an extra pro tip, try serving your treats on chilled plates. This simple step helps prevent them from melting too quickly, giving you and your guests more time to admire your handiwork before diving in. How to Package Your Treats as Gifts There’s nothing quite like sharing a homemade treat, and beautiful packaging makes the gift even sweeter. Customers are often happy to spend more on treats that come in thoughtful gift packaging, and the same principle applies to homemade gifts. They just feel more special. Look for small candy boxes lined with parchment paper, or wrap individual bars in wax paper and tie them with baker’s twine. Great ice cream packaging should balance function and fun. It needs to protect the delicate chocolate shell while also looking delightful. If you’re transporting your gifts, consider using an insulated bag to keep them perfectly frozen until they reach their destination. Related Articles 11 Unique Ice Cream Flavors for Adults to Try The 7 Best Shops for Gourmet Chocolates Online The Best Chocolate Almond Ice Cream: Recipe & Guide 5 Best Artisan Ice Cream Delivery Services Ready to take your first sweet bite? Frequently Asked Questions Can I just use chocolate chips for the shell? While you can melt chocolate chips, they often contain stabilizers to help them keep their shape while baking. This can make them a bit thick and less ideal for creating a thin, snappy shell. For the best results, I recommend using a high-quality chocolate bar or wafers designed for melting, as they will give you a smoother consistency and a more professional finish. Why is coconut oil so important for the magic shell? Coconut oil is the key to getting that classic, instant-hardening effect. It works by lowering the overall melting point of the chocolate, making it more fluid and easier to pour. When this mixture hits the cold ice cream, the coconut oil solidifies very quickly, creating that signature crisp shell with a satisfying snap. My chocolate shell cracked right after I filled it. What went wrong? This is a common issue, and it almost always comes down to temperature. If your melted chocolate is too hot when you pour it into a cold mold, the drastic temperature change can cause it to become brittle and crack. To prevent this, let your melted chocolate cool down to a lukewarm temperature, around 86 to 90 degrees Fahrenheit, before you start coating your molds. How long can I store my homemade chocolate-covered ice cream? When stored properly in an airtight container, your homemade treats should stay fresh and delicious for up to two weeks in the freezer. Storing them this way is important because it helps prevent freezer burn and stops the ice cream from picking up any other odors from your freezer, keeping them tasting just as good as the day you made them. What's the simplest method if I'm just starting out? If you're new to making these, I suggest starting with the chocolate-lined cup method. It’s very forgiving and doesn't require any tricky dipping. You simply coat the inside of a silicone mold or cup with chocolate, let it set, and then fill it with ice cream. It’s a straightforward way to get a beautiful result without much fuss.
By My Portal April 22, 2026
The journey to owning a Pecan Jacks franchise often begins with a single, memorable customer experience. For many owners, the transition from "super fan" to business owner is driven by a passion for the brand's artisanal quality, the unique liquor-infused flavors, and a family-oriented support system. By following a proven business model and comprehensive support, vacationers and locals alike are turning their love for Southern-inspired sweets into thriving, community-centric businesses. A Sweet Discovery in Santa Rosa Beach For Deborah Wilson and her daughter Annie, the path to business ownership didn’t start in a boardroom; it started on vacation. Three years ago, while enjoying the white sands of Santa Rosa Beach, they walked into a Pecan Jacks and experienced the "aroma of artisan chocolates" and "creamy ice cream" that defines the brand. The Journey from Customer to Franchisee. Many prospective business owners worry that the transition from a fan to a CEO is a mountain too steep to climb. However, Deborah and Annie found that the Pecan Jacks discovery process felt less like a sales pitch and more like "talking to an old friend." Key milestones in their journey included: The "Facebook Connection": Rediscovering the brand through social media and learning that franchising was now available. Transparent Communication: Direct access to leadership (like executive director Ken) to answer "all of the questions" with patience and clarity. The Support System: Moving from the "interest" phase to "ownership" via a structured training and site selection process. What Drew Them to the Brand: The "Three-Year" Connection What made Pecan Jacks brand stick in their minds for three years? The Product: It wasn't just "ice cream." It was the artisan quality of the chocolates and the unique, creamy texture of the small-batch scoops that set a benchmark they couldn't find elsewhere. The People: From their first interaction with the founders to their discovery calls with Ken Lynch, the experience felt personal. Deborah noted that talking to the leadership team felt like "talking to an old friend"—a level of comfort that is rare in the high-stakes world of franchising. The Branding: They were drawn to the vibrant, coastal aesthetic that makes every Pecan Jacks feel like a "sweet sanctuary" for the community. The "A-Ha!" Moment When Deborah and Annie realized that franchising was an option, the decision became clear. They weren't just buying a business; they were investing in a brand they had personally vetted as consumers. This "Fan-to-Founder" pipeline is a cornerstone of the Pecan Jacks family, ensuring that every new owner is as passionate about the pralines as the founders themselves. Advice for Future Franchisees: Deborah & Annie’s Top Tips For those currently "on the fence" or researching their next big move, Deborah and Annie shared these key pieces of advice: Ask the Questions: Don't hold back. Deborah found that the leadership team was incredibly patient and understanding with every concern she raised. Trust the "Gut" and the Flavor: If you love the product as a customer, your community likely will too. Authentic passion is the best sales tool. Look for Support, Not Just a System: They emphasized that Pecan Jacks offers a "partnership," not just a handbook. From Pecan Jacks University to hands-on site selection, you aren't doing this alone. Why Now is the Time for Confectionery Growth. The "indulgence food sector" is remarkably resilient. Whether the economy is booming or shifting, people consistently seek small, affordable luxuries. Pecan Jacks provides a unique dual-revenue stream—ice cream for immediate gratification and boxed confections for gifting—making it a versatile investment. Join the Pecan Jacks Family. Are you ready to turn your passion for premium treats into a rewarding career? Like Deborah and Annie, you can bring the joy of Pecan Jacks to your neighborhood. Author Bio: Cory Mosley is the Vice President of Growth and Franchise Development at Pecan Jacks. With years of experience in scaling retail concepts, Cory specializes in helping entrepreneurs navigate the journey from initial inquiry to Grand Opening.