
Author: Cory Mosley
Cory Mosley is the Vice President of Growth for Pecan Jacks. He supports franchise growth and brand strategy while helping protect the quality behind every scoop, bringing the “Sweet Day Is A Bite Away” philosophy to customers across the country.

The journey to owning a Pecan Jacks franchise often begins with a single, memorable customer experience. For many owners, the transition from "super fan" to business owner is driven by a passion for the brand's artisanal quality, the unique liquor-infused flavors, and a family-oriented support system. By following a proven business model and comprehensive support, vacationers and locals alike are turning their love for Southern-inspired sweets into thriving, community-centric businesses. A Sweet Discovery in Santa Rosa Beach For Deborah Wilson and her daughter Annie, the path to business ownership didn’t start in a boardroom; it started on vacation. Three years ago, while enjoying the white sands of Santa Rosa Beach, they walked into a Pecan Jacks and experienced the "aroma of artisan chocolates" and "creamy ice cream" that defines the brand. The Journey from Customer to Franchisee. Many prospective business owners worry that the transition from a fan to a CEO is a mountain too steep to climb. However, Deborah and Annie found that the Pecan Jacks discovery process felt less like a sales pitch and more like "talking to an old friend." Key milestones in their journey included: The "Facebook Connection": Rediscovering the brand through social media and learning that franchising was now available. Transparent Communication: Direct access to leadership (like executive director Ken) to answer "all of the questions" with patience and clarity. The Support System: Moving from the "interest" phase to "ownership" via a structured training and site selection process. What Drew Them to the Brand: The "Three-Year" Connection What made Pecan Jacks brand stick in their minds for three years? The Product: It wasn't just "ice cream." It was the artisan quality of the chocolates and the unique, creamy texture of the small-batch scoops that set a benchmark they couldn't find elsewhere. The People: From their first interaction with the founders to their discovery calls with Ken Lynch, the experience felt personal. Deborah noted that talking to the leadership team felt like "talking to an old friend"—a level of comfort that is rare in the high-stakes world of franchising. The Branding: They were drawn to the vibrant, coastal aesthetic that makes every Pecan Jacks feel like a "sweet sanctuary" for the community. The "A-Ha!" Moment When Deborah and Annie realized that franchising was an option, the decision became clear. They weren't just buying a business; they were investing in a brand they had personally vetted as consumers. This "Fan-to-Founder" pipeline is a cornerstone of the Pecan Jacks family, ensuring that every new owner is as passionate about the pralines as the founders themselves. Advice for Future Franchisees: Deborah & Annie’s Top Tips For those currently "on the fence" or researching their next big move, Deborah and Annie shared these key pieces of advice: Ask the Questions: Don't hold back. Deborah found that the leadership team was incredibly patient and understanding with every concern she raised. Trust the "Gut" and the Flavor: If you love the product as a customer, your community likely will too. Authentic passion is the best sales tool. Look for Support, Not Just a System: They emphasized that Pecan Jacks offers a "partnership," not just a handbook. From Pecan Jacks University to hands-on site selection, you aren't doing this alone. Why Now is the Time for Confectionery Growth. The "indulgence food sector" is remarkably resilient. Whether the economy is booming or shifting, people consistently seek small, affordable luxuries. Pecan Jacks provides a unique dual-revenue stream—ice cream for immediate gratification and boxed confections for gifting—making it a versatile investment. Join the Pecan Jacks Family. Are you ready to turn your passion for premium treats into a rewarding career? Like Deborah and Annie, you can bring the joy of Pecan Jacks to your neighborhood. Author Bio: Cory Mosley is the Vice President of Growth and Franchise Development at Pecan Jacks. With years of experience in scaling retail concepts, Cory specializes in helping entrepreneurs navigate the journey from initial inquiry to Grand Opening.
Walking down the freezer aisle can feel like a pop quiz you didn't study for. One pint boasts about being "all-natural," another is "organic," and a third has a cartoon character on it that your kids are screaming for. It’s easy to just grab whatever is on sale. But what if you’re looking for something genuinely better? A treat made with ingredients you can actually pronounce? This is where the idea of "clean" ice cream comes in. It’s not about dieting; it’s about getting back to basics with real cream, sugar, and flavor. This guide will help you decode the labels and cut through the noise, leading you straight to the purest ice cream brands worth your money. Ready to take your first sweet bite? Key Takeaways Focus on simple ingredients, not buzzwords : "Clean" isn't a regulated term, so your best bet is to look for ice cream made with recognizable ingredients like fresh cream, milk, and sugar, rather than a long list of artificial additives. Read the label to find the best pints : The ingredient list is your most reliable tool. A shorter list is usually a great sign, and certifications like USDA Organic or Non-GMO Project Verified are trustworthy shortcuts to finding a quality product. Quality ingredients create superior flavor and texture : A higher price often reflects the use of real cream and authentic flavorings instead of fillers and lab-made substitutes, resulting in a richer, creamier, and more satisfying scoop. What Does "Clean" Ice Cream Actually Mean? You’ve probably seen the word "clean" pop up everywhere, from beauty products to household cleaners. Now, it’s making its way into the freezer aisle. But what does it mean when we talk about "clean" ice cream? Unlike terms like "organic," "clean" isn't a regulated label with a strict definition. Instead, it’s a way to describe ice cream made with simple, understandable, and high-quality ingredients. Think of it as ice cream that’s closer to what you’d make in your own kitchen if you had a churn and a whole lot of patience. A clean ice cream ditches the long list of artificial additives, preservatives, and fillers you might find in many mass-produced pints. The focus is on real, whole-food ingredients: fresh milk and cream, real sugar, and natural flavorings like vanilla beans, cocoa, or actual fruit. It’s about transparency and getting back to the basics of what makes ice cream so delicious in the first place. For brands that follow this philosophy, like us here at Pecan Jacks, the goal is to create a rich, flavorful dessert without anything unnecessary. It’s a commitment to quality you can taste in every spoonful. Natural vs. Artificial Ingredients The biggest difference between a standard pint and a "clean" one often comes down to the ingredient list. Clean ice cream brands prioritize real ingredients over lab-created substitutes. This means you won't find artificial flavors, synthetic colorings, or high-fructose corn syrup. Instead of a chemical concoction designed to taste like strawberry, you’ll find actual strawberries. Many conventional ice creams also use a variety of gums and stabilizers to create a super-smooth texture and extend shelf life. While not all are bad, a clean approach uses minimal, if any, of these. The creaminess comes from high-quality dairy and a careful churning process, not from a list of additives. The result is a purer, more authentic flavor that lets the main ingredients truly shine. What Do Organic and Non-GMO Labels Mean? When you’re scanning the freezer aisle, labels like "USDA Organic" and "Non-GMO Project Verified" are strong clues that you’re looking at a cleaner option. An organic certification means the ingredients, from the milk to the sugar, were produced without synthetic pesticides, fertilizers, or genetically modified organisms (GMOs). This ensures a higher standard for how the ingredients are grown and processed. Similarly, a non-GMO label confirms that the ingredients haven't been genetically engineered. For many people, choosing non-GMO products is about supporting more natural and traditional farming practices. Brands that pursue these certifications are showing a deep commitment to sourcing high-quality, trustworthy ingredients, which is a cornerstone of the clean eating philosophy. The Deal with Grass-Fed Dairy and Ethical Sourcing Taking it a step further, some of the best ice cream brands focus on where their dairy comes from. You might see "grass-fed" on a label, which means the milk comes from cows that graze on pasture. Many believe grass-fed dairy offers a richer flavor and a better nutritional profile. It’s also a more humane and environmentally friendly way to raise animals. This ties into the broader idea of ethical sourcing. Brands committed to clean ingredients often care about the entire supply chain. They might partner with local family farms, ensure fair labor practices, and choose ingredients that are sustainably produced. This level of transparency shows a respect for the planet and the people involved in creating the final product, giving you another reason to feel good about your dessert choice. 8 Ice Cream Brands That Keep It Real When you’re craving a truly satisfying scoop, the last thing you want is a long list of artificial flavors, gums, and fillers. The good news is, you don't have to settle. We’ve rounded up eight fantastic ice cream brands that are committed to using high-quality, simple ingredients. From family-owned creameries to organic pioneers, these brands prove that you can have a delicious treat that you also feel good about eating. Get your spoons ready, because these are the pints worth seeking out. Pecan Jacks As a family-owned creamery, we pour our hearts into every batch. At Pecan Jacks, our philosophy is simple: start with the best ingredients to create the most delicious desserts. We use artisanal techniques passed down through generations to craft our gourmet ice cream , pralines, and other confections. Our commitment to quality means you get a rich, creamy texture and authentic flavor in every bite, without any unnecessary additives. It’s a difference you can taste, inspired by our coastal roots and a love for creating sweet moments for families just like ours. Van Leeuwen You’ve probably seen their iconic pastel trucks or pints in the freezer aisle, and for good reason. Van Leeuwen has built a loyal following by focusing on two things: French-style ice cream made with extra egg yolks for a rich, custardy texture, and a serious dedication to clean ingredients . Many of their flavors are made without added gums or stabilizers, which lets the quality of the milk, cream, and sugar shine through. They also offer an extensive and delicious line of vegan, cashew-based ice creams that are just as decadent as their dairy counterparts. Cosmic Bliss Formerly known as Coconut Bliss, Cosmic Bliss has expanded its offerings to include incredible grass-fed dairy options alongside its beloved plant-based pints. This makes them a fantastic choice for households with mixed dietary needs. Their commitment to high-quality ingredients is clear, whether you’re digging into a creamy dairy-based scoop or a rich, coconut milk dessert. They focus on sustainable and ethical sourcing, so you can feel great about the treat you’re enjoying. Their plant-based options are a game-changer for anyone avoiding dairy but still craving a premium ice cream experience. Straus Family Creamery A true pioneer in organic dairy, Straus Family Creamery has been committed to sustainable farming long before it was trendy. Their ice creams are a testament to their simple, wholesome approach. They use organic dairy from their own and other local farms, and their ingredient lists are refreshingly short and easy to understand. You won’t find any gums, artificial colors, or preservatives here. The result is a classic, clean-tasting ice cream with a rich, velvety texture that tastes like it came straight from the farm. It’s a perfect example of how simple, quality ingredients make all the difference. Alden's Organic If you’re looking for an organic option that’s widely available and family-friendly, Alden’s is a fantastic pick. They are committed to producing certified organic and non-GMO treats, which means you can trust what’s in every carton. Alden’s also avoids common additives like carrageenan and artificial flavorings, focusing instead on simple, wholesome ingredients. With a wide range of classic and creative flavors, plus fun novelties like ice cream sandwiches, they offer something for everyone. It’s a brand that makes it easy to choose a cleaner, organic option without sacrificing fun or flavor. Jeni's Splendid Ice Creams Jeni's is famous for its unique, crave-worthy flavors, but the magic behind the brand is its unwavering commitment to quality. They build each flavor from the ground up, using whole ingredients and dairy from grass-pastured cows. You won't find any synthetic flavorings, dyes, or off-the-shelf mixes in their pints. Instead, they use premium ingredients like fresh fruits, carefully sourced chocolates, and real vanilla. This dedication results in exceptionally smooth ice cream with vibrant, authentic flavors that are truly one-of-a-kind. Alec's Ice Cream Alec’s is making waves with its focus on regenerative agriculture and A2 dairy. For those who are sensitive to conventional dairy, A2 milk can be easier to digest. Alec’s is the first certified regenerative organic ice cream, meaning their sourcing practices actually help improve soil health and the environment. They are a top choice for anyone seeking clean, organic ingredients and a product that aligns with their values. Their flavors are rich and classic, proving that sustainability and incredible taste can go hand-in-hand. Frönen For the dairy-free crowd, Frönen is a dream come true. Their frozen desserts are made with a simple base of fruit, coconut cream, and a touch of natural sweetener like honey or maple syrup. That’s it. The ingredient lists are incredibly short, making it a perfect choice for those with allergies or anyone who wants a treat with no fillers, gums, or "natural flavors." Frönen offers a light and refreshing alternative to traditional ice cream, delivering a coconut cream-based option that’s both delicious and refreshingly simple. How to Decode an Ice Cream Label Walking down the freezer aisle can feel a bit overwhelming. With so many tubs and pints vying for your attention, how do you pick one that’s genuinely delicious and made with good stuff? The secret is on the back of the carton. Learning to read an ice cream label helps you see past the flashy packaging and understand exactly what you’re getting. It’s the best way to make sure you’re bringing home a treat that’s as pure and flavorful as it promises to be. Ingredient Red Flags to Watch For First things first, flip that pint over and scan the ingredient list. A good rule of thumb is that shorter is often better. You want to see ingredients you recognize, like cream, milk, sugar, and real flavorings like vanilla extract or cocoa. Be wary of a long list filled with things you can’t pronounce. Some low-quality ice creams use fillers, artificial flavors, chemical preservatives, and high-fructose corn syrup to cut costs and make the product last longer on shelves. These additives can create a gummy texture or an artificial aftertaste, taking away from the pure, creamy experience you’re looking for. What "Organic" and "Natural" Really Mean You’ll see the words "organic" and "natural" thrown around a lot, but they don’t mean the same thing. "Organic" is a regulated term. If an ice cream is certified organic, it means its ingredients were grown without synthetic pesticides and that the dairy comes from cows that weren't treated with growth hormones. The term "natural," however, is a bit more of a gray area. The FDA has a loose policy, generally considering it to mean nothing artificial or synthetic has been added. But because it’s not strictly regulated, the term can be used in misleading ways. Always check the ingredient list to be sure. Certifications That Actually Matter If you want a reliable shortcut to finding a quality pint, look for official seals on the packaging. These certifications are third-party verifications, which means the brand had to meet specific standards to earn them. The USDA Organic seal is a great one to spot, as it confirms the ice cream meets strict federal guidelines. Another helpful one is the Non-GMO Project Verified seal, which indicates that the ingredients haven't been genetically modified. These labels take the guesswork out of the equation and give you confidence that you’re choosing a product made with care and integrity. Does Purer Ice Cream Actually Taste Better? So, we've talked about what makes an ice cream "clean," but does it actually make a difference in your bowl? The answer is a definite yes. When you choose ice cream made with pure, simple ingredients, you're not just getting a "healthier" dessert; you're getting a fundamentally better one. The quality of the ingredients directly impacts everything from the richness of the flavor to the creaminess of the texture. It’s the difference between a forgettable treat and a truly memorable experience. Real Flavor vs. Artificial Taste Have you ever tasted a mint ice cream that reminded you more of toothpaste than a fresh garden herb? That’s the work of artificial flavoring. High-quality ice cream uses real ingredients to create its taste, like actual vanilla beans, fresh-picked strawberries, or rich cocoa. This commitment to authenticity results in a flavor that is complex, nuanced, and pure. You can taste the difference because the flavor is genuine, not a chemical imitation. At Pecan Jacks, we believe the best flavors come from the source, which is why our gourmet ice cream is crafted with real ingredients for a taste that’s both delicious and honest. The Scoop on Texture and Creaminess Texture is just as important as taste, and pure ingredients are the secret to that perfectly smooth, melt-in-your-mouth creaminess. When ice cream is made with fresh, high-fat cream and milk, it creates a rich and luxurious consistency. Many mass-produced ice creams use fillers and gums to mimic this texture, often resulting in a gummy or overly airy product that melts strangely. A truly premium ice cream has a dense, satisfying feel because it doesn't rely on shortcuts. The science behind ice cream making shows that simple, high-quality dairy is the foundation for an unbeatable scoop. Why Fewer Ingredients Often Means a Better Bite Next time you're at the grocery store, pick up a pint and read the label. If the ingredient list is a paragraph long and filled with words you can't pronounce, it's a red flag. The best ice creams often have the shortest ingredient lists: cream, milk, sugar, and the real ingredients for flavor. A simple recipe allows the quality of each component to stand out. There’s no need for artificial colors or preservatives when you’re starting with great ingredients. Learning to read food labels can help you spot the difference between an artisanal product and a highly processed one. Where to Find These Top-Tier Ice Creams So, you’re ready to stock your freezer with some of the best ice cream out there, but where do you begin? Finding these artisanal pints isn’t always as simple as running to the nearest big-box store. Often, these brands are a bit more selective about where they sell their products to ensure quality and freshness. The good news is, you have plenty of options, whether you prefer browsing the aisles of a local shop or having your favorite flavors delivered right to your door. The hunt is part of the fun, and it usually leads you to one of three places: specialty grocery stores, the brand’s own website, or a local scoop shop. At Pecan Jacks, we love welcoming new faces to our coastal-inspired locations , but we also make it easy to get our handcrafted treats no matter where you live. Let’s walk through the best ways to find these top-tier ice creams so you can get to the best part: eating them. In Specialty and Health Food Stores Your first stop should be the freezer aisle of your local specialty or health food store. These shops often prioritize products with high-quality, transparent ingredients, making them a natural home for cleaner ice cream brands. You’re more likely to find gems like Straus Family Creamery , which is known for using organic milk and simple, non-GMO ingredients. These stores do the vetting for you, curating a selection of brands that align with a more mindful approach to food. Next time you’re at a smaller, independent grocer, take a closer look. You might just discover your new favorite pint hiding in plain sight. Shopping Online and Direct from the Source If you can’t find what you’re looking for locally, the internet is your best friend. Many artisanal brands, including us here at Pecan Jacks, ship directly to customers nationwide. Ordering from the source is a fantastic way to get the freshest product possible and explore the full range of flavors, including unique or seasonal options you might not find in stores. It’s the ultimate convenience. You can browse our collection of handcrafted ice cream and have a taste of the coast delivered right to your doorstep. This is also a great way to support small, family-owned businesses directly. How to Find Deals and Save Money We get it, premium ice cream can be a treat for the budget, too. But a little savvy shopping can go a long way. A great strategy is to sign up for the email or text newsletters of your favorite brands. This is where you’ll often find exclusive discounts and be the first to know about special promotions. Keep an eye out for deals around holidays, especially National Ice Cream Day in July, when many companies offer sweet incentives. Following brands on social media can also clue you into flash sales or limited-time offers, helping you enjoy a top-tier scoop without the top-tier price tag. Is Premium Ice Cream Worth the Price? When you’re standing in the freezer aisle, it’s easy to wonder why one pint of ice cream costs twice as much as another. Is there really that big of a difference? The short answer is yes. That higher price tag often reflects a commitment to quality that you can taste in every spoonful and feel good about long after the carton is empty. From the richness of the ingredients to the care put into every batch, premium ice cream offers more than just a sweet treat. It’s an experience built on better ingredients, cleaner recipes, and the passion of dedicated makers. Let’s look at what really goes into that price. Breaking Down the Cost The biggest factor in the price of premium ice cream is the quality of the ingredients. Artisanal makers use fresh, whole ingredients like real cream, cane sugar, and actual vanilla beans instead of cheaper substitutes. Mass-produced brands often cut costs by using milk powders, corn syrup, and artificial flavorings. They also pump more air into their ice cream (a term called "overrun") to increase volume, meaning you're paying for air instead of cream. The best ice cream has a smooth, dense texture and rich flavors that come from using high-quality ingredients you can actually pronounce, and that quality simply costs more to produce. The Health Perks of Cleaner Ingredients Choosing a premium ice cream often means you’re also choosing a cleaner, more wholesome product. Many artisanal brands build their recipes around simple, recognizable ingredients and avoid the artificial additives common in cheaper options. You’re less likely to find things like high-fructose corn syrup, artificial sweeteners, or stabilizers like carrageenan on the label. Some brands even go a step further by using organic milk from grass-fed cows, which can offer a better nutritional profile. When you opt for a cleaner ice cream, you’re getting a treat that’s not only delicious but also made with more mindful ingredients. Why Supporting Artisanal Makers Matters When you buy from an artisanal ice cream maker, you’re doing more than just satisfying a craving. You’re supporting a small business, often a family, that is passionate about their craft. These makers aren't focused on cutting corners to maximize profits; they’re dedicated to creating the best possible product. This commitment shows in their choice of ingredients, their small-batch production methods, and their unique flavor creations. By choosing to support these makers, you’re helping to keep craftsmanship alive and ensuring that you get a product made with genuine care and attention to detail. What Real Customers Are Saying When you’re standing in the freezer aisle, it’s tough to know which pint will actually deliver. That’s where customer reviews and taste tests come in handy. They cut through the marketing noise and tell you what people genuinely think. Across the board, two things consistently stand out: the quality of the ingredients and the authenticity of the flavor. People are looking for a clean, rich taste that reflects what’s on the label, not a list of artificial additives or a bland, icy texture. This desire for authenticity is a major theme in online reviews and professional taste tests. Brands that use real cream, cane sugar, and actual vanilla beans tend to get rave reviews, while those that rely on fillers and artificial flavors often fall flat. It’s not just about being a "healthier" option; it’s about the overall experience. A truly great ice cream delivers a satisfying, memorable flavor that makes you feel good about what you're eating. When a brand gets these fundamentals right, people notice. When they don’t, people are even quicker to point it out. Let’s look at what real customers are saying about some of the most popular ice cream brands on the market. What People Love Most Time and again, people praise ice cream brands that deliver rich, authentic flavor without any artificial aftertaste. For example, taste testers often put Häagen-Dazs near the top of their lists for its commitment to "producing quality ice cream in both classic and new flavor choices at a reasonable price." Similarly, brands like Alden’s Organic get high marks for having a "natural vanilla flavor that’s neither overwhelming nor a background player." This feedback shows that customers appreciate balance and quality. They want to taste the real vanilla, the rich chocolate, or the fresh fruit that’s promised on the label. It’s this dedication to genuine taste that turns a simple scoop into a memorable treat and keeps people coming back for more. Honest Feedback and Common Complaints On the flip side, one of the most frequent complaints you’ll find in ice cream brand taste tests is a lack of flavor. One reviewer noted that a popular brand’s ice cream "was seriously lacking when it came to overall flavor." Even premium brands can miss the mark. For instance, while Van Leeuwen is known for its quality, some find that the "taste of vanilla bean is barely discernible" in its classic vanilla. This highlights a key point: if you’re paying for premium ingredients, you expect to taste them. Customers are quick to notice when a flavor tastes weak or artificial, proving that a long list of flashy flavors can’t make up for a scoop that just doesn’t deliver on taste. How to Choose the Right Ice Cream for You With so many incredible options filling the freezer aisle, finding your perfect pint can feel like a delicious adventure. The best approach is to think about what matters most to you. Are you searching for the richest, creamiest texture? Do you prioritize simple, all-natural ingredients? Or are you on the hunt for a unique flavor that you just can't find anywhere else? Let’s walk through how to narrow down the choices and find an ice cream that you’ll absolutely love. Find a Brand That Fits Your Taste The secret to truly amazing ice cream isn't a secret at all: it’s quality. The best brands start with high-quality ingredients, and you can taste the difference in every spoonful. Look for a smooth, creamy texture and rich flavors that don’t taste artificial. A great way to vet a brand is by reading the ingredient list. If it’s short, simple, and full of things you recognize (like milk, cream, and sugar), you’re on the right track. When you find a company that shares your passion for real ingredients, you’ll likely find your new favorite gourmet ice cream . The Best Picks for Dietary Restrictions Living with dietary restrictions doesn't mean you have to miss out on amazing ice cream. The market for dairy-free, gluten-free, and vegan options has grown so much, and many brands are dedicated to creating treats that are both clean and delicious. Brands like Alden's Organic and Cosmic Bliss focus on organic ingredients and natural sweeteners, so you can indulge without worry. When you’re looking for a non-dairy option, check the label to see what kind of base they use. Bases made from oat milk, cashew milk, or coconut cream often produce a richer, creamier texture than other alternatives. Ready to Pick Your Pint? When you’re trying a new brand for the first time, a great strategy is to start with a simple flavor like vanilla or chocolate. This lets you really taste the quality of the base ice cream without too many distractions. If the brand nails the basics, you can feel confident that their more complex flavors will be just as good. For vegan options, look for descriptions that promise a texture like real ice cream, not sorbet, to ensure you get that satisfying creaminess. Ultimately, the fun is in the discovery, so don’t be afraid to try something new. Related Articles 5 Best Artisan Ice Cream Delivery Services The 4 Best Liquor Infused Ice Cream Brands to Try The Best Chocolate Almond Ice Cream: Recipe & Guide Handcrafted Pralines 101: The Ultimate Guide Top 10 Luxury Chocolate Brands You Need to Know Ready to take your first sweet bite? Frequently Asked Questions What's the easiest way to define "clean" ice cream? Think of "clean" ice cream as a dessert made with a short list of ingredients you’d recognize from your own kitchen. It’s not a formal, regulated term, but a philosophy focused on using real, high-quality ingredients like fresh cream, milk, and actual sugar. It avoids artificial flavors, synthetic colors, and fillers that are common in many mass-produced pints. Are "clean" and "organic" the same thing? Not exactly, though they often overlap. "Organic" is a certification with strict government standards, meaning the ingredients were grown without synthetic pesticides and meet other guidelines. "Clean" is a broader idea about using simple, whole ingredients. While many clean brands are also organic, a brand can still be considered "clean" without the official certification if it sticks to a pure, simple recipe. Why does this type of ice cream cost more? The higher price tag comes down to the quality of the ingredients and the production process. Artisanal brands use expensive components like fresh, high-fat dairy, real vanilla beans, and cane sugar instead of cheaper fillers like milk powders and corn syrup. They also tend to make their ice cream in smaller batches, which is a more careful and labor-intensive process. What's the biggest red flag I should look for on an ingredient list? The most telling sign is length and complexity. If the ingredient list is a long paragraph filled with chemical-sounding names, artificial colors (like Red 40), or high-fructose corn syrup, it’s a good indicator that the ice cream relies on additives rather than quality. A great pint of ice cream usually has a refreshingly short and simple list. I can't have dairy. Are there any good "clean" options for me? Absolutely. The dairy-free ice cream world has some fantastic clean options. Many brands now create rich, creamy frozen desserts using bases like coconut cream, cashew milk, or oat milk. Just like with dairy ice cream, you can check the label for a simple ingredient list to find a high-quality, plant-based treat that doesn't rely on gums or artificial flavors.
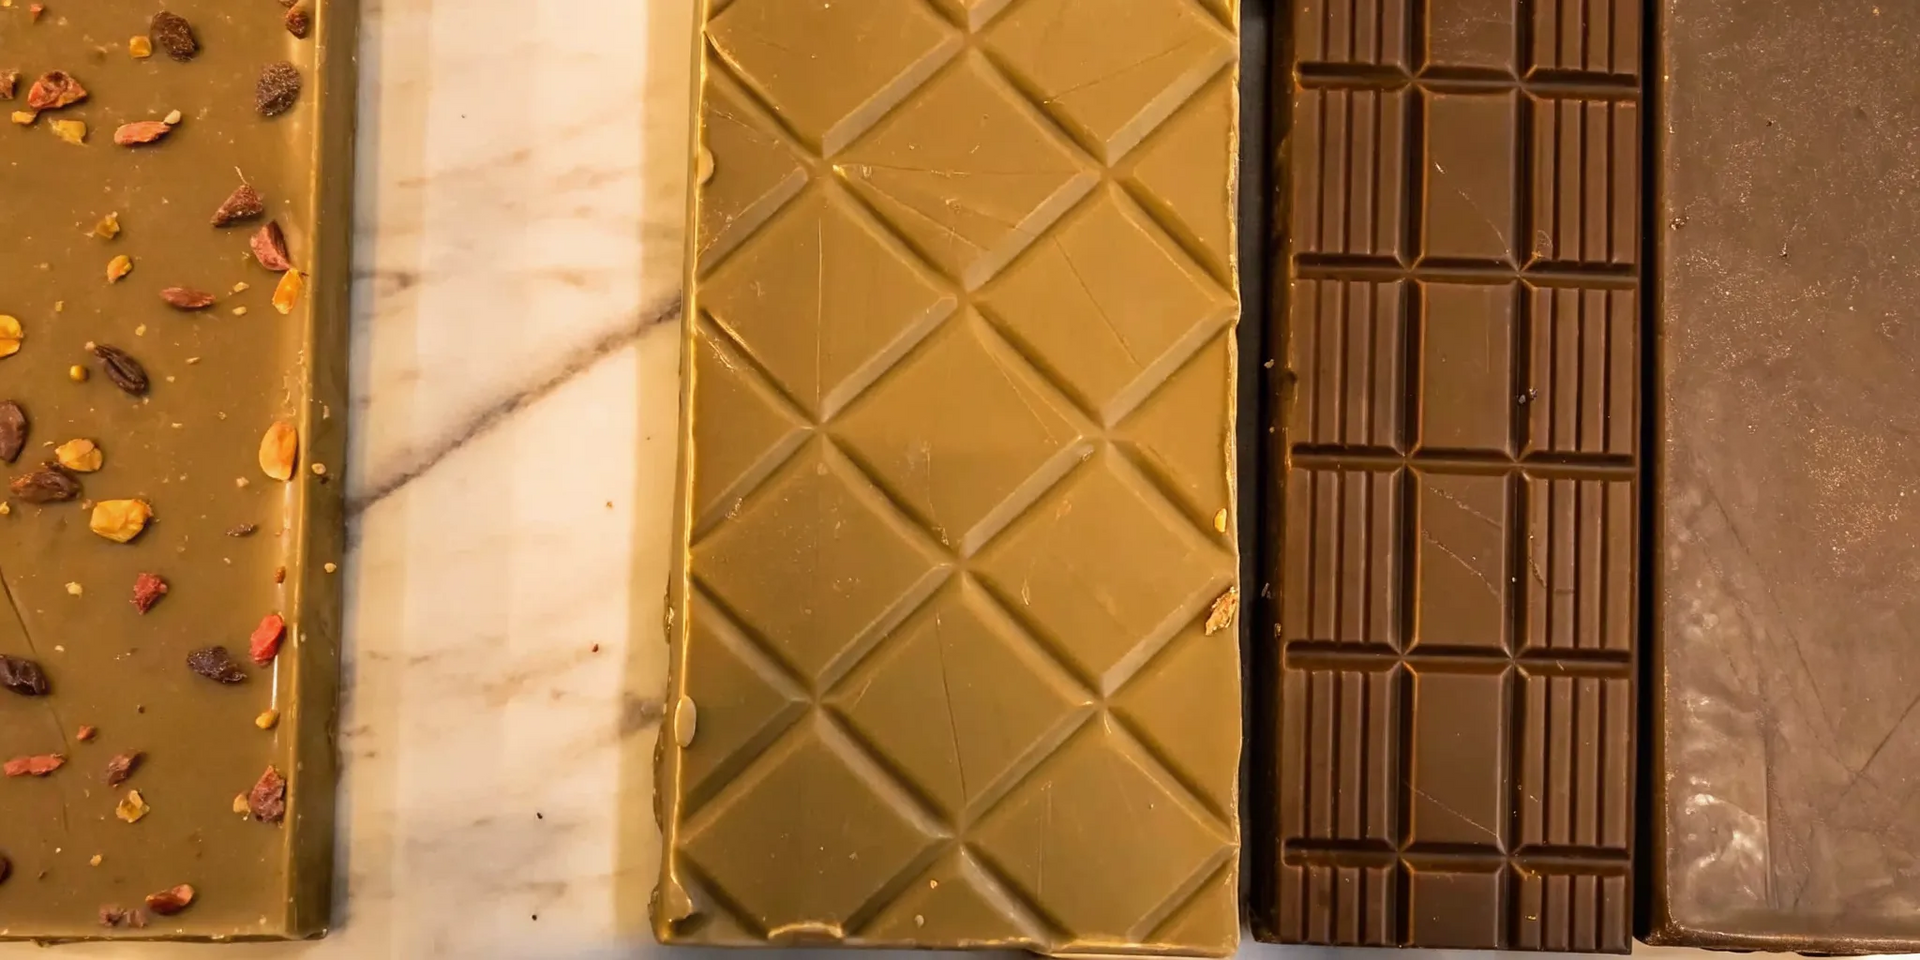
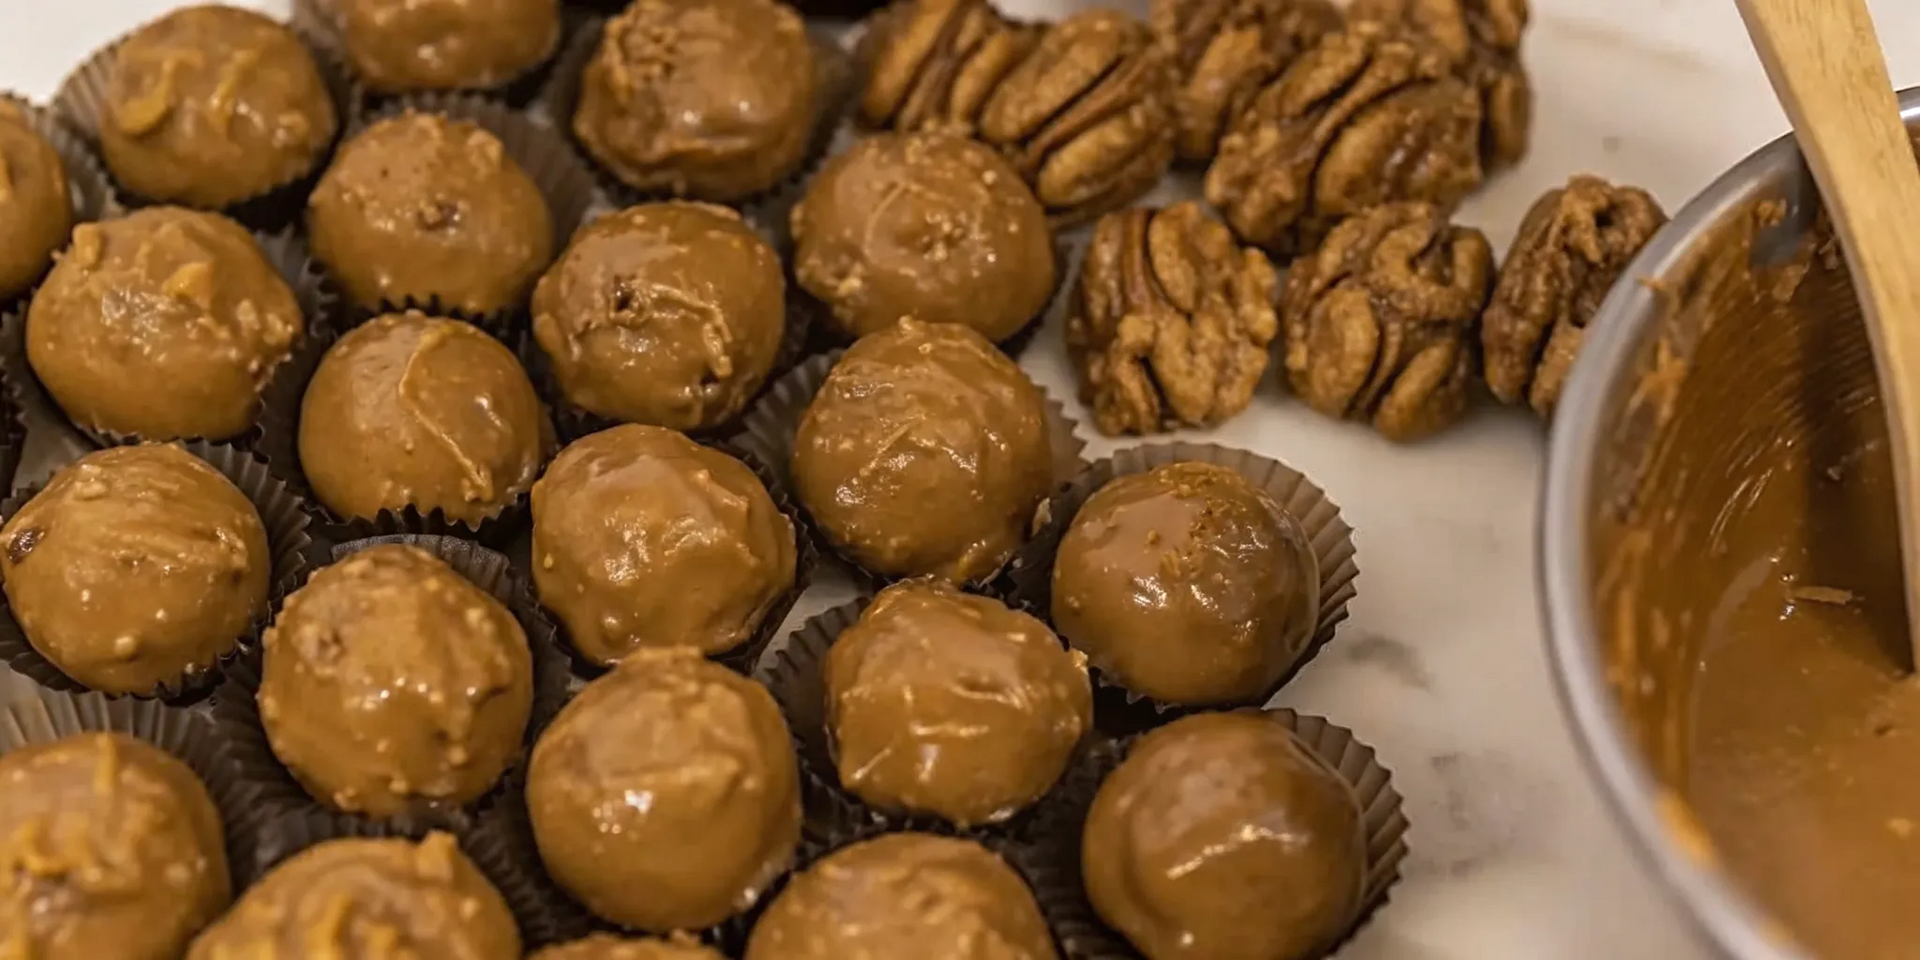
There’s a story behind every great food, and chocolate is no exception. Behind the best bars are passionate artisans who have dedicated themselves to their craft, from sourcing the finest cocoa beans to perfecting their tempering techniques. This hands-on approach is what separates a simple candy from a memorable confection. When you understand the care and skill that goes into each small batch, you appreciate every bite a little more. It’s a connection to the maker and their commitment to quality. We’re going to explore what makes these handcrafted gourmet chocolate bars so incredible and introduce you to some brands doing it right. Ready to take your first sweet bite? Key Takeaways It's more than a price tag : What makes chocolate gourmet isn't the cost, but the commitment to quality. Look for premium ingredients, small-batch craftsmanship, and unique, natural flavor pairings to spot the real deal. Shop with your taste in mind : The best way to pick a gourmet chocolate bar is to start with the flavors you already love. From there, check the label for simple, high-quality ingredients and consider if it's a personal treat or a special gift. Save money by shopping directly : For the best prices and selection, buy from the chocolatier's website. Signing up for their email list and placing larger orders to get free shipping are easy ways to make your indulgence more affordable. What Makes a Chocolate Bar "Gourmet"? Ever wonder what separates a regular candy bar from a truly "gourmet" one? It’s more than just a pretty wrapper. Gourmet chocolate is an experience, crafted with an incredible amount of care from start to finish. It’s about celebrating rich, complex flavors that you just can’t find in mass-produced sweets. The difference comes down to three key things: the quality of the ingredients, the skill of the maker, and the creativity behind the flavor combinations. It starts with high-quality cocoa beans It all begins with the cocoa bean. Think of it like coffee or wine; the origin and quality of the bean determine the final taste. Gourmet chocolatiers source the finest cocoa beans from specific regions, each with a unique flavor profile. At Pecan Jacks, we believe the best flavors come from the best sources, which is why we start with high-quality cocoa, real butter, and fresh cream. This commitment to premium ingredients is the foundation of any chocolate bar worth the splurge. You can truly taste the difference when the core ingredient is exceptional. It's crafted with artisanal techniques Next up is the craftsmanship. Gourmet chocolate isn't churned out by machines on a massive assembly line. It’s often made in small batches by skilled artisans who have perfected their craft. This hands-on approach allows for meticulous attention to detail, from roasting the beans to tempering the chocolate for that perfect snap and glossy finish. Our handcrafted treats follow this same philosophy. This dedication to artisanal techniques ensures a consistently smooth, luxurious texture and a depth of flavor that mass production simply can’t replicate. It’s a true labor of love. It features unique flavors and ingredients Finally, what makes gourmet chocolate so exciting is the creativity. Chocolatiers are artists, and the chocolate bar is their canvas. They experiment with unique and unexpected flavor pairings that you won't find in the candy aisle. Forget artificial flavorings; we’re talking about real, high-quality additions. Our gourmet chocolates are handcrafted to be unforgettable, pairing rich, smooth chocolate with the finest nuts and caramels. From sea salt to nutty pralines, these thoughtful combinations create a memorable tasting experience that’s both balanced and bold. Gourmet Chocolate Bars You Need to Try Ready to find your new favorite treat? I’ve rounded up five of the best gourmet chocolate brands that are absolutely worth the splurge. Each one brings something special to the table, from unique flavor pairings to time-honored crafting techniques. Whether you’re treating yourself after a long week or looking for the perfect gift, these chocolate bars deliver a truly memorable experience. Get ready to unwrap something delicious. Pecan Jacks handcrafted chocolates If you love chocolate that feels both classic and special, you have to try Pecan Jacks. As a family-owned candy kitchen, they pour a lot of love and care into their work, and you can taste it in every bite. Their handcrafted chocolates are made in small batches, ensuring every piece is perfect. They expertly pair rich, smooth chocolate with the finest pecans, cashews, and almonds for a satisfying crunch and a perfect balance of flavors. It’s the kind of treat that’s designed to be unforgettable and completely irresistible. Compartés luxury chocolate bars For the adventurous chocolate lover, Compartés is a must. Handmade in Los Angeles, these bars are as beautiful as they are delicious, often featuring stunning designs and artistic packaging. But it’s the unique and interesting flavors that really make them stand out. Compartés uses top-tier ingredients to create their luxury chocolate bars , resulting in a smooth texture and rich taste that’s anything but ordinary. If you’re looking for a chocolate bar that doubles as a work of art, this is the brand for you. Valrhona premium French chocolates Valrhona is the brand that professional chefs and serious chocolate enthusiasts swear by, and for good reason. This French chocolatier is celebrated for its commitment to excellence, from its ethically sourced cocoa beans to its exceptional flavors. Valrhona’s premium chocolates often highlight single-origin beans, allowing you to taste the distinct notes of cocoa from different regions around the world. It’s a sophisticated choice that offers a deep and complex flavor experience, making it a truly worthy splurge for anyone who appreciates the finer points of gourmet chocolate. The Chocolate Season artisan bars The Chocolate Season is a perfect example of small-batch artistry at its best. This family-run, woman-owned business creates stunning artisan chocolate bars using high-quality Valrhona chocolate. You can find their creations in milk, white, and dark varieties, all made with real ingredients and without any artificial colors or flavors. Each bar is handmade with incredible attention to detail, making them a wonderful choice for anyone who values true craftsmanship and clean, simple ingredients. Supporting this brand means you get an amazing treat while celebrating a small business. Ethel M Chocolates small-batch creations Based in the Nevada desert, Ethel M Chocolates has a rich history of creating high-quality gourmet treats. Their small-batch approach means every bar is crafted with care, and they are especially known for their special fillings and unique toppings. Whether you’re craving a classic combination or something a bit more inventive, their gourmet chocolate bars are a delightful indulgence. They are perfect for treating yourself to a little moment of joy or for giving as a thoughtful gift to a fellow chocolate lover. Unique Flavors to Look For in Gourmet Chocolate Once you step into the world of gourmet chocolate, you’ll find an incredible variety of flavors waiting for you. Artisans are always experimenting with new combinations, pushing the boundaries of what a chocolate bar can be. From the subtle notes of single-origin beans to bold, surprising pairings, there’s a whole spectrum of tastes to explore. Here are a few unique flavor profiles to keep an eye out for on your next chocolate adventure. Classic dark and single-origin bars If you want to taste chocolate in its purest form, a single-origin bar is the way to go. Unlike mass-produced bars that blend beans from all over, single-origin chocolate uses cacao from one specific region or farm. This allows the unique environment, or terroir, to shine through in the flavor. You might notice fruity notes from Madagascan beans or earthy, nutty tones from Ecuadorian cacao. It’s a fantastic way to appreciate the craft and discover how complex chocolate can be without any added ingredients. Think of it like sampling fine wine, but for chocolate lovers. Sweet and salty combinations There’s something undeniably satisfying about the combination of sweet and salty, and chocolatiers have perfected this pairing. A sprinkle of sea salt can make the rich sweetness of chocolate pop, creating a more dynamic and memorable taste. You’ll find everything from classic sea salt dark chocolate to more adventurous bars with potato chips, pretzels, or salted caramel. These gourmet chocolate bars are perfect for when you’re craving something that hits all the right notes and keeps your taste buds guessing. Fruit-infused and tropical blends Fruit and chocolate are a timeless duo. Gourmet chocolate often features real fruit infusions, creating a bright, tangy contrast to the deep, rich cocoa. You’ll find classic pairings like raspberry with dark chocolate, but also exciting tropical blends with notes of passionfruit, mango, or coconut that can transport you straight to the coast. These vibrant, fresh flavors are a testament to the commitment to quality and creativity that defines artisanal chocolate making. They offer a refreshing twist that’s perfect for a sunny day or when you need a little escape. Coffee and dessert-inspired flavors For those who love all things sweet, dessert-inspired chocolates are a dream come true. Many artisans draw inspiration from classic treats, creating bars that taste like tiramisu, crème brûlée, or even a rich mocha. Coffee is a popular addition, as its roasted notes beautifully complement the flavor of cocoa. You’ll also find bars loaded with crunchy, buttery nuts. Our premium chocolates are often paired with the finest pecans, cashews, and almonds, creating a texture and taste that’s both familiar and incredibly luxurious. It’s like getting two desserts in one delicious bite. Where to Find Gourmet Chocolate Once you know what you’re looking for, the fun part begins: the search. Finding high-quality chocolate is an adventure, and there are several places you can look to discover your next favorite treat. From the convenience of online shopping to the charm of a local market, here are the best places to find gourmet chocolate bars that are truly worth it. Shop directly from brand websites Going straight to the source is one of the best ways to get your hands on gourmet chocolate. When you shop directly from a brand’s website, you get access to their entire collection, including online exclusives or seasonal specials you might not find anywhere else. It also ensures you’re getting the freshest product possible. At Pecan Jacks, we believe the best flavors come from the best sources, which is why we use high-quality cocoa, real butter, and fresh cream. Shopping direct allows you to explore the full range of gourmet chocolates and learn the story behind each creation. Visit specialty chocolate shops There’s something magical about stepping into a shop dedicated entirely to confections. Specialty chocolate shops offer a curated experience, showcasing a variety of high-end bars from different artisans. The staff are often incredibly knowledgeable and can guide you to a chocolate that perfectly suits your taste. We love welcoming customers into our own family-owned shops for this very reason. You can " find all Pecan Jacks locations and visit our family-owned shops for handcrafted pralines, gourmet chocolates, brittles, and artisan ice cream." It’s a wonderful way to experience the quality and personal touch that sets gourmet chocolate apart. Check out local artisan markets If you enjoy discovering unique, handcrafted goods, local artisan markets are a treasure trove for gourmet chocolate. These markets are where passionate, small-scale chocolatiers often get their start, offering creative flavors you won’t find in a big-box store. Pecan Jacks is a "premium handcrafted ice cream and candy brand known for its small-batch production, innovative flavors, and commitment to quality." This is the exact kind of dedication you’ll find at local markets, making them the perfect place to discover one-of-a-kind chocolate bars and support talented creators in your community. How Much Does Gourmet Chocolate Cost? When you decide to treat yourself to a gourmet chocolate bar, you're paying for more than just a sweet snack; you're investing in an experience. The price tag reflects the artistry and high-quality ingredients that go into every bite. While the cost can vary, understanding the typical price range and what drives it can help you appreciate the value behind these delicious creations. Let's break down what you can expect to spend and why it's worth it. Understanding the price range Generally, you can expect most gourmet chocolate bars to cost between $10 and $12. You might find some simpler, single-origin bars starting around $4 to $8, while more elaborate or rare options can be a bit higher. For example, many brands price their signature bars right around $9.95 or $11.95. This price point allows chocolatiers to use premium ingredients without cutting corners. Think of it less as a candy bar and more as an affordable luxury, a small indulgence that delivers a big flavor payoff. You can explore a wide variety of premium chocolate bars online to see this range for yourself. What influences the final cost? So, what exactly are you paying for? Several factors contribute to the price of gourmet chocolate. For starters, there's a growing trend among shoppers to choose fewer, but better, things. This means brands are focusing more on the quality of their ingredients, especially the sourcing of cocoa . Ethical practices and unique production methods also play a big role, as they require more time, skill, and investment. As the cost of raw cocoa rises, chocolatiers often highlight the exceptional quality and craftsmanship of their products to justify the price, ensuring you receive a truly special treat that’s made with care and integrity. How to Save on Gourmet Chocolate Indulging in gourmet chocolate is one of life’s simple pleasures, but it doesn’t have to be a major expense. With a few smart shopping habits, you can enjoy high-quality treats without stretching your budget. It’s all about knowing where to look for deals and how to make the most of your purchase. Think of it as becoming a savvy chocolate connoisseur. These simple tips will help you stock up on your favorite artisan bars and confections, so you always have a delicious treat on hand for yourself or for a last-minute gift. Sign up for email lists and promos One of the easiest ways to get a deal is by subscribing to your favorite brand’s email list. Many companies, including small artisan chocolatiers, offer a welcome discount just for signing up. For example, some brands might send you a code for $5 off your first order. Beyond the initial offer, you’ll be the first to know about upcoming sales, new product launches, and exclusive promotions for subscribers. It’s a simple step that keeps you connected to the brands you love and ensures you never miss a chance to save on their gourmet chocolate bars. Buy in bulk to get free shipping Shipping costs can add up, especially when you’re ordering from multiple online shops. A great way to get around this is to buy in bulk. Most brands offer free shipping once your order reaches a certain total, often around $99. Instead of placing small orders here and there, plan ahead and stock up on your favorites all at once. This is perfect for grabbing gifts for upcoming birthdays or holidays, or simply for making sure your personal stash of luxury chocolates never runs low. It’s a practical strategy that saves you money in the long run. Look for subscriptions and seasonal sales If you love trying new things, look for brands that offer subscription services. These curated boxes often provide a variety of chocolates at a discounted rate, introducing you to new flavors you might not have chosen yourself. Another key strategy is to keep an eye out for seasonal sales. Holidays like Valentine’s Day, Easter, and Christmas are prime times to find deals on everything from chocolate assortments to pralines. Here at Pecan Jacks, we love celebrating with our customers and often have special offers on our handcrafted southern confections, making it the perfect time to treat yourself. How to Choose the Perfect Gourmet Chocolate Bar With so many incredible options, how do you pick the perfect one? Finding your ideal gourmet chocolate bar is easier than you think. It’s all about knowing what you like and what to look for. A little thought can turn a simple purchase into a truly special experience. These tips will help you select a chocolate bar you'll absolutely love, whether it's a treat for yourself or a gift for someone else. Consider your flavor preferences First things first, think about what tastes you enjoy most. Are you a fan of classic, deep dark chocolate, or do you prefer the creamy sweetness of milk chocolate? Gourmet chocolate isn't just about the basics. You'll find all sorts of exciting combinations , from dark chocolate with raspberry to milk chocolate with a hint of espresso. Whether you crave something sweet, salty, fruity, or rich, there’s a bar out there for you. Considering your favorite flavors is the best way to narrow down the options and find a treat that truly satisfies. Read the ingredient list and brand story The best chocolate bars tell a story, and it starts with their ingredients. Take a peek at the label. High-quality bars will list simple, premium ingredients like fine cocoa, real butter, and fresh cream. This transparency shows a brand's commitment to quality. Learning about the company's history can also deepen your appreciation for the treat. When you understand the craftsmanship and care that goes into each bar, every bite feels a little more special. It’s not just about buying chocolate; it’s about connecting with the artisans who made it. Match the chocolate to the occasion Are you treating yourself after a long week, or are you looking for the perfect gift? The occasion can help guide your choice. A rich, single-origin dark chocolate bar might be the perfect solo indulgence, while a beautifully packaged bar with unique flavors could make a wonderful birthday or thank-you present. Think about who you're buying for and what the moment calls for. A thoughtful selection shows you care, turning a simple chocolate bar into a memorable gesture. Exploring different options can help you find the right fit for any event, big or small. Related Articles The 7 Best Shops for Gourmet Chocolates Online Top 10 Luxury Chocolate Brands You Need to Know Pecan Jacks Ice Cream News: Expansions, Awards & More Southern Candymakers Coupon: How to Save Big Ready to take your first sweet bite? Frequently Asked Questions What’s the biggest difference between a gourmet chocolate bar and a regular candy bar? The main difference comes down to care and quality. Gourmet chocolate is made in small batches by skilled artisans who use the best ingredients, like high-quality cocoa beans from specific regions, real butter, and fresh cream. A standard candy bar is mass-produced with a focus on consistency and shelf life, often using more sugar and simpler ingredients. Think of it as the difference between a handcrafted loaf of bread from a local bakery and a sliced loaf from the supermarket. Is dark chocolate the only "true" gourmet chocolate? Not at all. While dark chocolate, especially single-origin bars, is popular for its complex flavors, any type of chocolate can be gourmet. A high-quality milk or white chocolate bar made with premium cocoa butter, real vanilla, and creative, natural ingredients is just as much of a gourmet experience. The quality is determined by the ingredients and the crafting process, not the percentage of cocoa. Why do people make such a big deal about single-origin chocolate? Single-origin chocolate is special because it lets you taste the unique flavor profile of a specific place. Just like coffee beans from different countries have distinct tastes, so do cocoa beans. A bar made with beans from Madagascar might have bright, fruity notes, while one from Ecuador could be more earthy. It’s a way to experience chocolate in its purest form and appreciate the subtle differences that the soil and climate create. I'm new to gourmet chocolate. What's a good way to start? A great place to begin is with a flavor profile you already know you love. If you enjoy sweet and salty snacks, try a sea salt chocolate bar. If you love nuts, look for a bar that features high-quality pecans or almonds. Reading the ingredient list is also helpful; look for simple, recognizable ingredients. This way, you’re exploring better quality within a taste you’re comfortable with, which makes the experience more enjoyable. Is the higher price for gourmet chocolate really worth it? Yes, if you think of it as an affordable luxury. You're paying for the exceptional quality of the ingredients, the skill and time of the chocolatier, and a much more satisfying and complex flavor. Because the taste is so rich, you often feel satisfied with just a few squares. It’s a treat meant to be savored, making it a worthwhile indulgence for a special moment or a gift.
