How to Make Easy Peanut Butter Banana Ice Cream

Cory Mosley is the Vice President of Growth for Pecan Jacks. He supports franchise growth and brand strategy while helping protect the quality behind every scoop, bringing “A Sweet Day Is A Bite Away®” philosophy to customers across the country.
Let's talk about those bananas on your counter, the ones covered in brown spots and looking a little sad. Don't throw them out! Those are your golden tickets to an amazing dessert. Ripe bananas are naturally much sweeter, which means you won't need to add any extra sugar to create a delicious treat. They also have a softer texture that blends into a perfectly smooth, creamy base that rivals traditional ice cream. This recipe for Peanut Butter Banana Ice Cream is the perfect strategy for using up those spotty bananas, turning potential food waste into a delightful dessert that satisfies your sweet tooth without any guilt.
Key Takeaways
- Use Very Ripe Bananas for Natural Sweetness : For the best flavor and a creamy texture, use bananas with lots of brown spots. Their natural sugars mean you can skip adding any extra sweeteners, creating a delicious and healthy base.
- Patience is Key for a Creamy Texture: Don't stop blending when the mixture looks crumbly; keep going until it becomes perfectly smooth. Scrape the sides of your blender and add a tiny splash of liquid only if necessary to get things moving.
- Personalize Your Recipe with Fun Additions : Think of the two-ingredient base as a starting point. You can easily customize it by swapping in a different nut butter, blending in cocoa or vanilla, or folding in your favorite mix-ins like chocolate chips and chopped nuts.
What Is Peanut Butter Banana "Nice Cream"?
If you’ve ever found yourself with a bunch of overripe bananas and a craving for something sweet, you’re going to love this. Peanut Butter Banana "Nice Cream" is a fantastic frozen dessert made almost entirely from frozen bananas. It gets its clever name because it’s “nice” to your body, but it tastes so decadent you’ll hardly believe it. The magic happens when you blend frozen bananas until they transform into a creamy, soft-serve-like texture. While nothing can truly replace a scoop of rich, handcrafted ice cream, this homemade version is a wonderful and quick alternative for a healthy treat any day of the week.
The Perfect Healthy Treat
This simple recipe is your secret weapon for a guilt-free dessert. Because it’s made from a base of fruit, it’s a treat you can feel great about eating. The natural sweetness comes from ripe bananas, so there’s no need for added sugar, cream, or eggs. This makes it a perfect fit if you follow a dairy-free, gluten-free, or plant-based lifestyle. It’s a delicious way to satisfy your sweet tooth without straying from your health goals. Plus, it’s an excellent strategy for using up those spotty bananas on your counter, turning potential food waste into a delightful dessert.
A Snack the Whole Family Will Love
One of the best things about nice cream is that it’s a certified crowd-pleaser for all ages. Kids and adults alike are won over by its creamy texture and sweet flavor. With just two main ingredients, it’s incredibly simple to make. The peanut butter adds a wonderful richness that balances the banana flavor, making it feel just as indulgent as traditional ice cream. It’s a fun recipe to make with your kids and a treat you can happily serve the whole family. Creating sweet moments together is what our family-owned kitchen is all about, and this recipe is perfect for that.
Gather Your Ingredients
Before we get blending, let's talk ingredients. The best part about this recipe is its beautiful simplicity. You only need two main ingredients to create a delicious, creamy dessert that feels incredibly indulgent. But, like any great recipe, the quality of what you put in makes all the difference. We’ll also cover a few fun extras you can toss in to make this peanut butter banana ice cream uniquely yours. Let’s get everything ready!
Pick the Perfect Bananas
The secret to the best peanut butter banana ice cream isn't a secret at all: it's using very ripe bananas. I’m talking about the ones on your counter that are covered in brown spots and maybe looking a little sad. Those are your golden tickets to flavor! Ripe bananas are naturally much sweeter, which means you won't need to add any extra sugar. They also have a softer texture that blends into a perfectly smooth, creamy base that rivals traditional ice cream. So, next time you think your bananas are past their prime for snacking, just know they’re entering their peak ice cream-making era.
Choose Your Peanut Butter
Now for the other star of the show: peanut butter. You have a lot of freedom here, so go with what you love. A classic creamy peanut butter will give you the smoothest result, but if you enjoy a little texture, crunchy peanut butter is a fantastic choice. For a healthier twist, I recommend using a natural peanut butter where the only ingredients are peanuts and maybe a little salt. This really lets the banana's sweetness shine through. And don't feel limited to just peanut butter! This recipe is wonderful with almond, cashew, or even sunflower seed butter, so feel free to experiment with different nut butters to find your favorite combination.
Fun Optional Add-Ins
While bananas and peanut butter are a perfect pair on their own, a few simple additions can really make your nice cream sing. A small splash of vanilla extract (about half a teaspoon) adds a lovely warmth and depth of flavor. I also love adding a tiny pinch of salt, which might sound strange, but it actually balances the sweetness and makes the peanut butter flavor pop. If you’re a chocolate lover, try blending in a tablespoon of unsweetened cocoa powder for a rich, chocolate-peanut butter treat. You can also fold in your favorite mix-ins after blending, like mini chocolate chips, chopped pecans, or a swirl of caramel.
How to Make Peanut Butter Banana Nice Cream
Ready to whip up a treat that’s both delicious and simple? This peanut butter banana "nice cream" is a fantastic choice for quick, healthy desserts. While we’ll always have a special place in our hearts for a scoop of rich, handcrafted ice cream, this recipe is perfect for a guilt-free snack any day of the week. It only takes a few ingredients and a little prep to create something truly magical. Let’s walk through the steps together.
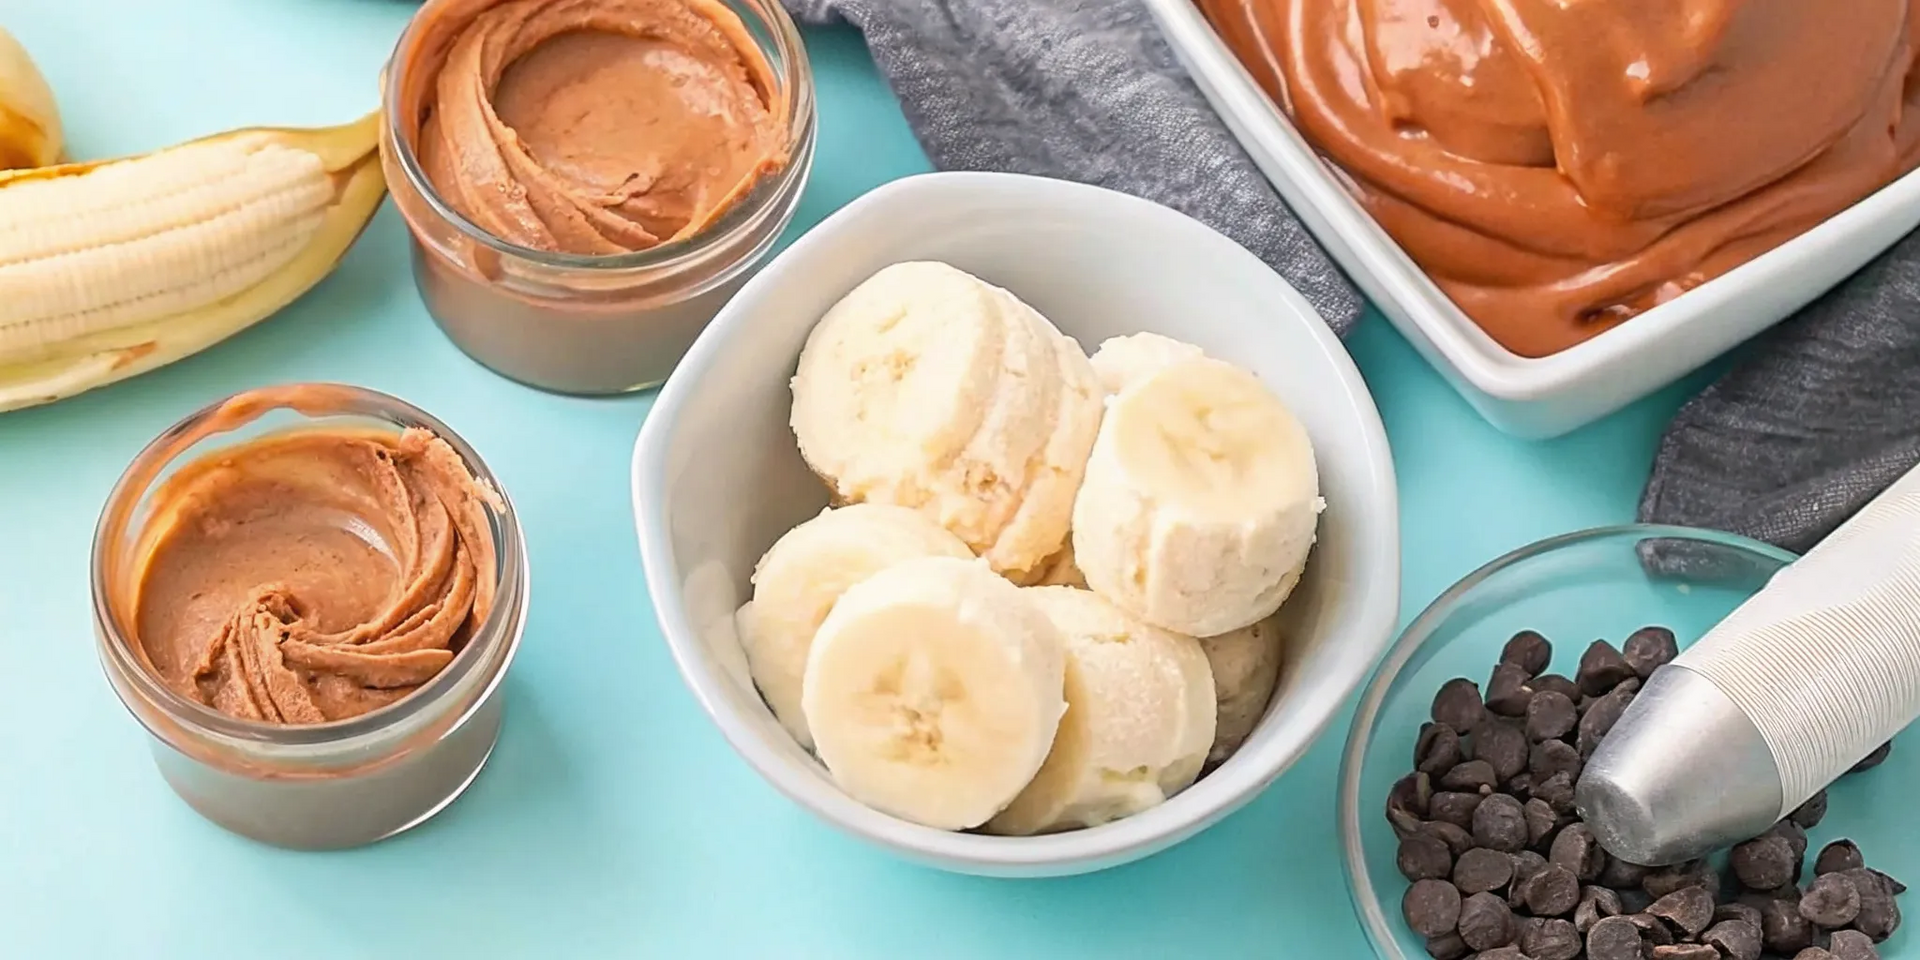
Step 1: Prep and Freeze Your Bananas
First, let's get those bananas ready. This step is the secret to a perfectly thick and creamy texture. Peel three to four ripe bananas and slice them into half-inch rounds. Spread the slices in a single layer on a baking sheet lined with parchment paper to prevent sticking. Freeze them for at least two hours, or until they're completely solid. Properly frozen bananas are the foundation of great nice cream, ensuring your blender can transform them into a smooth, frosty treat. A little prep goes a long way!
Step 2: Blend to Creamy Perfection
Once your banana slices are frozen solid, it’s time for the magic. Transfer the frozen pieces into a high-powered blender or a food processor. Pulse a few times to break them up, then blend continuously until the mixture becomes smooth, just like soft-serve. You might need to scrape down the sides. Now, add two tablespoons of your favorite peanut butter and blend again until it’s completely mixed in. Using a powerful blender helps create the smoothest possible peanut butter banana ice cream, giving you that dreamy, velvety consistency.
Step 3: Serve Immediately or Freeze for Later
You have a choice to make, and there’s no wrong answer! If you love the consistency of soft-serve, you can scoop your nice cream into bowls and enjoy it right away. It will be wonderfully creamy straight from the blender. If you prefer a firmer, more traditional ice cream texture, transfer the mixture to a loaf pan or an airtight, freezer-safe container. Smooth the top with a spatula and freeze for another one to two hours. This extra time will give it that classic, scoopable firmness. Either way, you’re in for a delicious treat.
Tips for the Best Flavor and Texture
You have your ingredients, but before you blend, let’s cover a few tricks to make your nice cream absolutely amazing. Getting that perfectly smooth, creamy texture is easier than you think. It’s all about using the right ingredients and a couple of key techniques. These small adjustments make a huge difference and will have everyone thinking you picked it up from a gourmet shop.
Use Ripe Bananas for Sweetness
The secret to a naturally sweet nice cream is using very ripe bananas. I’m talking about the ones covered in brown spots. As bananas ripen, their starches convert to sugar, making them intensely sweet and fragrant. This means you get all the sweetness you need without adding extra sugar. Using yellow or slightly green bananas will result in a less sweet and slightly starchy taste. So, plan ahead and let those bananas get super ripe. Your patience will be rewarded with a delicious treat that truly lets the banana flavor shine through.
Add a Splash of Liquid for a Creamier Blend
Sometimes, depending on your blender, the mixture can get too thick to blend smoothly. If your blender is struggling, the fix is simple: add a tiny splash of liquid. A tablespoon of milk, almond milk, or even water is usually all it takes to get everything churning into a creamy whip. The key is to add it very slowly. If you add too much liquid at once, you risk turning your thick, scoopable nice cream into a runny smoothie. Start with a small amount, blend, and only add more if you absolutely need it to get things moving.
Scrape the Sides of Your Blender
This might be the most important tip for achieving that flawlessly smooth texture. As you blend, bits of frozen banana will get stuck to the sides of the container. To make sure every last piece gets incorporated, you’ll need to stop the blender a few times and use a spatula to scrape down the sides. This simple step prevents icy chunks from hiding in your final product and ensures a consistently creamy result. It’s a technique we use to get that professional, velvety texture in our own handcrafted ice creams, and it works just as well at home.
Get the Right Tools and Techniques
Making ice cream at home might sound complicated, but for this simple recipe, you just need one key piece of equipment. The right tool will turn your frozen bananas into a dessert that’s unbelievably creamy and smooth, just like the soft-serve you loved as a kid. Whether you have a blender or a food processor, you can achieve a fantastic result. The trick is knowing how to use your machine to get that perfect texture. We’ll walk through which appliance works best and how to avoid the common hiccups that can leave you with a chunky, icy mess instead of a dreamy, scoopable treat. With a few simple techniques, you’ll be a nice cream pro in no time.
Blender vs. Food Processor: Which Is Better?
You can use either a powerful blender or a food processor to make peanut butter banana nice cream, and both have their strengths. Many people find a food processor with an “S” blade works wonders, as it easily chops and churns the frozen banana chunks into a smooth consistency without needing much, if any, extra liquid. If you’re using a blender, a high-powered model is your best bet. It has the motor strength to pulverize the frozen fruit into a velvety texture. For the best results in a blender, you might need to use the tamper to push the ingredients down or add a tiny splash of milk to help things get moving and create a vortex.
Common Blending Mistakes to Avoid
Patience is key when making nice cream. At first, the mixture will look crumbly or like little dots, but don't give up. Just keep blending, and it will magically transform into a creamy whip. If the mixture is too thick and your blender is struggling, add a tablespoon or two of milk (dairy or non-dairy works) to help it blend more easily. Another great tip is to scrape down the sides of your blender or food processor bowl periodically. This ensures all the banana pieces get fully incorporated, leaving you with a consistently smooth texture and no frozen chunks left behind. Following these simple steps will help you get the perfect consistency every time.
Creative Recipe Variations to Try
The beauty of peanut butter banana nice cream is its simplicity, but that’s also what makes it so much fun to play with. Think of the basic two-ingredient recipe as your blank canvas. It’s delicious all on its own, but it’s also waiting for you to add your own creative signature. Getting creative in the kitchen is one of the best ways to find your next favorite treat, and this recipe is incredibly forgiving. You can experiment with different flavors and textures without worrying about messing things up. It’s all about making something you truly love.
Whether you’re a peanut butter purist who just wants a little something extra or you’re ready to build a completely new flavor combination, you have so many options. You can start by simply swapping out the peanut butter for another creamy alternative, which can completely change the nutty undertones of your nice cream. Or, you can deepen the existing flavors with simple pantry staples like vanilla and cocoa. And, of course, the best part of any ice cream experience is the mix-ins. Adding crunchy, chewy, or gooey bits at the end is what takes a simple scoop from good to unforgettable. Let’s get into a few easy ways you can make this recipe your own.
Swap Peanut Butter for Other Nut Butters
While peanut butter is the classic choice, don't be afraid to switch it out. Using a different nut or seed butter is an easy way to create a whole new dessert. Almond butter offers a slightly milder, sweeter flavor that pairs beautifully with banana. For an even richer and creamier texture, try using cashew butter. If you need a nut-free option, sunflower seed butter works wonderfully and provides a unique, earthy taste. The best part is that no adjustments are needed; you can simply swap the butters in equal amounts. This simple change can make your go-to recipe feel brand new again.
Add Cocoa, Vanilla, or a Sweetener
Sometimes, all you need is a small addition to make the flavors pop. A splash of vanilla extract, about a teaspoon, can add a wonderful warmth and depth to your nice cream. For all the chocolate lovers out there, try blending in one or two tablespoons of unsweetened cocoa powder for a rich, chocolate-peanut butter treat. A tiny pinch of salt also works wonders to balance the sweetness of the bananas. If your bananas weren't quite ripe enough or you just prefer a sweeter dessert, a small drizzle of maple syrup or honey will do the trick without overpowering the fruit.
Fold in Your Favorite Mix-Ins
This is where you can really have fun and personalize your nice cream. Once your base is blended to creamy perfection, gently fold in your favorite additions for extra flavor and texture. Think mini chocolate chips, chopped pecans, or a swirl of your favorite jam. You can even crumble in cookies or brownies for a more decadent dessert. For an extra peanut butter kick, warm a spoonful in the microwave for a few seconds until it’s pourable, then drizzle it over the top. If you need some inspiration, check out the combinations in our own artisan ice cream flavors to see what sounds good to you.
How to Serve Your Nice Cream
Now for the best part: dressing up your nice cream! While it’s delicious on its own, a few simple additions can turn this healthy snack into a truly special dessert.
Top with Fruit, Granola, or a Drizzle
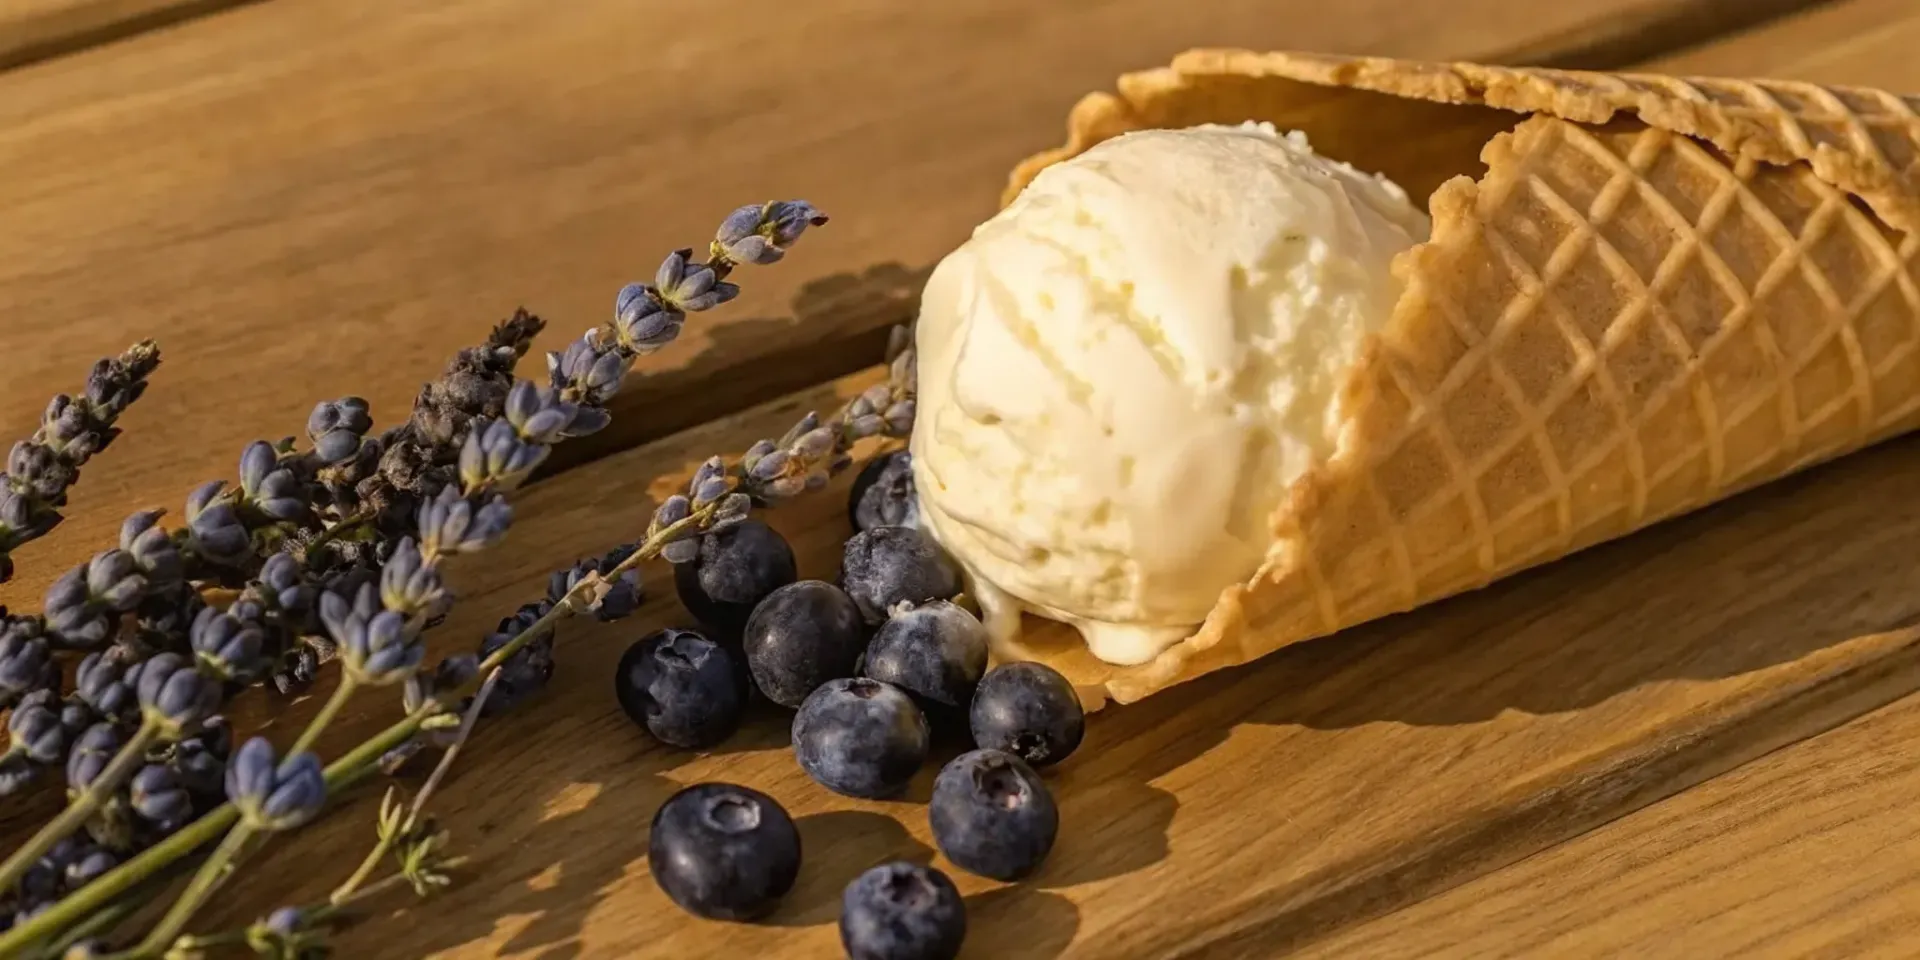
A great way to add flavor and texture is with toppings. For a fresh, vibrant touch, add sliced bananas or a handful of mixed berries. If you love a good crunch, sprinkle on some granola or chopped nuts. You can also create a decadent drizzle by gently warming some peanut butter in the microwave until it’s easy to pour. For a truly special treat inspired by our own candy kitchen, try crumbling some of our authentic southern pralines over your bowl. The combination of creamy, cold nice cream and a sweet, nutty crunch is absolutely divine.
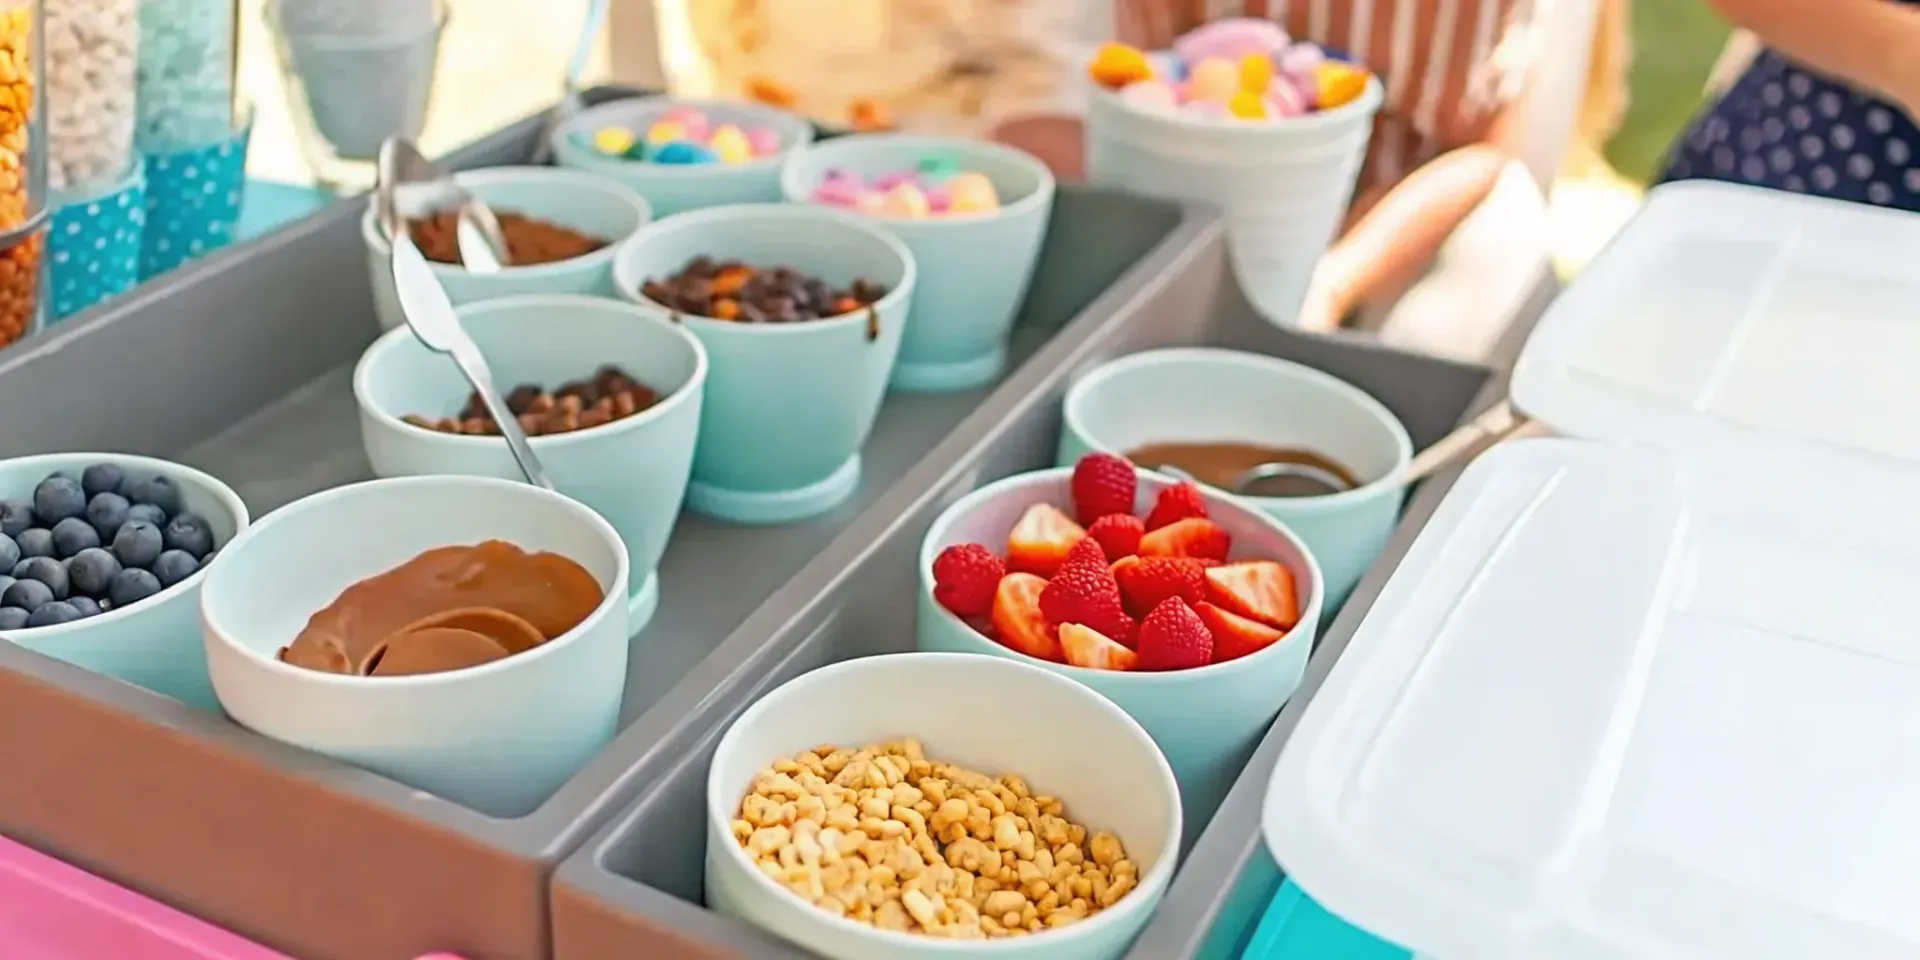
Make It Fun for Kids and Guests
Serving nice cream is a great opportunity to get everyone involved, especially the little ones. Turn dessert into a fun activity by setting up a topping bar. Just arrange small bowls filled with different options like fresh fruit, mini chocolate chips, sprinkles, and chopped nuts, then let your family and guests build their own perfect bowl. It’s a simple way to make the experience more interactive and memorable. This hands-on approach is always a huge hit at parties or family gatherings. And when you're looking for a quick treat without the prep, you can always explore our own handcrafted gourmet ice cream flavors for another easy, delicious option.
How to Store Your Homemade Nice Cream
You’ve blended your delicious peanut butter banana nice cream, and it’s a hit! If you happen to have any leftovers (which is a big "if" in my house), you'll want to store them properly. Unlike the tubs of artisan ice cream you might get from our kitchen, homemade nice cream freezes a bit differently. Storing it the right way ensures you can enjoy that creamy texture again later without sacrificing flavor. Here’s how to keep your creation tasting its best.
Keep It Fresh in the Freezer
To keep your nice cream fresh and delicious, the most important step is using an airtight container. This is non-negotiable! An airtight seal protects your treat from developing ice crystals, which cause freezer burn, and prevents it from absorbing any stray odors from your freezer (nobody wants onion-flavored nice cream). You can find special freezer-safe ice cream containers online, but any quality airtight container you have on hand will work perfectly. For extra protection, try pressing a piece of plastic wrap or parchment paper directly onto the surface of the nice cream before sealing the lid.
How Long Does Nice Cream Last?
For the absolute best flavor and texture, I recommend enjoying your homemade nice cream within two weeks. It will be perfectly safe to eat for much longer, up to two or three months, as long as it's stored correctly in that airtight container. However, you’ll notice that the longer it sits in the freezer, the harder it will become. It loses some of that initial soft-serve creaminess over time. A great habit to get into is labeling your container with the date you made it. This way, you’ll always know how fresh it is and can enjoy it at its peak.
Soften Before Serving
If you pull your nice cream out of the freezer and it’s as hard as a rock, don’t worry, you didn’t do anything wrong. Because it’s made almost entirely from fruit, it lacks the specific structure that keeps traditional ice cream scoopable straight from the freezer. All it needs is a little time to relax. Simply let the container sit on the counter at room temperature for about 15 to 20 minutes. This will soften it just enough to restore its creamy, scoopable consistency without turning it into a melted puddle. A little patience is all it takes to get back to that perfect texture.
When You're Craving the Real Deal
This peanut butter banana nice cream is a fantastic recipe to have in your back pocket. It’s perfect for a quick, healthy dessert or a post-workout snack that feels like a total indulgence. It’s creamy, delicious, and a treat you can feel great about making for your family whenever a sweet craving strikes.
But let’s be real, sometimes you just want ice cream. The real, rich, churned-to-perfection kind. While this homemade version is a wonderful alternative, there are moments that call for the deep, complex flavor and velvety texture that only comes from a true artisanal scoop. When that specific craving hits, a healthy substitute just won’t cut it, and you deserve to treat yourself to the real thing.
That’s when you can let us handle the scooping. At Pecan Jacks, crafting unforgettable sweet treats is our family's passion. We pour our hearts into making handcrafted gourmet ice cream with the finest ingredients, inspired by the coastal charm we grew up with. From classic flavors that taste like childhood to unique creations you won’t find anywhere else, we believe in celebrating life's sweet moments. So go ahead and make this amazing nice cream whenever you like, but when you're ready for a truly special indulgence, we've got a pint with your name on it.
Frequently Asked Questions
Why does my nice cream get rock-hard in the freezer? This happens because the recipe is mostly fruit and water, which freezes solid. Unlike traditional ice cream that has fat and sugar to keep it soft, nice cream needs a little help after freezing. Just let it sit on the counter for about 15 minutes before scooping. This gives it enough time to soften to a creamy, scoopable texture without melting completely.
Can I make this without a high-powered blender? Yes, you definitely can. A food processor is actually a fantastic alternative and sometimes works even better because its wide base and S-blade can churn the frozen banana pieces easily. If you're using a standard blender, you might just need a little more patience. Let your banana slices thaw for five minutes before blending, and don't be afraid to add a tablespoon of milk to help things move along.
My nice cream turned out icy instead of creamy. What went wrong? An icy texture usually happens for one of two reasons. Your bananas might not have been frozen completely solid, or your blender didn't fully incorporate everything. Make sure your banana slices are frozen for at least two hours. Also, remember to stop and scrape down the sides of your blender a few times. This pushes any stubborn, unblended pieces back into the mix, ensuring you get a perfectly smooth and creamy result.
Is it possible to make this without peanut butter? Absolutely. The peanut butter adds flavor and a bit of richness, but you can easily leave it out for a pure banana flavor or swap it with something else. Other nut butters like almond or cashew work great. For a nut-free version, try sunflower seed butter. You could also add a tablespoon of cocoa powder for a chocolatey taste or just blend the bananas on their own for a simple, sweet treat.
My bananas aren't very ripe. Can I still make this recipe? You can, but it will affect the final result. The magic of nice cream comes from using very ripe, spotty bananas because their natural sugars are at their peak. This is what gives the dessert its sweetness without needing added sugar. If you use yellow or greenish bananas, your nice cream will taste less sweet and a bit starchy. If that's all you have, you can add a drizzle of maple syrup or honey to help balance it out.