How to Make the Best Pina Colada Ice Cream

Cory Mosley is the Vice President of Growth for Pecan Jacks. He supports franchise growth and brand strategy while helping protect the quality behind every scoop, bringing “A Sweet Day Is A Bite Away®” philosophy to customers across the country.
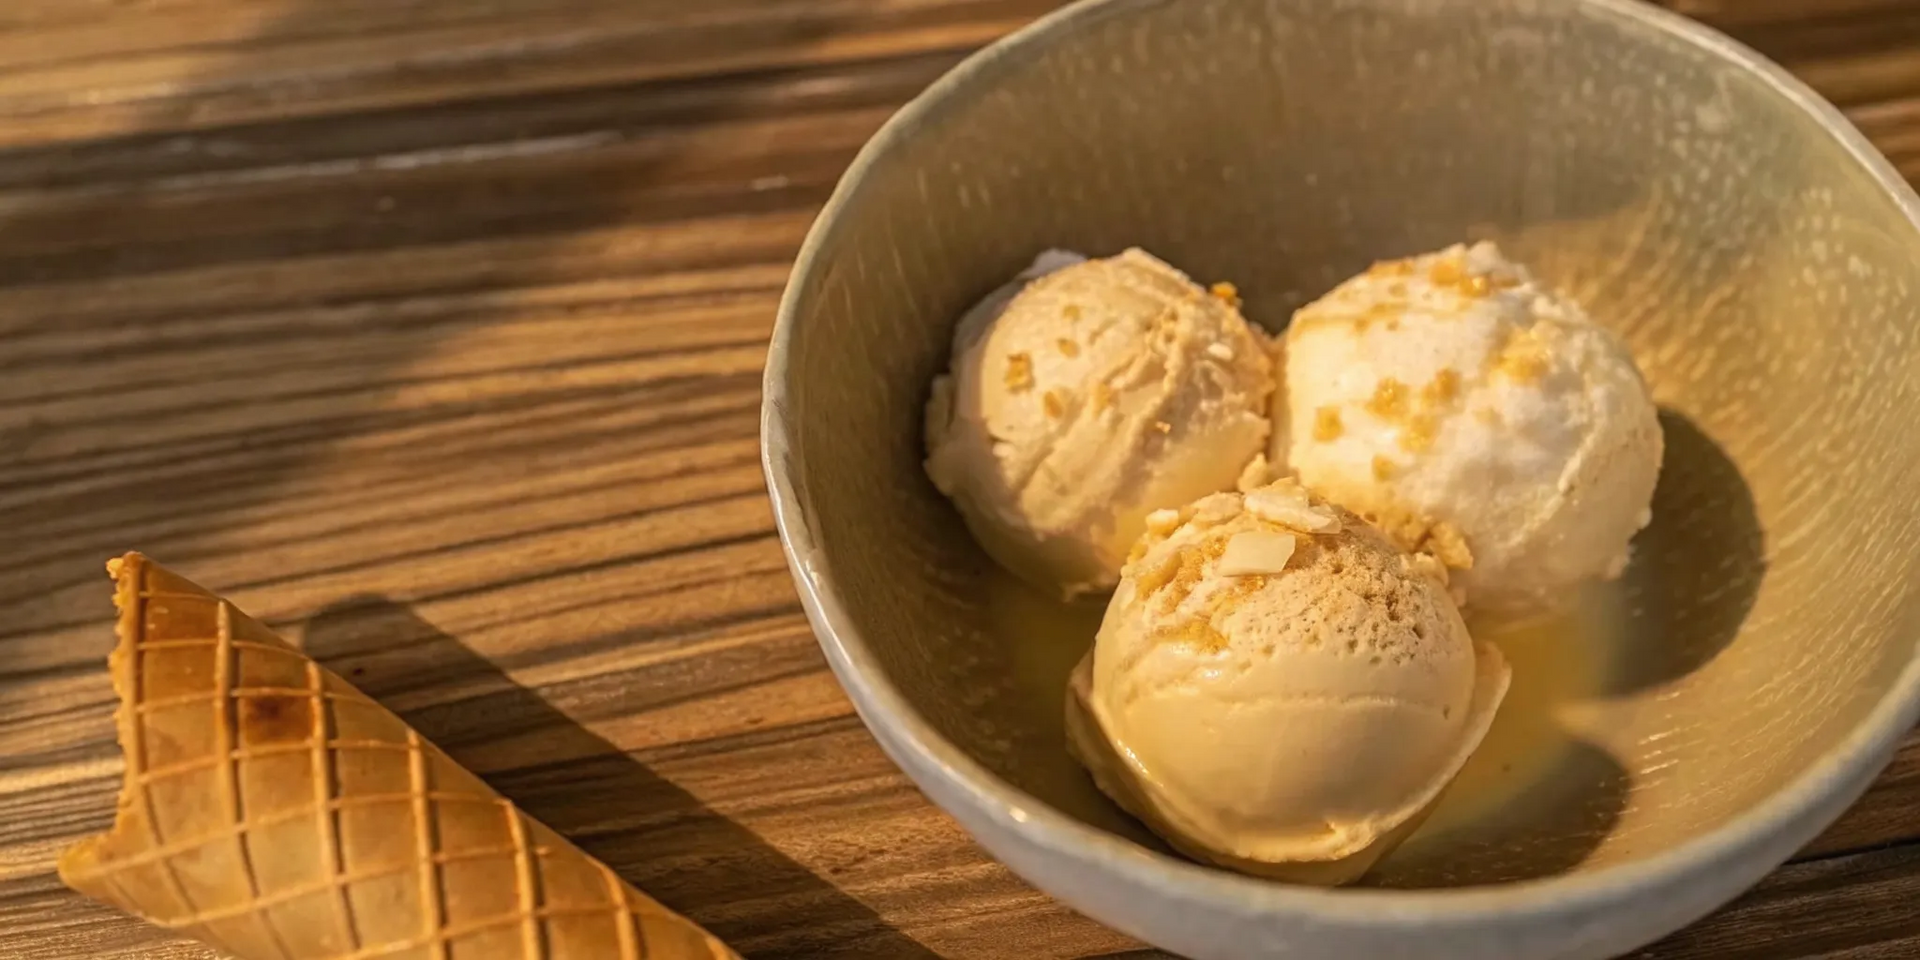
Some flavors have the power to transport you. One spoonful, and suddenly you’re somewhere warm, with your toes in the sand and a gentle ocean breeze on your skin. That’s the magic of the classic piña colada, and it’s a feeling we love to capture in our own coastal-inspired treats at Pecan Jacks. This recipe is all about bringing that vacation vibe right into your kitchen. We’re going to show you how to make the most incredible homemade Pina Colada Ice Cream, a dessert that perfectly balances sweet, tangy pineapple with rich, luscious coconut. It’s a scoop of pure sunshine, and it’s so much easier to make than you might think.
Key Takeaways
- Prioritize Full-Fat Ingredients : For a truly creamy and decadent ice cream, always choose full-fat coconut milk or cream; this is the most important step for achieving a smooth texture and avoiding unwanted ice crystals.
- Chill Your Base and Consider Rum : To get a softer, more scoopable texture, thoroughly chill your mixture for at least four hours before churning, and add a small amount of rum (or corn syrup) to help prevent the ice cream from freezing too hard.
- Adapt the Recipe to Your Needs : This recipe is incredibly versatile, so you can easily make it vegan with coconut cream, create a family-friendly version with rum extract, or use the no-churn method if you don't have an ice cream maker.
What Exactly Is Piña Colada Ice Cream?
If you could turn a tropical vacation into a dessert, it would be piña colada ice cream. It’s a rich, frozen treat that captures the classic flavors of the beloved cocktail it’s named after. Think of the perfect balance of sweet, tangy pineapple and creamy, luscious coconut, all churned into a scoopable delight. It’s the kind of dessert that instantly makes you feel like you have your toes in the sand, even if you’re just relaxing on your couch.
The magic comes from its simple yet decadent ingredient list. Most recipes start with a creamy base, often using coconut cream to deliver that authentic tropical flavor. Then, pineapple puree or juice is swirled in for a bright, fruity kick. Many traditional recipes also include a splash of rum. Beyond adding that signature cocktail taste, the alcohol actually helps keep the ice cream soft , resulting in a smoother, easier-to-scoop texture straight from the freezer.
One of the best things about this ice cream is how adaptable it is. Because coconut cream is a key ingredient, it’s incredibly easy to make a dairy-free or vegan version without sacrificing any of the rich texture. Whether you’re making it for a summer party or just as a special treat for yourself, piña colada ice cream is a refreshing escape in every spoonful. It’s pure, simple, and tastes like sunshine.
Gathering Your Ingredients
Before you start dreaming of sandy beaches and tropical breezes, let's get all your supplies in order. The secret to any amazing dessert, from our own artisan ice cream to the one you’re about to make, is starting with the right ingredients. Getting everything measured and ready to go makes the whole process smoother and a lot more fun. Here’s what you’ll need to create that perfect Piña Colada flavor, whether you’re going for the classic recipe or a dairy-free version.
The Classic Ingredients
To make a truly decadent Piña Colada ice cream, you’ll want to focus on ingredients that deliver that signature creamy, tropical taste. Start with crushed pineapple for fruity sweetness and full-fat coconut milk for a rich, smooth base. You’ll also need some thickened cream and white sugar to create that classic ice cream texture. For an authentic kick, a little white rum and a squeeze of fresh lime juice will brighten up all the flavors. If you enjoy a bit of texture, feel free to toss in some toasted shredded coconut. These simple components are the key to a scoop that tastes like a vacation.
Simple Vegan and Dairy-Free Swaps
Making a delicious vegan or dairy-free version is incredibly simple, and you won’t lose any of the creamy goodness. The star of the show here is coconut cream, which creates an unbelievably rich texture all on its own. Instead of white sugar, you can use a natural sweetener like maple syrup. Canned pineapple chunks will provide that bright, fruity punch. If you want the rum flavor without the alcohol, a bit of rum extract works perfectly. These easy swaps ensure everyone can enjoy a scoop of homemade Piña Colada ice cream, no matter their dietary needs.
Let's Talk About the Rum
The secret to a truly authentic piña colada ice cream is, you guessed it, the rum. It’s what gives this tropical treat its signature flavor and makes it feel like a mini-vacation in a bowl. Here at Pecan Jacks, we have a soft spot for creating unique adult-infused ice cream , so we know a thing or two about balancing spirits and sweets. Adding rum does more than just add a boozy kick; it fundamentally changes the ice cream’s final texture, making it smoother and creamier. But don’t worry, if you’re making this for the whole family, I’ve got a simple alcohol-free alternative for you, too.
What Rum Does for Flavor and Texture
Rum is the key to achieving that classic piña colada taste, but its role in ice cream making is also scientific. Alcohol has a lower freezing point than water, which means adding a splash of rum to your ice cream base helps prevent it from freezing rock-solid. This little trick of food science results in a softer, more scoopable texture right out of the freezer, minimizing large, crunchy ice crystals. For the best flavor, I recommend using a light or gold rum. These varieties will complement the sweet pineapple and creamy coconut without overpowering them, creating a perfectly balanced tropical flavor that tastes like sunshine.
Making an Alcohol-Free Version
Want to capture that delicious piña colada flavor without the alcohol? You absolutely can. Creating a family-friendly version is simple and just as tasty. While you can just leave the rum out, your ice cream might freeze a bit harder. To keep it creamy and soft, try adding a tablespoon of light corn syrup or glucose syrup to your base. This will help mimic the textural benefits of the alcohol. For that signature rum flavor, a half-teaspoon of rum extract is a fantastic substitute that will give you the taste you’re looking for without any of the booze.
How to Make Piña Colada Ice Cream
Ready to bring that tropical vacation vibe right into your kitchen? Making incredible piña colada ice cream at home is easier than you think. It all comes down to three simple stages: mixing a flavorful base, chilling it properly, and churning it into a creamy, dreamy dessert. At Pecan Jacks, we know that the best ice cream starts with great ingredients and a little bit of patience. Follow these steps, and you’ll be scooping up your own island-inspired treat in no time.
Step 1: Mix the Base
First things first, let's create the heart of your ice cream. In a large bowl, combine your full-fat coconut milk, heavy cream, sugar, and pineapple juice. Whisk everything together until the sugar completely dissolves; you don't want any grainy texture in your final product. Once it's smooth, stir in your pureed pineapple. If you're making the classic boozy version , this is the perfect time to add your rum. A good mix at this stage ensures all those delicious tropical flavors are perfectly blended, setting you up for a smooth and creamy result.
Step 2: Chill the Mixture
I know it’s tempting to go straight to the churning, but this next step is your secret weapon for amazing texture. Pour your ice cream base into an airtight container and place it in the refrigerator to chill for at least four hours, though overnight is even better. Chilling the mixture thoroughly allows the flavors to meld together and, more importantly, ensures the base is cold enough to churn efficiently. This process helps prevent ice crystals from forming, which is the key to achieving that professionally creamy consistency we all love.
Step 3: Churn and Freeze
Now for the fun part. Pour your cold piña colada base into your ice cream maker and churn according to the manufacturer’s instructions. This usually takes about 20 to 30 minutes. You’re looking for a consistency that’s thick and resembles soft-serve ice cream. Once it’s churned, transfer the ice cream to a freezer-safe container. For an extra-smooth finish, press a piece of plastic wrap directly onto the surface before sealing it with a lid. Freeze for at least four hours, or until it's firm enough to scoop.
No Ice Cream Maker? No Problem
You don’t need a bulky, expensive ice cream maker to create a creamy, dreamy dessert at home. While we love our professional churners here at Pecan Jacks for crafting our gourmet ice cream , I'm a huge fan of the no-churn method for its simplicity and fantastic results. This technique uses a few clever shortcuts to achieve that perfect scoopable texture without any special equipment. It’s all about whipping cream to create airiness and using sweetened condensed milk for a smooth base that freezes beautifully. It’s a game-changer for home cooks who want to whip up a batch of tropical goodness on a whim.
The Simple No-Churn Method
Making delicious Piña Colada ice cream at home is surprisingly simple. First, you’ll whip two cups of heavy cream until it forms soft, fluffy peaks. In a separate bowl, mix a can of sweetened condensed milk with cream of coconut and a splash of rum for that signature flavor. If you're making a family-friendly batch, you can swap the rum for a little extra pineapple juice. Next, gently fold the whipped cream into your coconut mixture, being careful not to deflate all that air you just created. Finally, stir in your diced pineapple and toasted coconut flakes. Pour everything into a loaf pan or freezer-safe container, cover it, and let it freeze for at least six hours, or until firm. The result is a rich, creamy dessert that tastes like a tropical vacation.
How to Make a Vegan Version
Just because you’re skipping dairy doesn’t mean you have to miss out on rich, creamy ice cream. Creating a vegan version of this tropical treat is surprisingly simple and every bit as delicious. By leaning on the natural creaminess of coconut, you can make a piña colada ice cream that’s decadent, refreshing, and completely plant-based. It’s a wonderful way to bring the spirit of our handcrafted ice cream into your kitchen, with a fun, dairy-free twist. This approach focuses on whole ingredients to create a dessert that’s pure tropical bliss in a bowl.
Easy Vegan Ingredient Swaps
To make a fantastic vegan piña colada ice cream, you just need a few smart ingredient swaps. The foundation of this creamy, dairy-free treat is full-fat coconut cream, which provides the perfect rich texture without any dairy. Instead of refined sugar, a touch of maple syrup adds sweetness that complements the tropical flavors beautifully. From there, the ingredients are naturally vegan: canned pineapple chunks (with their juice!), a splash of rum extract for that classic piña colada flavor, and some sliced banana to make it even creamier. These simple, accessible ingredients come together to create a flavor that will transport you straight to the beach.
The Vegan Recipe Steps
Ready to make it happen? This process is straightforward, especially if you have a machine like a Ninja Creami. First, let a can of full-fat coconut milk chill overnight. This helps the thick cream rise to the top. Scoop out about a half cup of that cream and combine it with your canned pineapple, maple syrup, and rum extract. Gently stir in about a half cup of sliced banana. Pour this mixture into your pint container, pop on the lid, and freeze it upright for at least 24 hours. Once it’s completely frozen solid, you can process it using your machine’s “lite ice cream” setting. The result is a perfectly smooth and scoopable vegan piña colada ice cream.
Common Mistakes to Avoid
Making incredible ice cream at home is part science, part art. While the process is straightforward, a few common slip-ups can be the difference between a tropical dream and an icy disappointment. Getting these details right is the secret to a dessert that tastes like it came straight from a coastal creamery like ours. Let's walk through a few key mistakes to sidestep so your homemade piña colada ice cream turns out perfectly creamy and delicious on your very first try.
Using Low-Fat Coconut Milk
The key to a rich, decadent ice cream is fat. When making a piña colada version, this means reaching for full-fat coconut milk, not the low-fat or "lite" kind. The higher fat content is what creates that luxurious, velvety mouthfeel we all crave in a scoop of ice cream. Using a lower-fat option will introduce too much water, resulting in a final product that’s more icy and thin than creamy. For that authentic, scoop-shop quality, you need the fat to ensure a smooth texture and carry that beautiful, tropical coconut flavor. Don't skimp on this step; it truly makes all the difference.
Adding Too Much Rum
A splash of rum gives piña colada ice cream its signature spirited kick, but this is a time when you want to measure carefully. Alcohol has a lower freezing point than the other ingredients in your ice cream base. A small amount is great because it helps keep the ice cream from freezing rock-solid, making it easier to scoop. However, if you get a little too generous with your pour, the alcohol can prevent the ice cream from freezing properly at all. As a rule of thumb, stick to no more than three tablespoons of a standard (21%) rum or two tablespoons of a stronger (40%) one for the best consistency.
Skipping the Chill Step
I know it’s tempting to pour your ice cream base directly from the blender into the ice cream maker, but patience is a virtue here. Chilling the mixture thoroughly for at least four hours (or even overnight) is a non-negotiable step. This pre-chill period allows the fats to solidify and the flavors to meld together beautifully. When the base is ice-cold before it hits the machine, it churns faster and more evenly, which is essential for creating a smooth and creamy consistency. Skipping this will likely result in a grainy texture and larger ice crystals, which is something we definitely want to avoid.
Using Pineapple in Heavy Syrup
When you're at the store, you'll see canned pineapple packed in its own juice or in a heavy syrup. Always choose the one packed in juice. Pineapple in heavy syrup contains a lot of extra sugar, which can throw off the balance of your recipe, making the final product cloyingly sweet. It can also add more liquid and sugar than the recipe accounts for, potentially affecting the final texture. Using pineapple packed in its own juice gives you much better control over the sweetness and allows the bright, natural taste of the pineapple to be the star of the show, perfectly complementing the rich coconut and warm rum.
Tips for the Perfect Scoop
Making ice cream at home is one thing, but making unforgettable ice cream is another. The difference often comes down to a few simple but crucial details. These are the little secrets that take your creation from "good" to "I can't stop eating this." At Pecan Jacks, we live by these details, and now I'm sharing them with you. Think of these tips as your roadmap to the creamiest, most flavorful piña colada ice cream you’ve ever had. Ready to turn your kitchen into a gourmet creamery? Let’s get into it.
Always Use Full-Fat Coconut Cream
This is my most important piece of advice, so listen closely: do not, under any circumstances, reach for low-fat coconut milk. For that truly decadent, rich, and creamy texture you crave, full-fat coconut cream is non-negotiable. The higher fat content is essential for creating a smooth mouthfeel and preventing the formation of large, crunchy ice crystals. Using a lower-fat alternative will result in a final product that’s more icy and sorbet-like than creamy. Trust me, this single ingredient choice makes all the difference between a disappointing batch and a pint of pure tropical bliss. It’s the foundation for a truly premium ice cream.
The Secret to a Softer Scoop
Have you ever pulled homemade ice cream from the freezer, only to find it’s frozen solid as a rock? There’s a simple trick to avoid that. Adding a small amount of rum does more than just add that classic piña colada flavor. The alcohol actually lowers the freezing point of the mixture, which keeps the ice cream softer and much easier to scoop right away. It’s a little bit of food science that leads to a much better texture. At Pecan Jacks, we use this same principle in our adult-infused ice cream to get that perfect consistency. Just a splash is all you need to guarantee a soft, ready-to-serve scoop every time.
Don't Forget to Toast Your Coconut
This step is so simple, yet it adds an incredible layer of flavor and texture that you just can't get otherwise. Taking a few extra minutes to toast your shredded coconut is a game-changer. Spreading it in a dry pan over medium heat until it’s fragrant and golden brown brings out a nutty, complex sweetness that perfectly complements the pineapple and rum. Plus, it adds a delightful, satisfying crunch that contrasts beautifully with the creamy ice cream base. Don't skip this! It’s a small effort that provides a huge payoff in the final flavor and makes your homemade treat feel truly artisanal.
Balance Your Sweet and Tangy Flavors
The magic of a great piña colada is the perfect harmony between sweet, creamy coconut and bright, tangy pineapple. Achieving this balance is key to making your ice cream taste authentic and refreshing. I always recommend using fresh or frozen pineapple (and its juice) instead of canned, which can be overly sweet and syrupy. Taste your base mixture before you chill it. Does it need more pineapple for a tangy kick? A little more coconut cream for richness? Don't be afraid to adjust the ingredients to match your personal preference. This is where you get to be the artist and explore tropical flavors to create your perfect pint.
How to Serve and Store Your Creation
You’ve churned your way to a creamy, tropical dessert. Now for the best part: enjoying it! Just like we do in our Pecan Jacks kitchens, paying attention to the final details can make a good treat truly great. Here’s how to serve and store your piña colada ice cream to keep it tasting its absolute best.
Fun Toppings and Serving Ideas
Let's get creative and dress up your scoops. Toppings are a fantastic way to add texture and an extra layer of flavor. Toasted coconut flakes are a classic for a reason; they provide a satisfying crunch that beautifully complements the smooth ice cream. For an even more impressive presentation, you can serve your ice cream with slices of grilled pineapple. The warmth and caramelized sweetness of the fruit create a perfect contrast with the cold, creamy dessert. And for a simple, festive touch, don't forget a maraschino cherry on top. If you're hosting a party, go all out and serve scoops inside a hollowed-out pineapple for a true showstopper.
Storing It for Later
If you manage to have any leftovers, proper storage is key to preserving that perfect texture you worked so hard to create. Transfer the ice cream to an airtight, freezer-safe container. A shallow, flat container is better than a deep one because it helps the ice cream stay frozen solid. For extra protection against dreaded freezer burn, press a piece of plastic wrap or wax paper directly onto the surface of the ice cream before sealing the lid. This simple step prevents ice crystals from forming and keeps your creation tasting fresh. Store it in the coldest part of your freezer, usually the back, not the door.
How Long Will It Last?
Your homemade piña colada ice cream is at its peak deliciousness within the first two weeks of making it. During this time, it will maintain its creamy, scoopable texture. While it’s still perfectly safe and tasty to eat after that, you might notice a change. Over time, small ice crystals can grow, making the texture a bit icier than its original state. Don’t worry, the wonderful piña colada flavor will still be there. So, while it's best enjoyed fresh, you can certainly savor your homemade treat for a little while longer.
Related Articles
- The Top 7 Alcoholic Ice Cream Brands, Ranked
- The 4 Best Liquor Infused Ice Cream Brands to Try
- Pecan Jacks Ice Cream News: Expansions, Awards & More
- Pecan Jacks Earns Platinum—Best Sweets, 2024 Perfect Awards
- Pecan Jacks Atlanta Opening & 2025 Best of Georgia Winner
Frequently Asked Questions
Do I really need an ice cream maker for this recipe? Not at all. While an ice cream maker is great for churning, you can get a wonderfully creamy result without one. The no-churn method uses whipped heavy cream to create a light, airy texture and sweetened condensed milk to ensure it freezes smoothly without becoming icy. It’s a fantastic and simple alternative that delivers a rich, scoopable dessert with minimal fuss.
Why did my ice cream turn out icy instead of creamy? This is a common problem, and it usually comes down to one of two things: fat content or temperature. To get that luxurious, creamy texture, you must use full-fat ingredients like full-fat coconut milk or heavy cream. The lower fat content in "lite" versions means more water, which creates ice crystals. Also, be sure to chill your base mixture in the refrigerator for at least four hours before churning. A very cold base freezes faster, resulting in smaller ice crystals and a much smoother final product.
Can I make this without alcohol? Of course. To make a family-friendly version, you can simply leave the rum out. However, the alcohol does help keep the ice cream from freezing rock-solid. To get a similar soft texture, you can add a tablespoon of light corn syrup to your base. For that signature rum flavor without the booze, a half-teaspoon of rum extract works perfectly as a substitute.
Is it okay to use fresh pineapple instead of canned? Yes, fresh pineapple is a wonderful choice and can give your ice cream an even brighter, tangier flavor. Just be sure to puree it thoroughly so you don’t end up with large, frozen chunks in your finished dessert. You may also want to taste your base before chilling it, as the sweetness of fresh pineapple can vary, and you might need to adjust the sugar slightly.
How can I keep my leftover ice cream from getting rock-hard in the freezer? The best way to keep your homemade ice cream scoopable is to prevent ice crystals from forming on the surface. After you transfer the ice cream to a freezer-safe container, press a piece of plastic wrap or wax paper directly onto the surface before sealing it with a lid. This creates a barrier that helps maintain its creamy texture. Storing it in the coldest part of your freezer, like the very back, also helps it stay fresh.